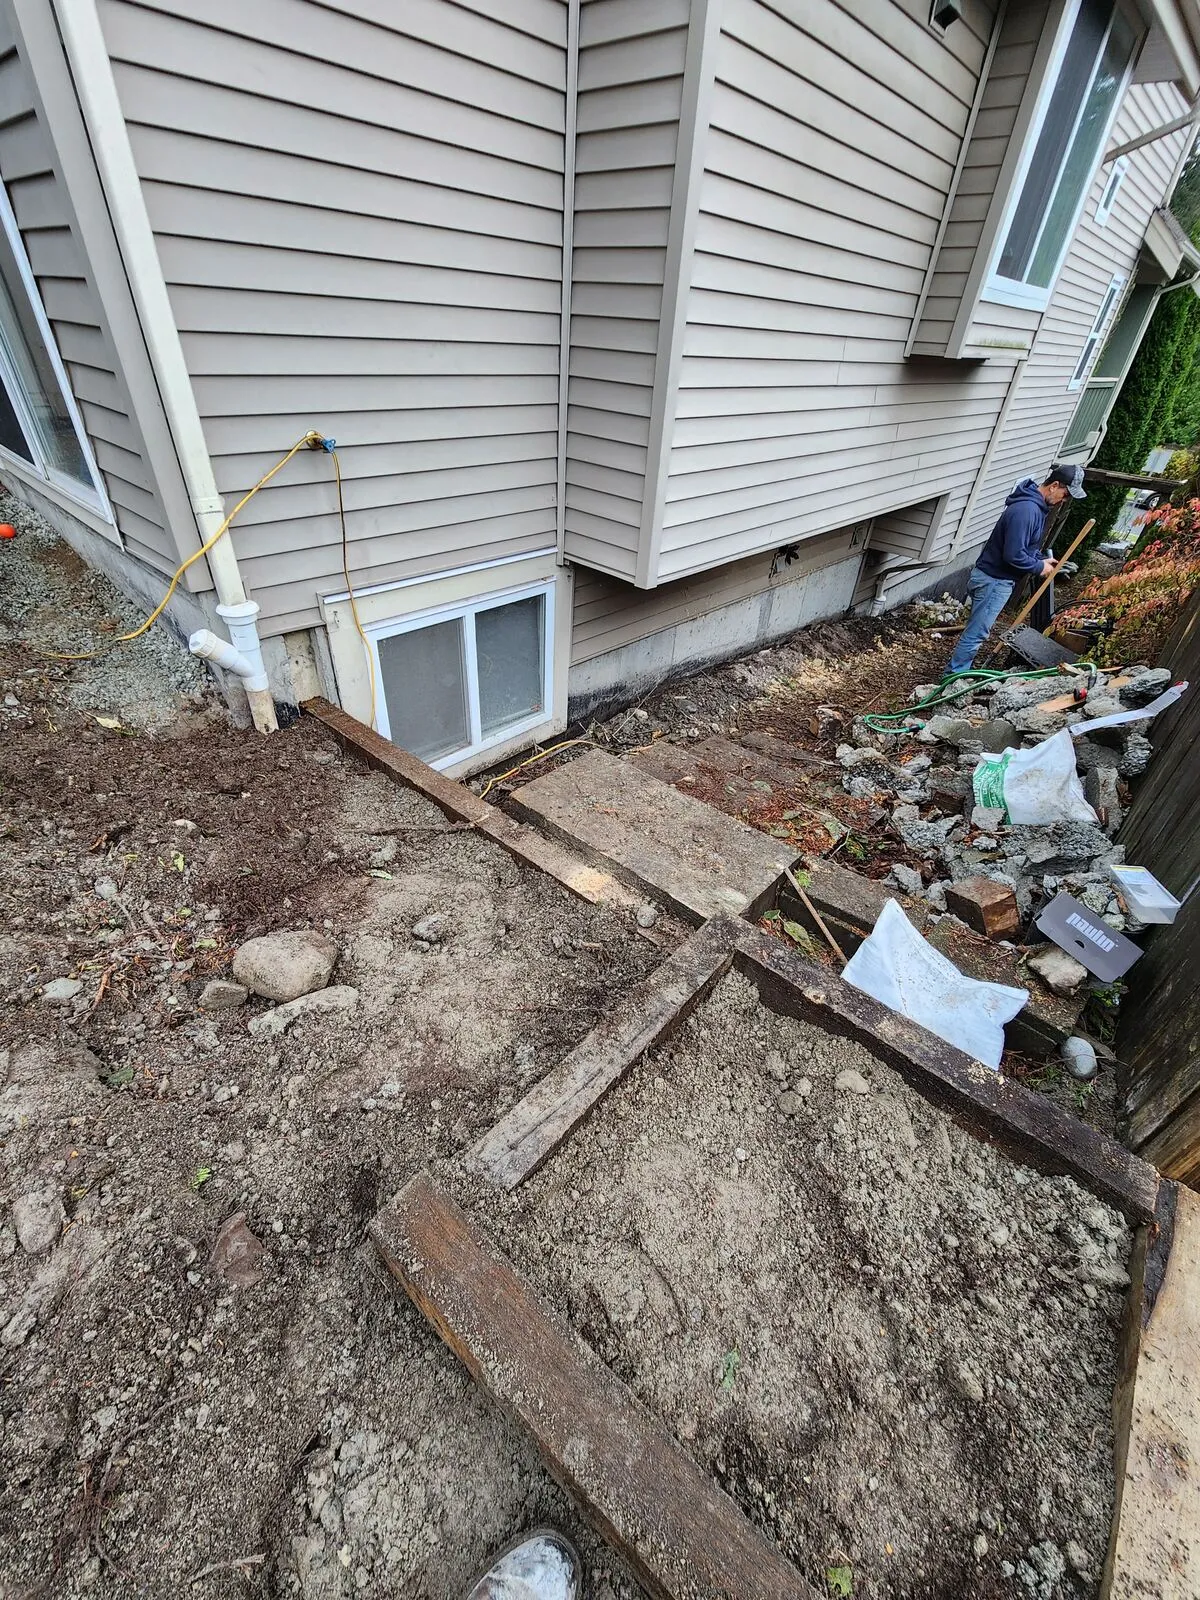
What the backyard looked like before
The homeowner inherited a sloped backyard with an aging concrete-paver patio set on settled fill, an overgrown rockery, exposed boulders pushing up through the surface, and no real drainage along the back of the house. After heavy rain, water ran straight against the foundation. The existing pavers had heaved, the boulders had shifted, and the bed walls behind them were starting to slump down the slope.
Step one: removing the old patio and clearing the slope
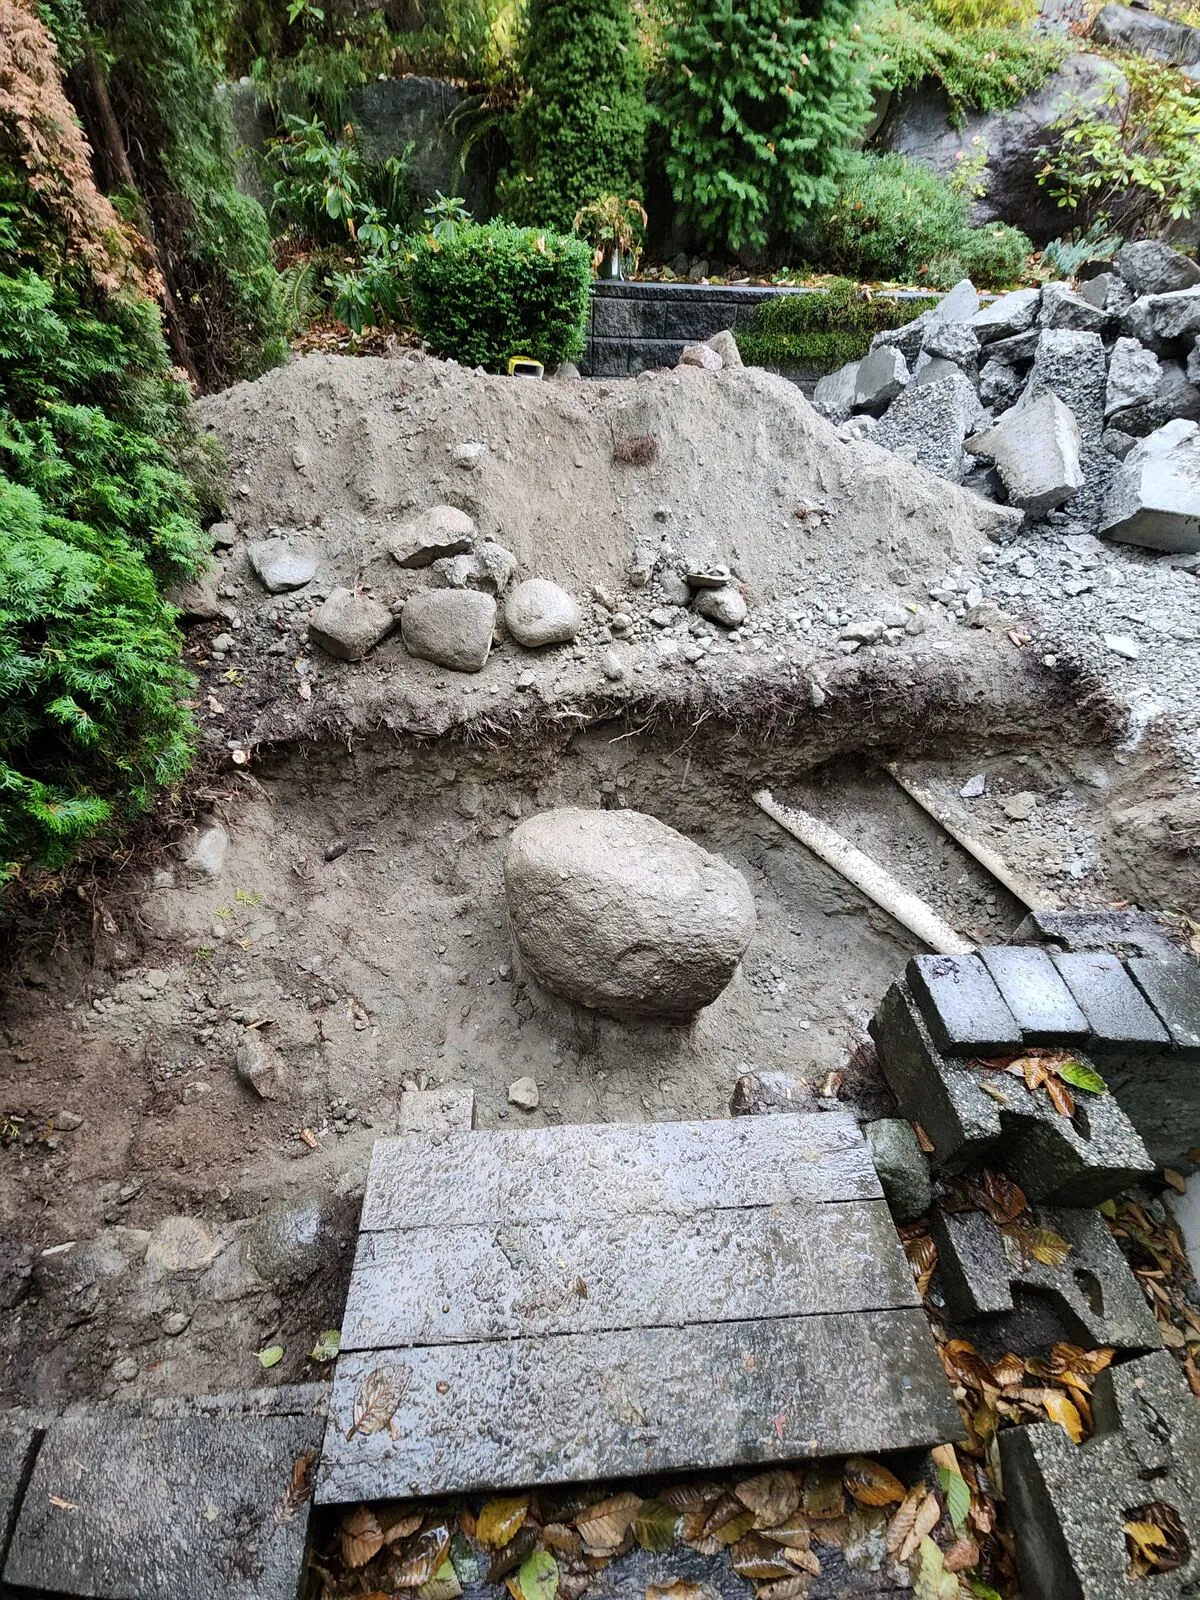
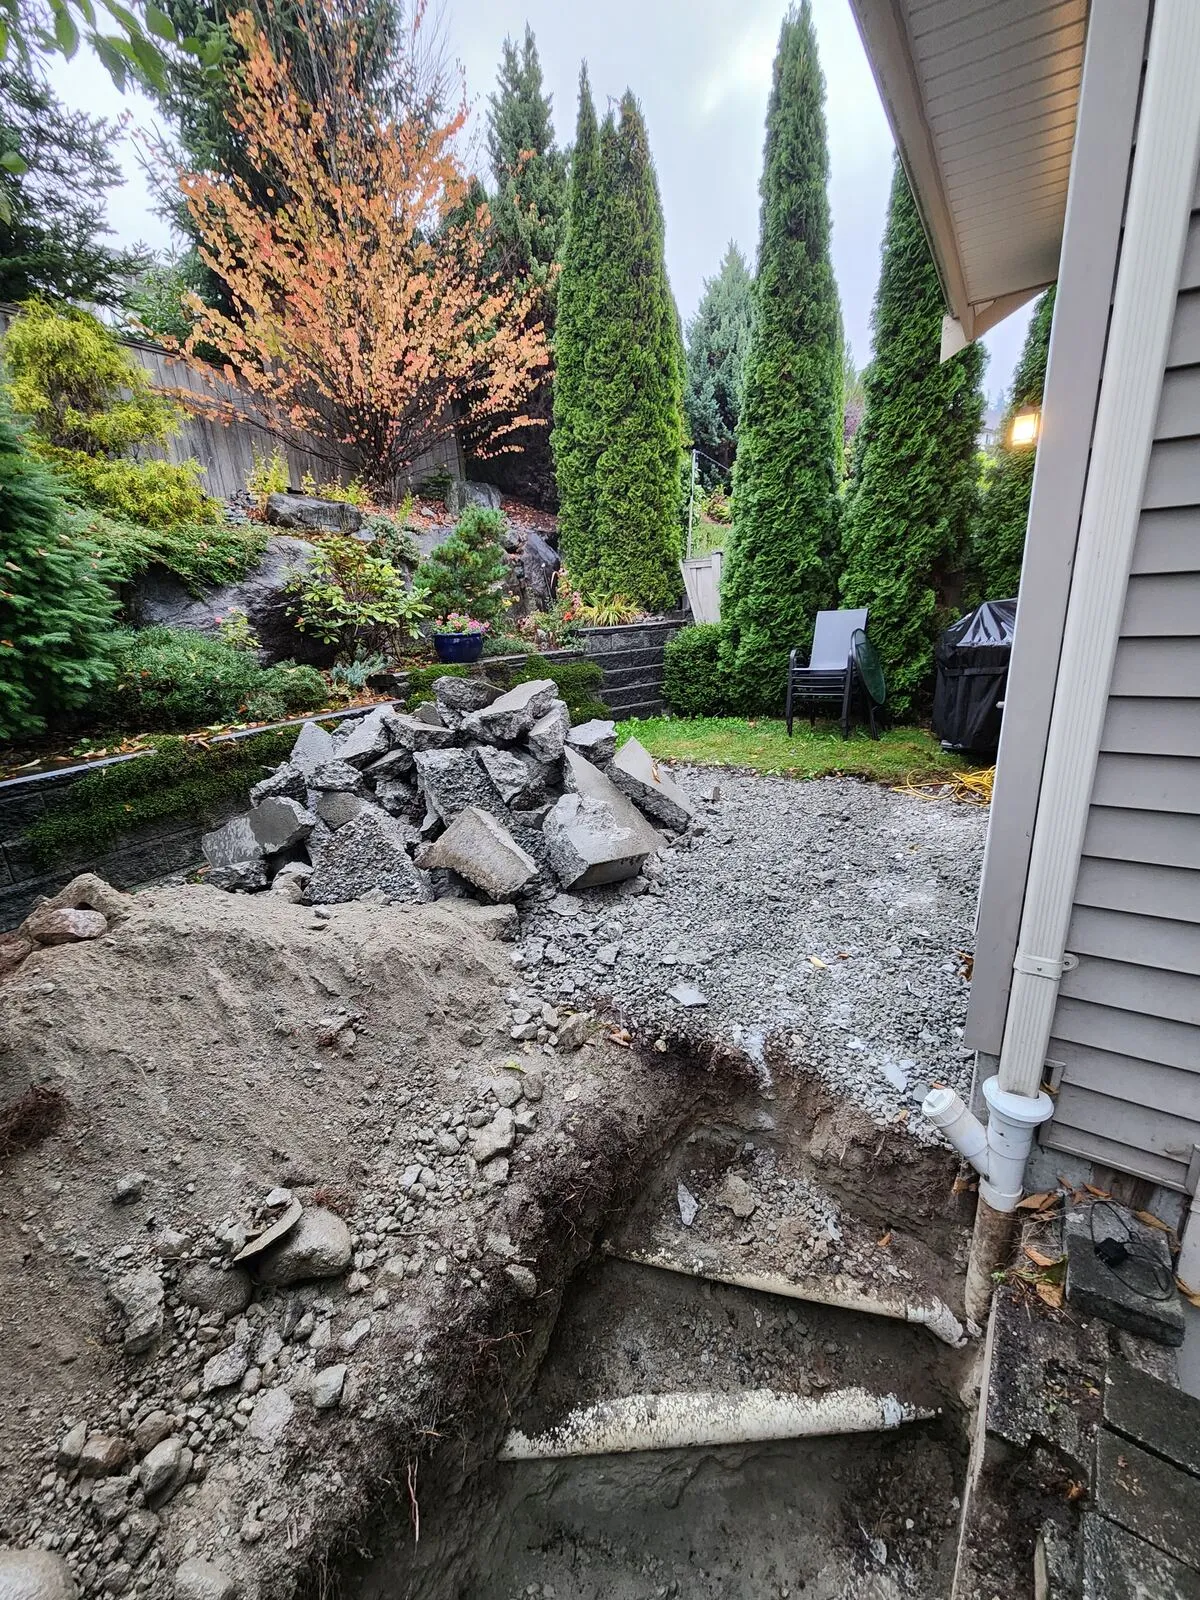
We started by stripping out the old paver field and breaking up the underlying concrete, hauling everything to a staging pile for disposal. The half-buried boulders were dug out, the slope cut back, and the trench line along the foundation opened up so we could see what we were working with. Demo and clearing took the better part of the first week.
Drainage first: perimeter drain tile against the foundation
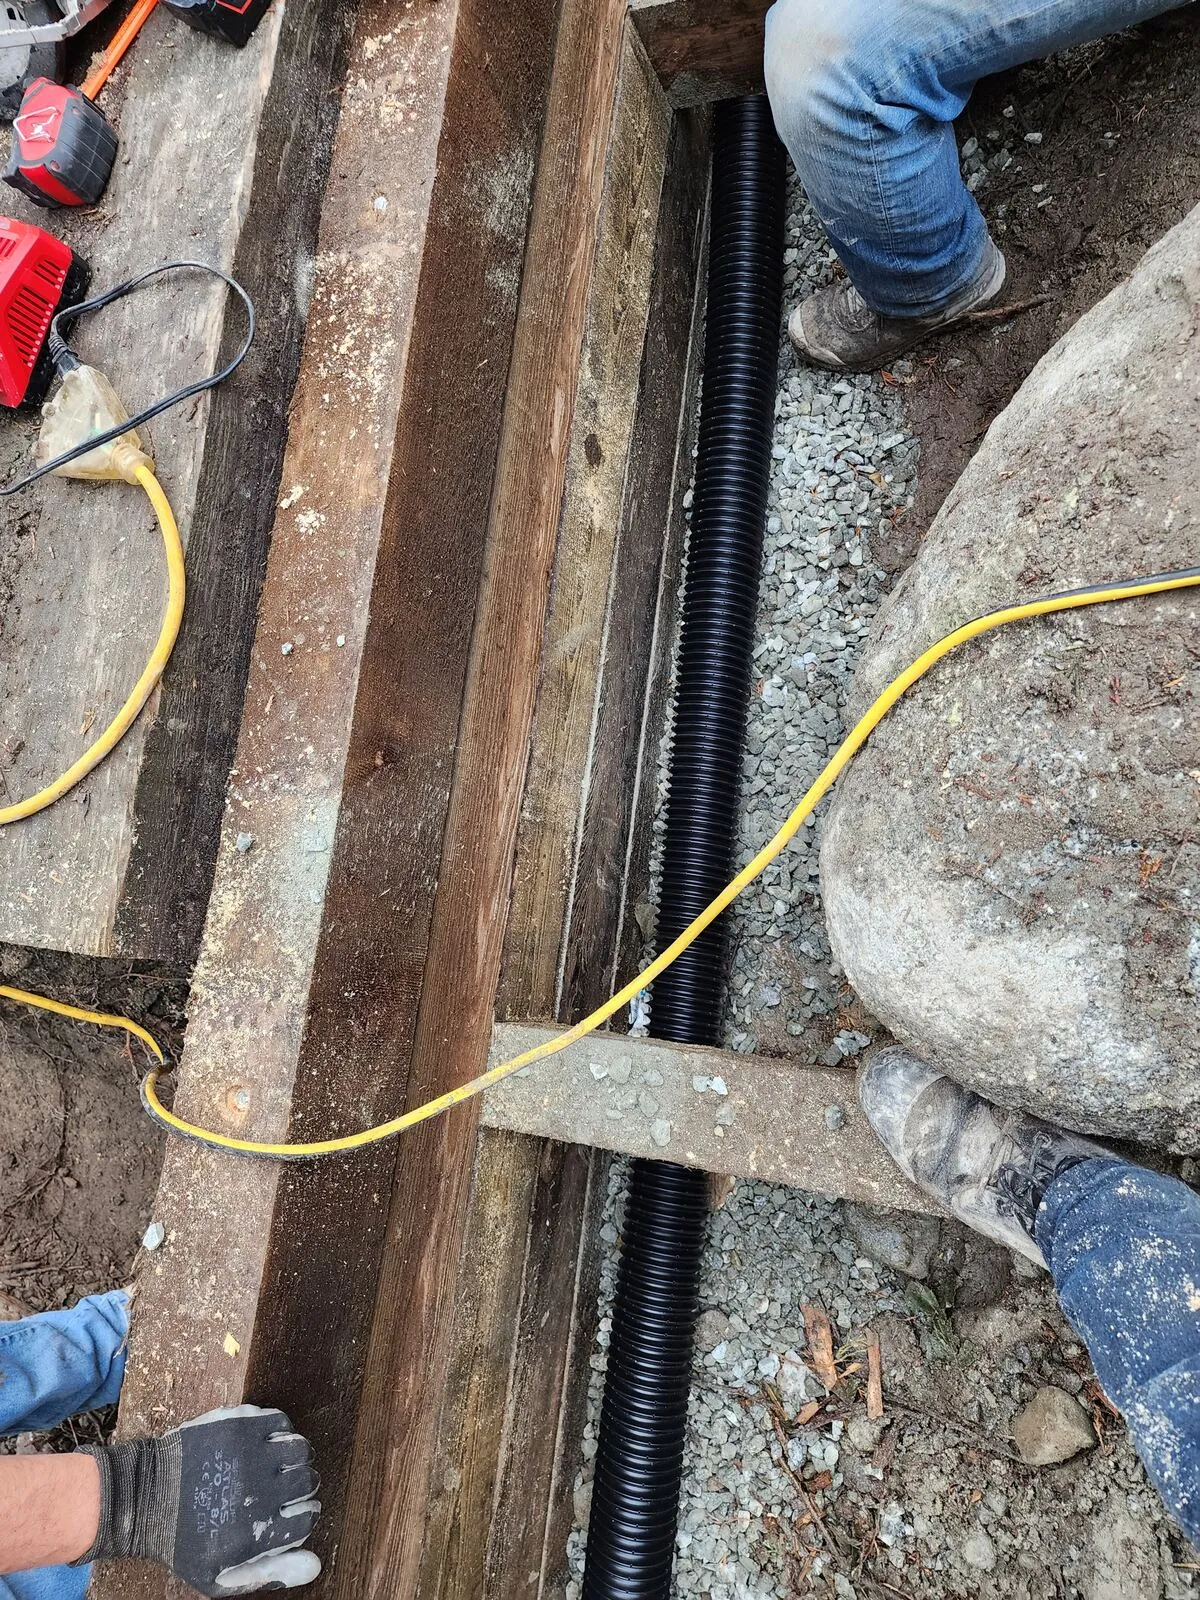
Drainage is the part that decides whether the rest of the build lasts. We trenched along the foundation, laid perforated drain tile in a gravel bed, and tied it into the existing downspouts and storm connection so roof water and yard water both have somewhere to go that isn't the basement wall. Getting this right before any retaining wall or patio goes in is the single biggest reason this kind of project succeeds long-term.
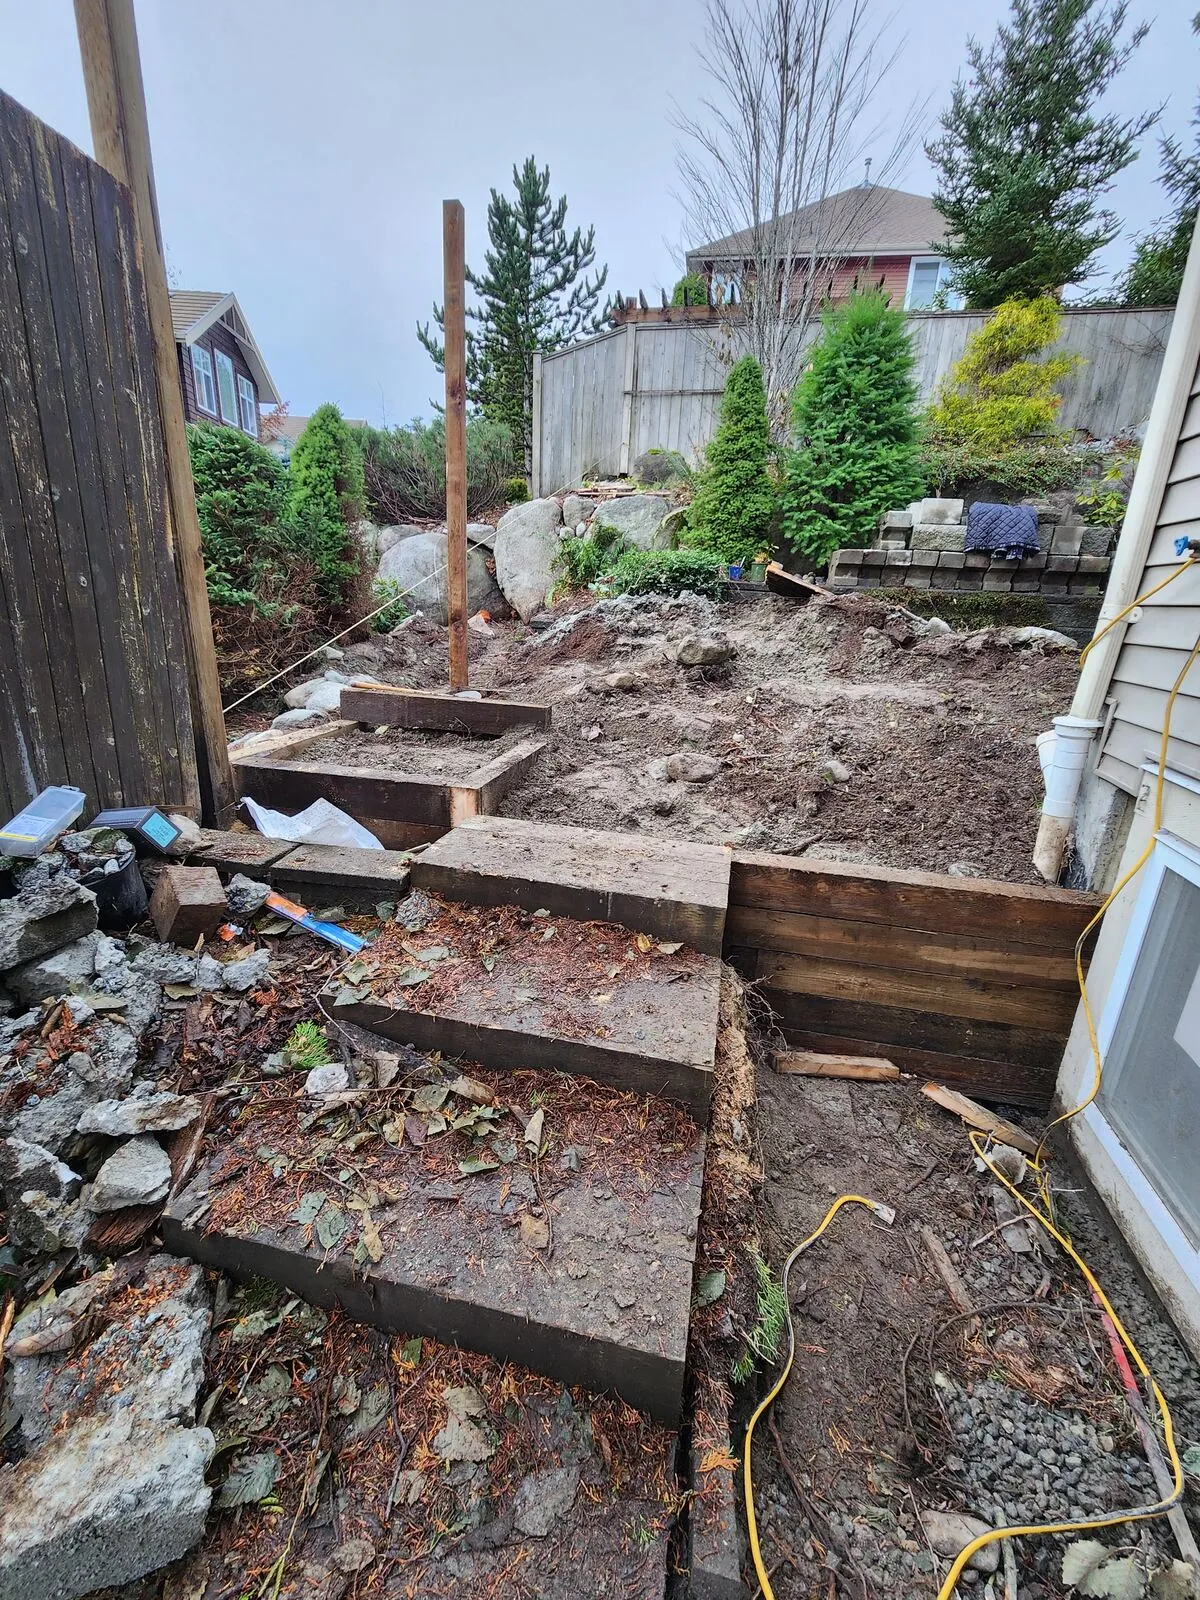
Tiered timber retaining walls and base prep
With the drainage in, we built tiered pressure-treated 6×6 retaining walls to hold the slope back and define the patio zone. Each course was leveled, dead-men anchors set back into the bank for resistance, and the backfill placed and compacted in lifts. We then built up a properly compacted gravel base for the patio surface — that base, not the stone on top, is what keeps a paving-stone patio flat for the long run.
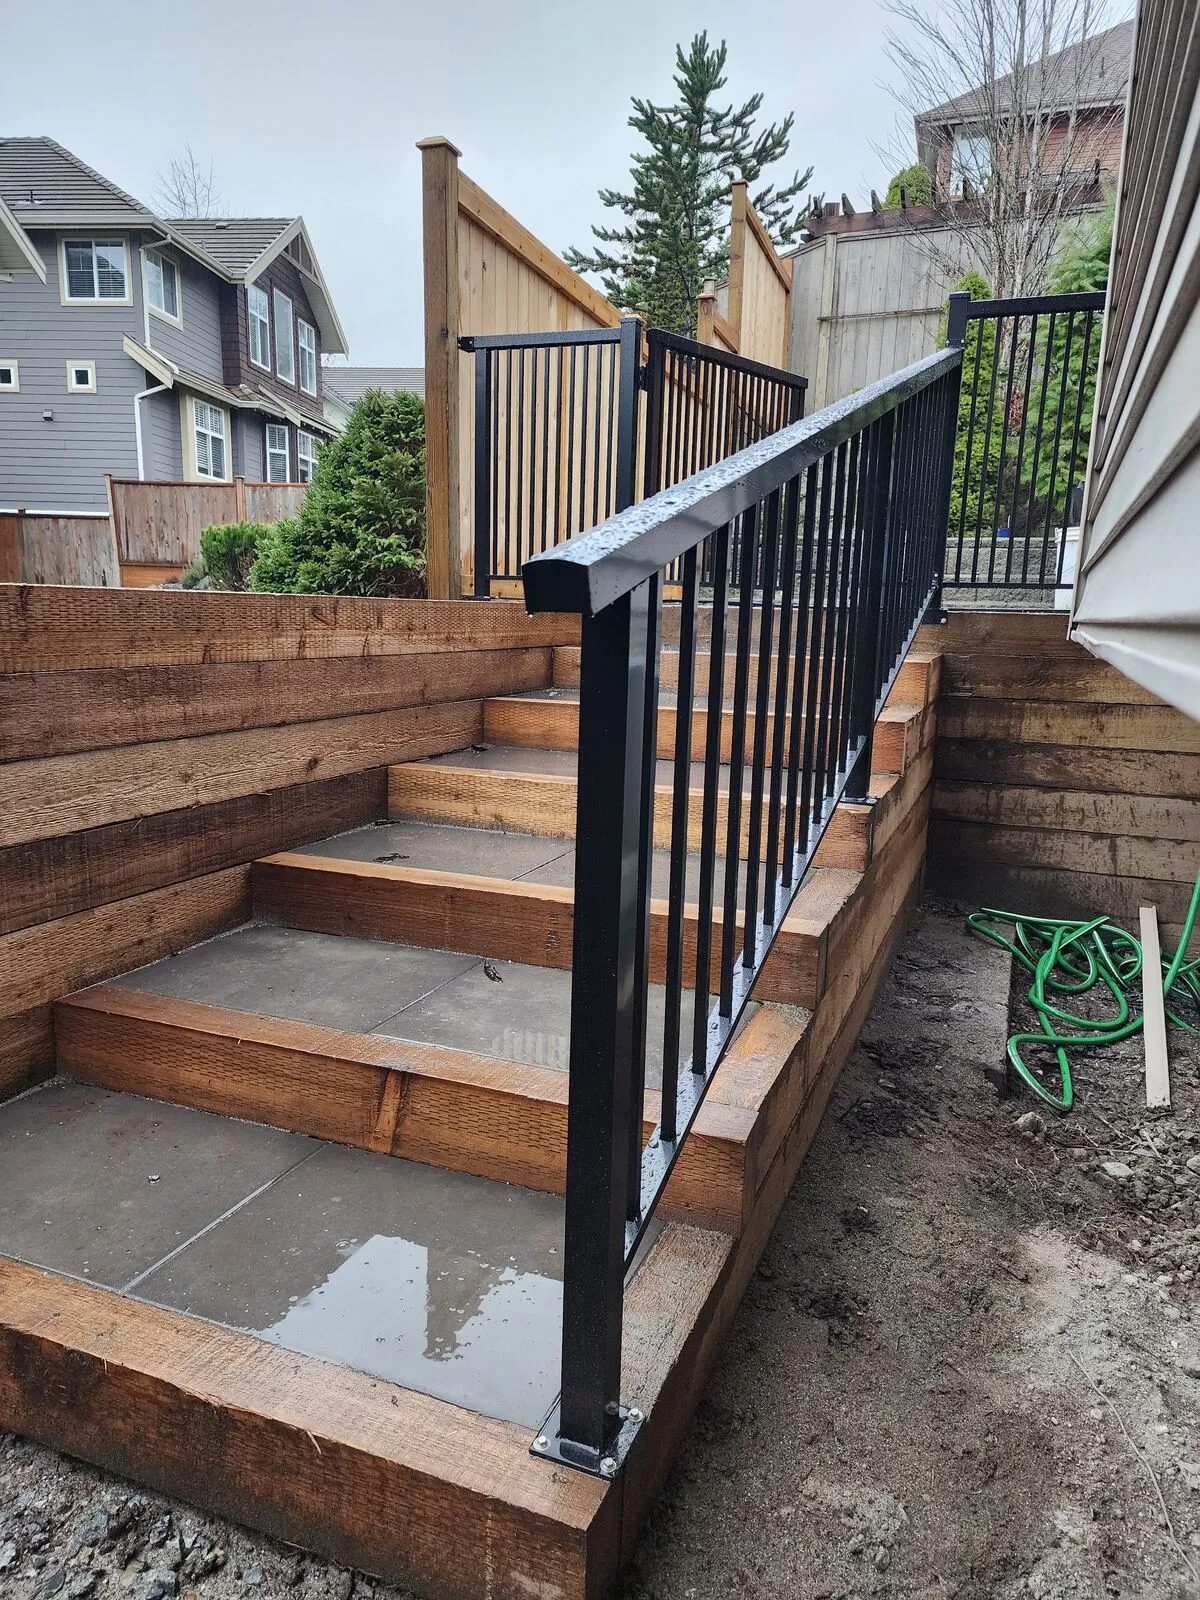
Concrete-and-timber stairs with black aluminum railing
To get from the upper yard down to the patio we built combination stairs — timber stringers and risers with poured concrete treads — finished with a powder-coated black aluminum railing for safety and a clean modern line. The railing posts are through-bolted into the timber framing, not surface-mounted, so they don't loosen up over time.
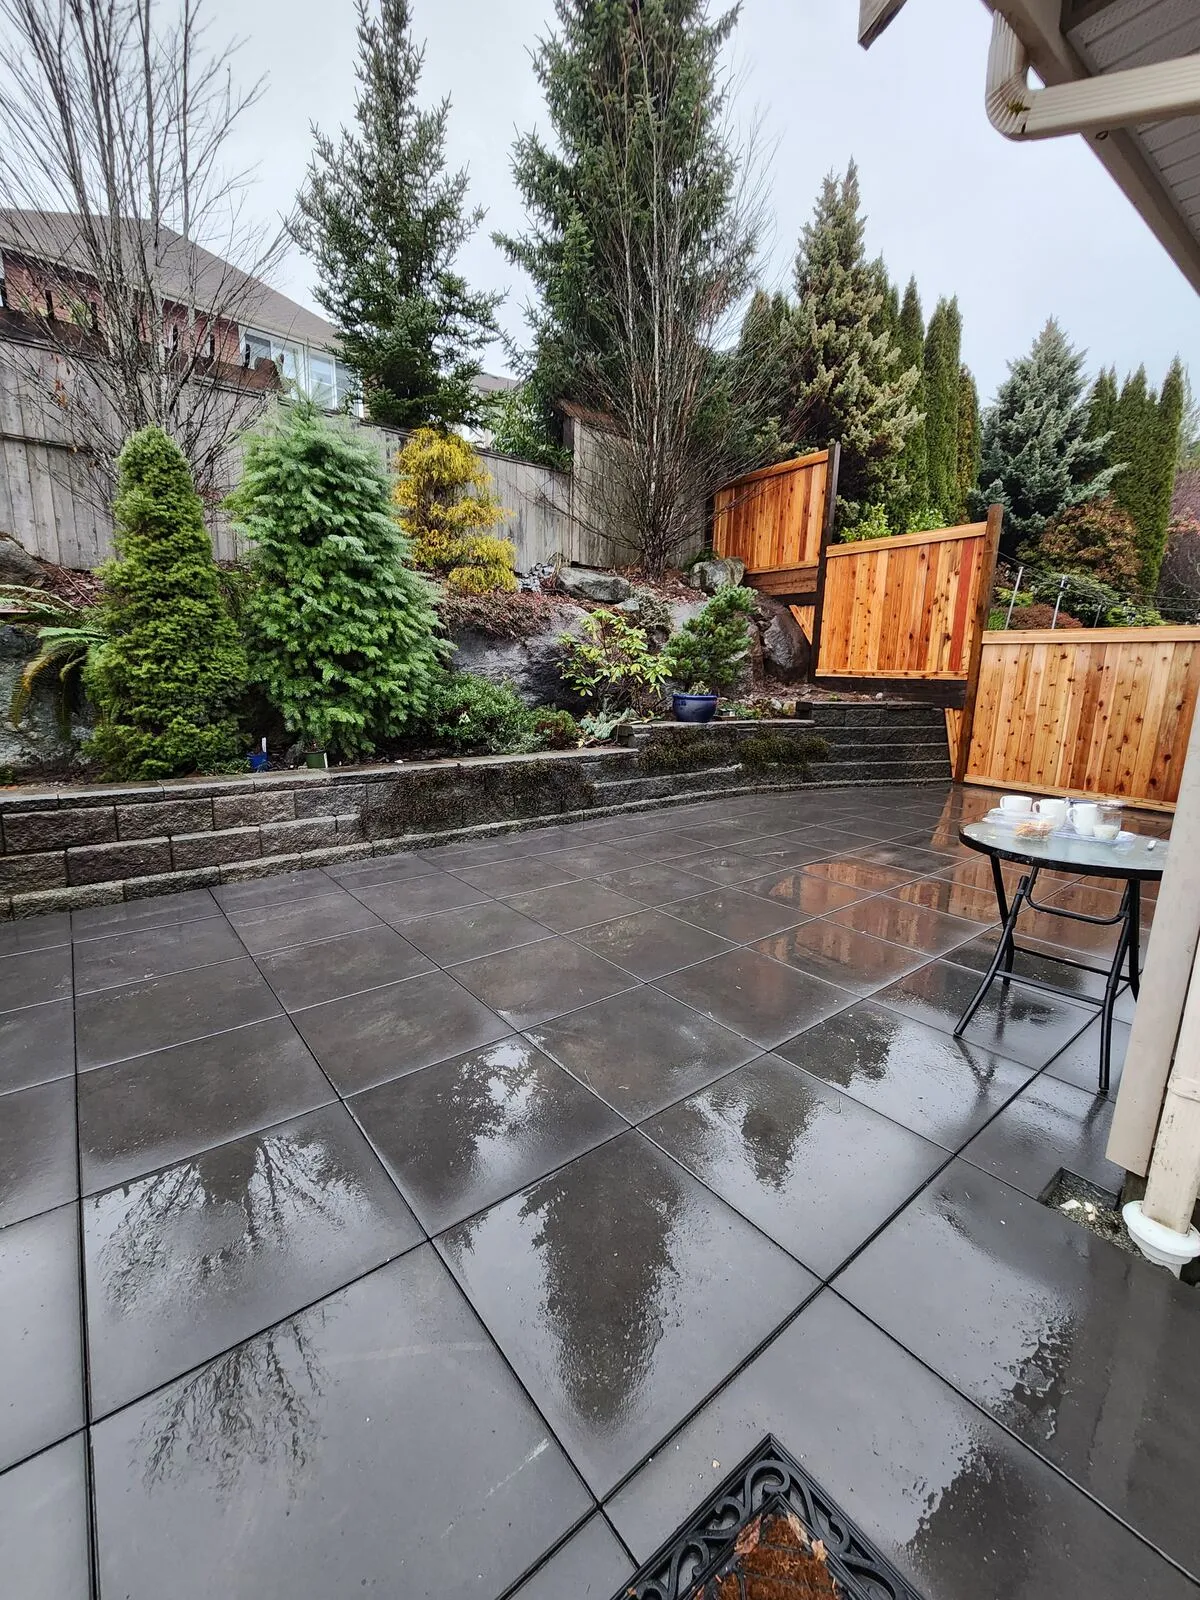
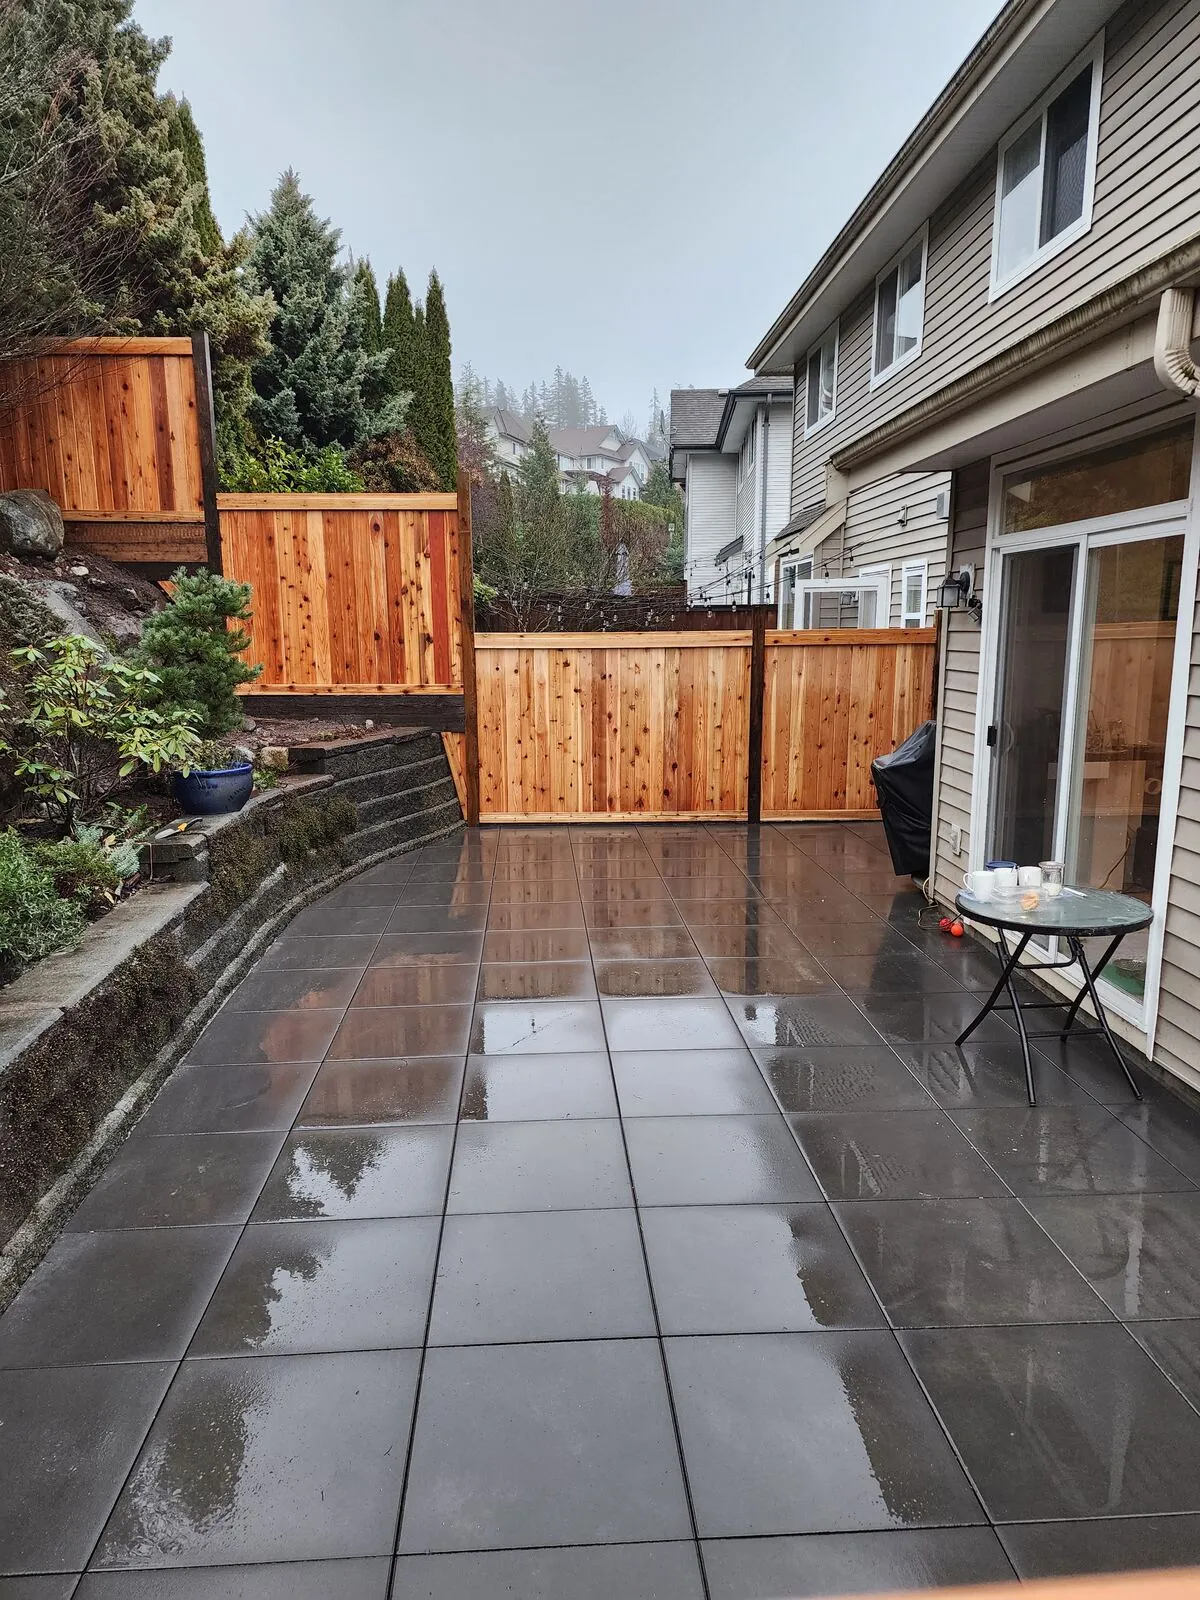
Charcoal-grey paving stone patio
We laid a charcoal-grey textured paving stone over the compacted base with tight joints, full-cut edges where the patio meets the wall and house, polymeric joint sand swept and locked, and edge restraint on the open side. The colour ties into the railing and slate accents, and the texture keeps it from getting slick in our wet season.
Cedar privacy fencing to close the yard in
We finished the build with new cedar privacy-fence panels along the back and side property line — vertical boards with a horizontal cap detail that warms the whole space up against the dark patio and railing. The result is a usable, level outdoor room where there used to be a slumping slope.