Where this project started
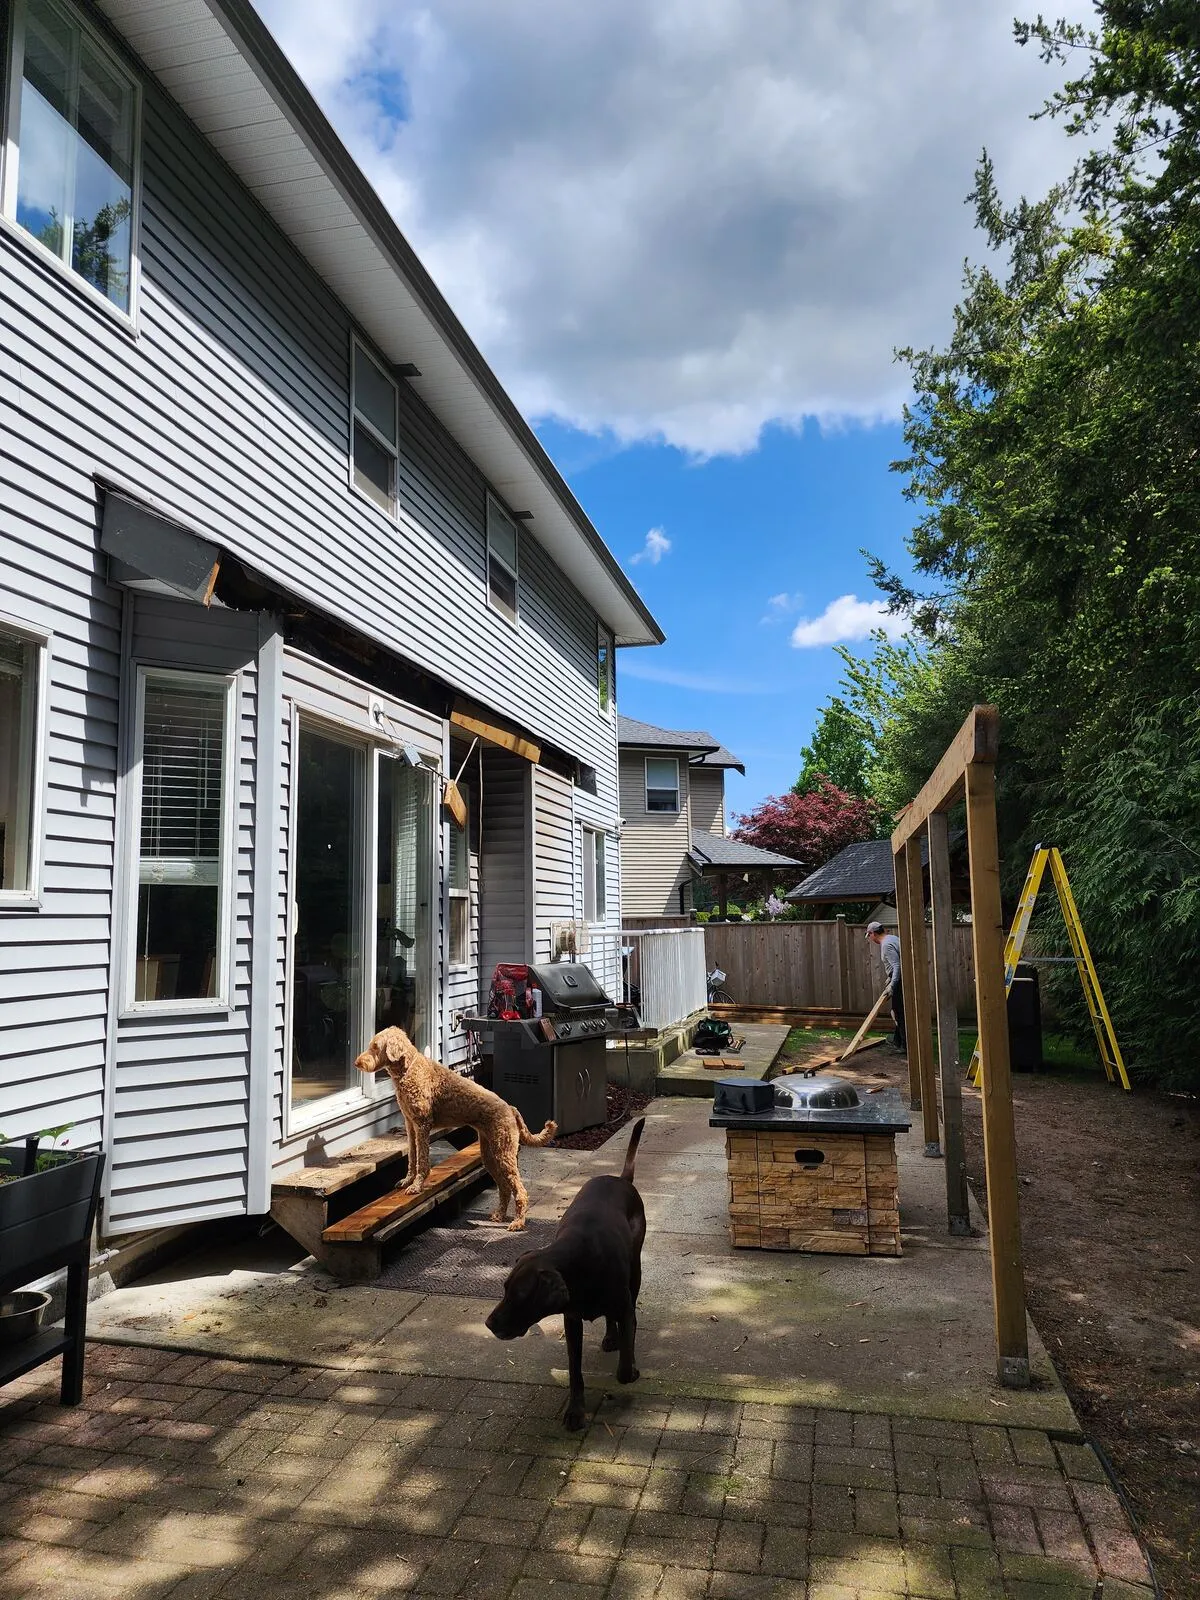
The homeowners had a small concrete patio off the back of the house with a tired little roof over part of it. They wanted to turn the whole back of the yard into a real outdoor room — somewhere the family could sit out of the rain in October, host friends in the summer, and let the dogs in and out without dragging mud through the house. We designed a full-size cedar post-and-beam patio cover from scratch and built it over about six weeks in May and June 2025.
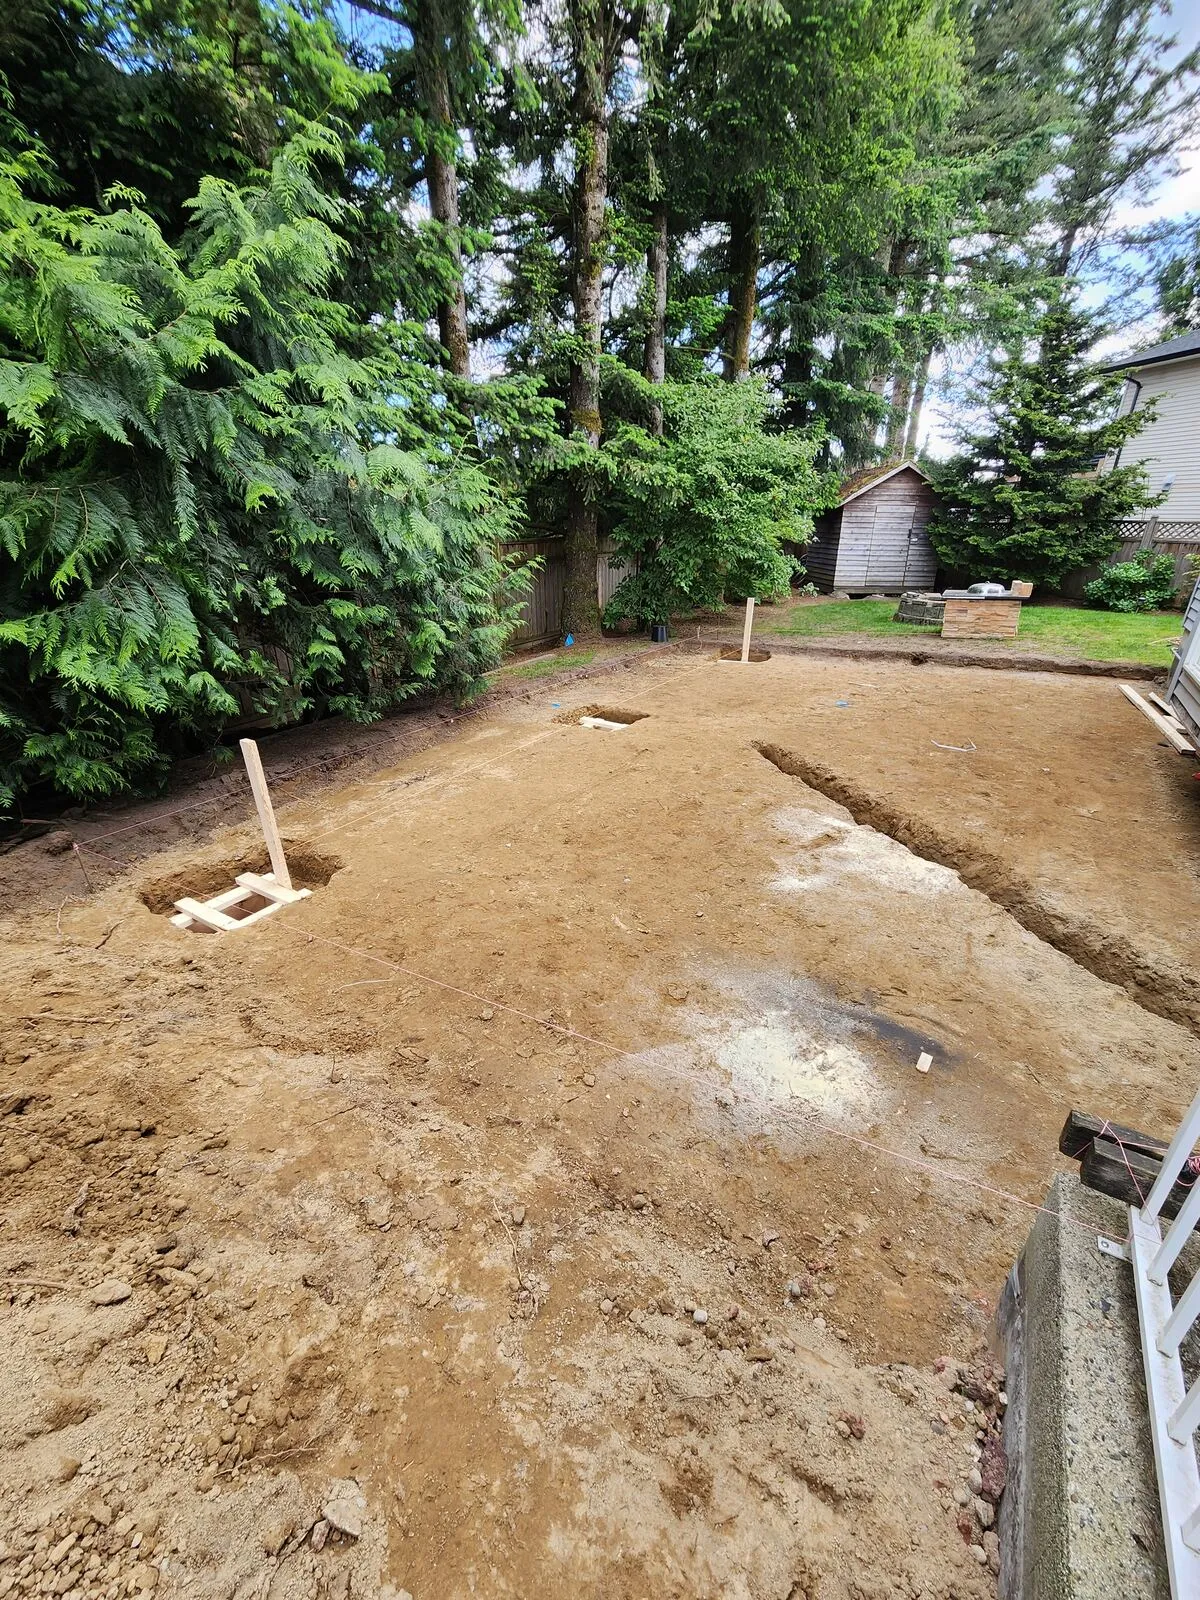
Site prep and engineered footings
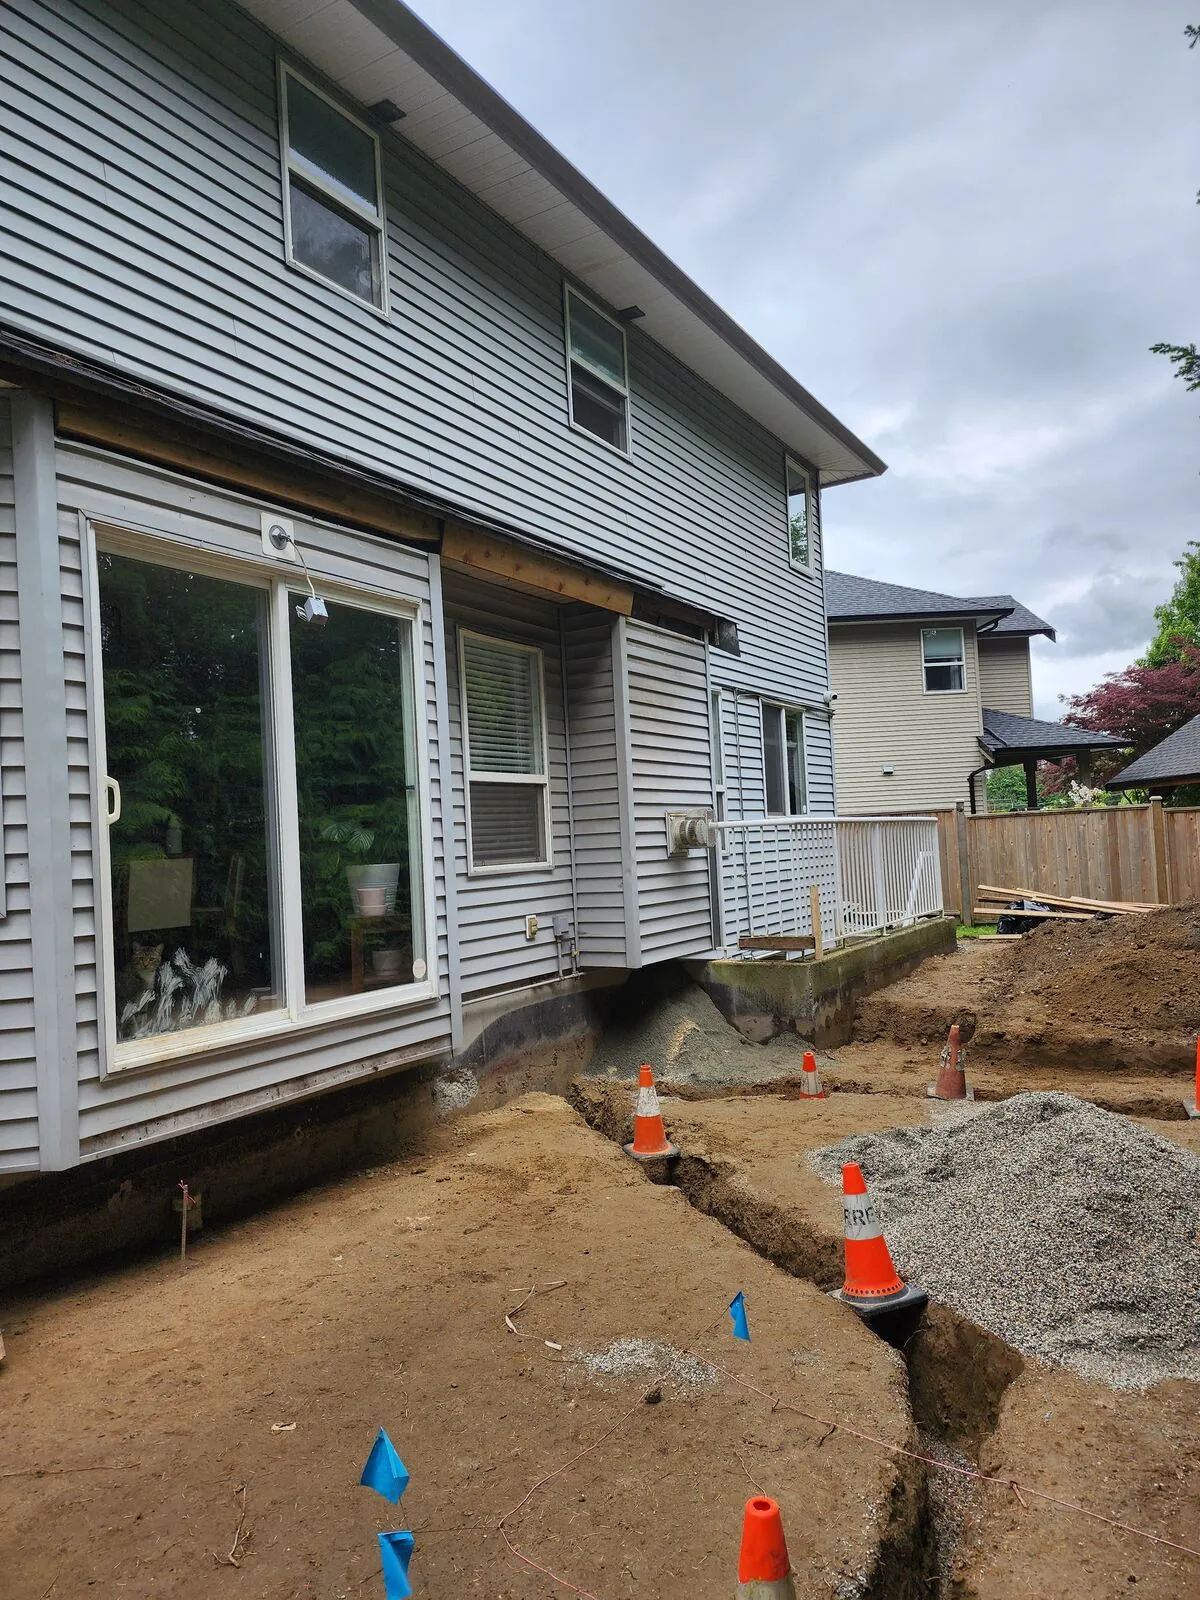
First step was clearing the old patio cover and laying out the new footprint. We marked the post locations from the engineered drawings, dug and formed Sonotube footings to the depths the engineer called for, and tied in rebar so each post sits on a proper concrete pier rather than just resting on the slab. At the same time we opened up the wall at the house to expose the rim joist where the new ledger would tie in.
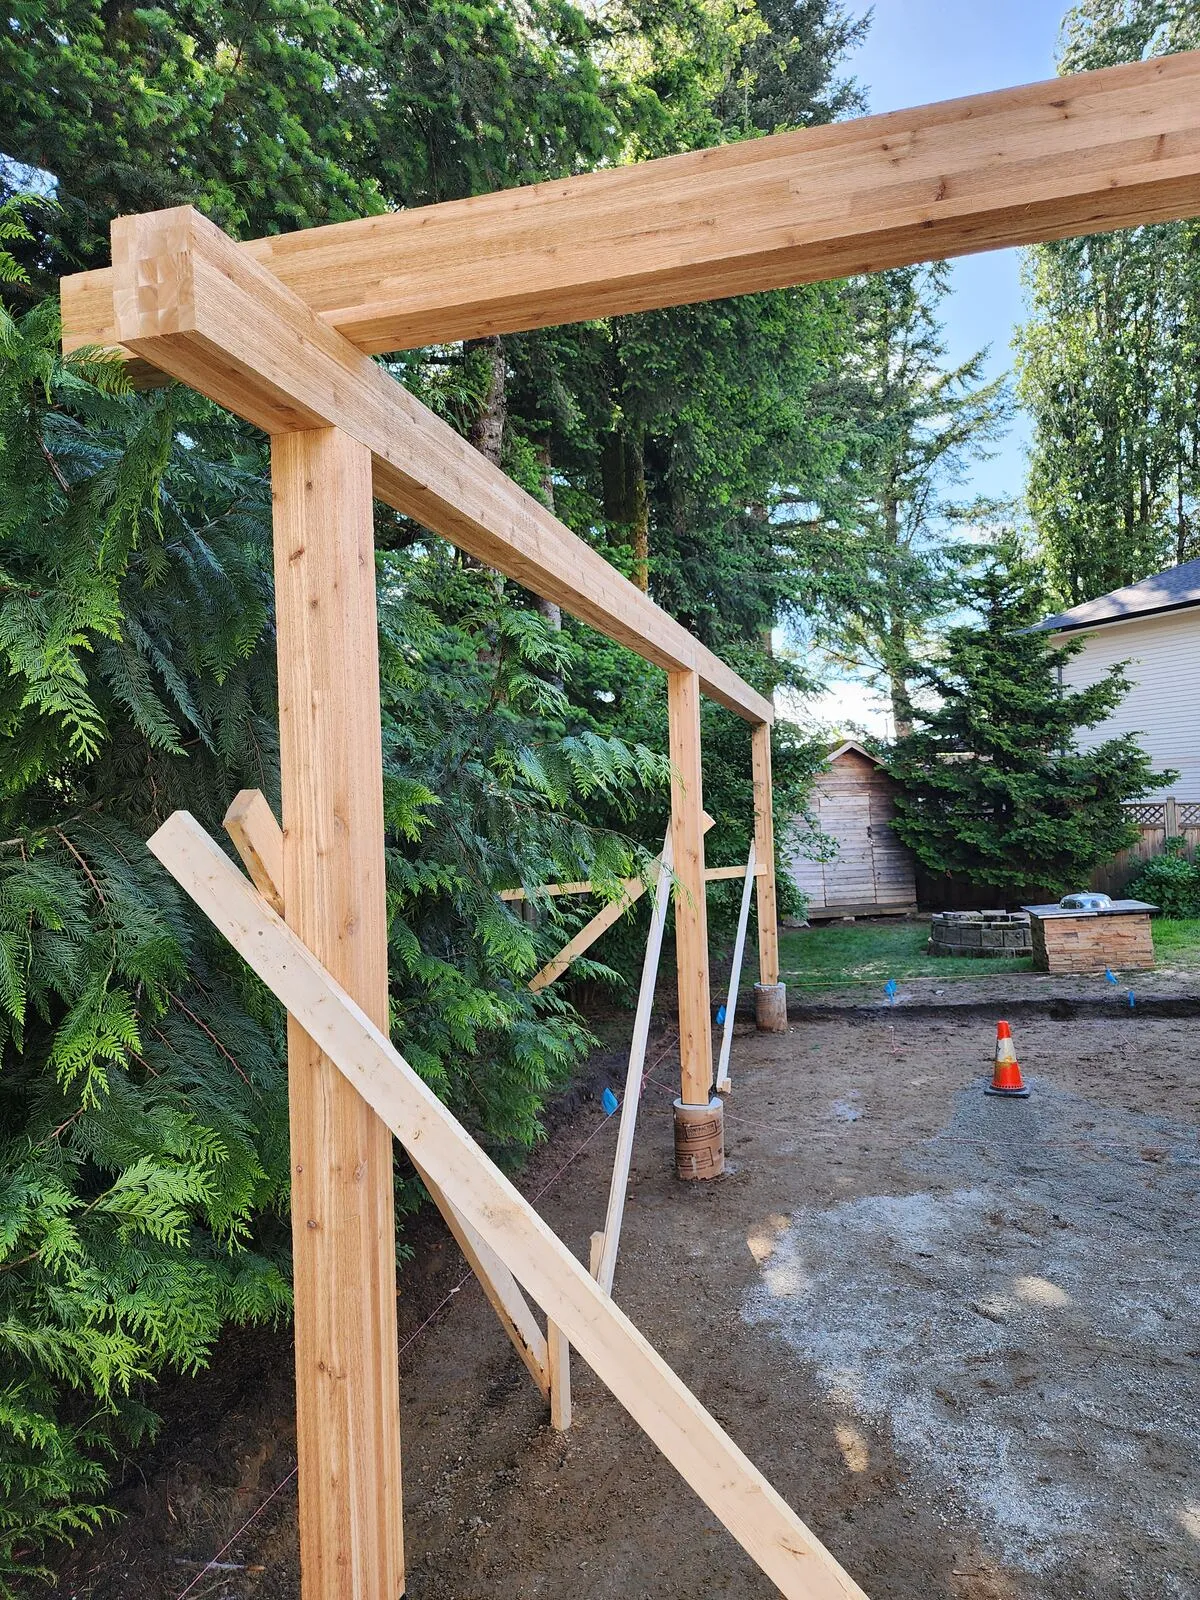
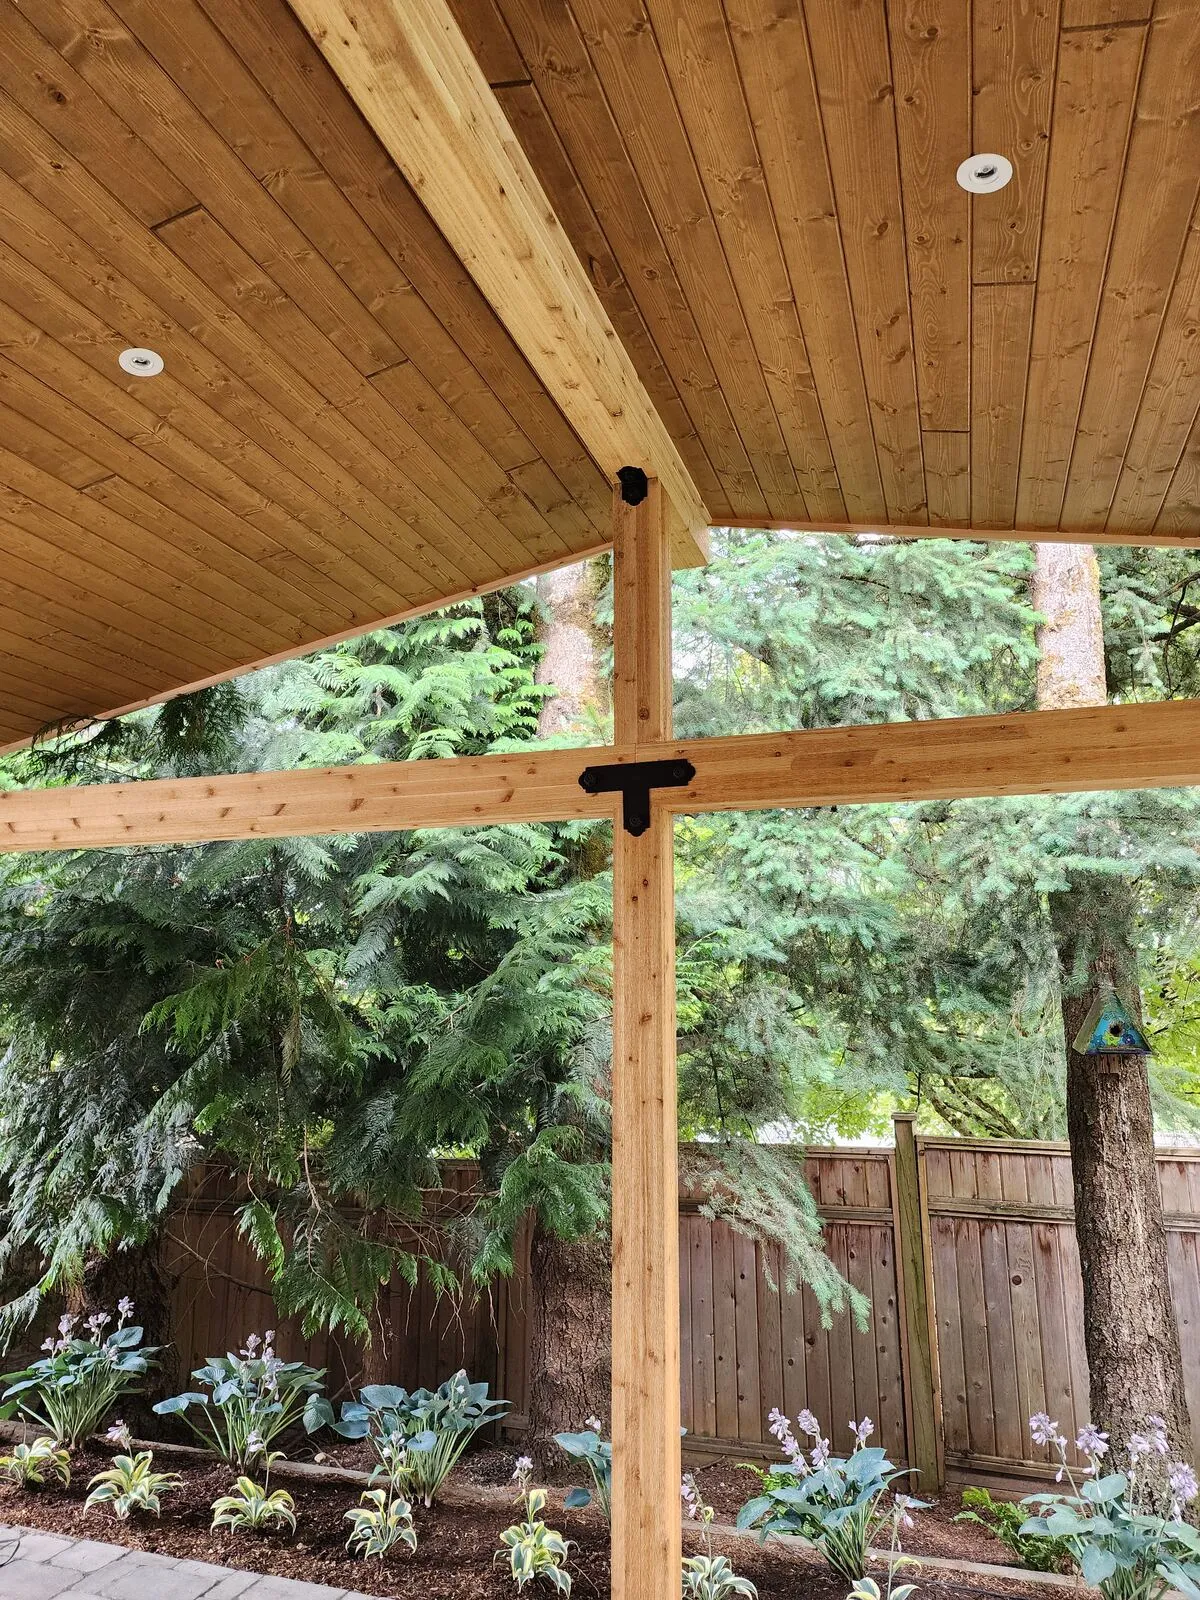
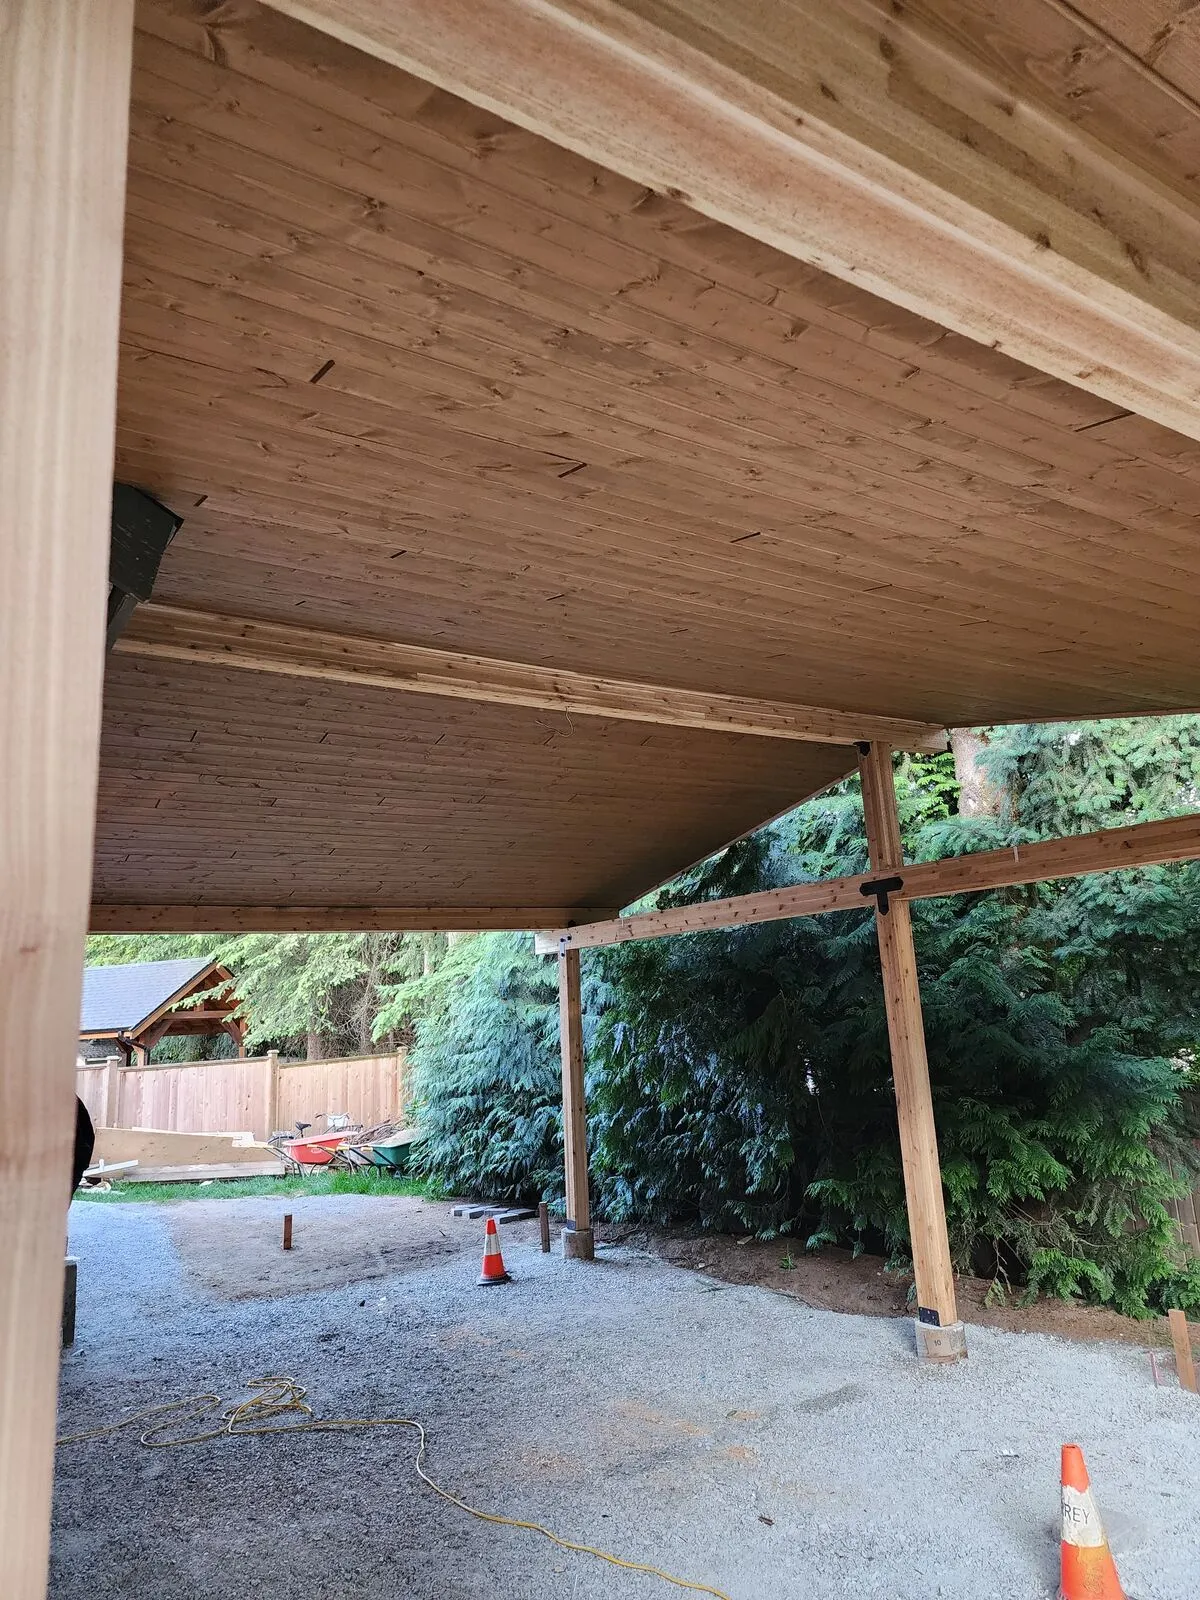
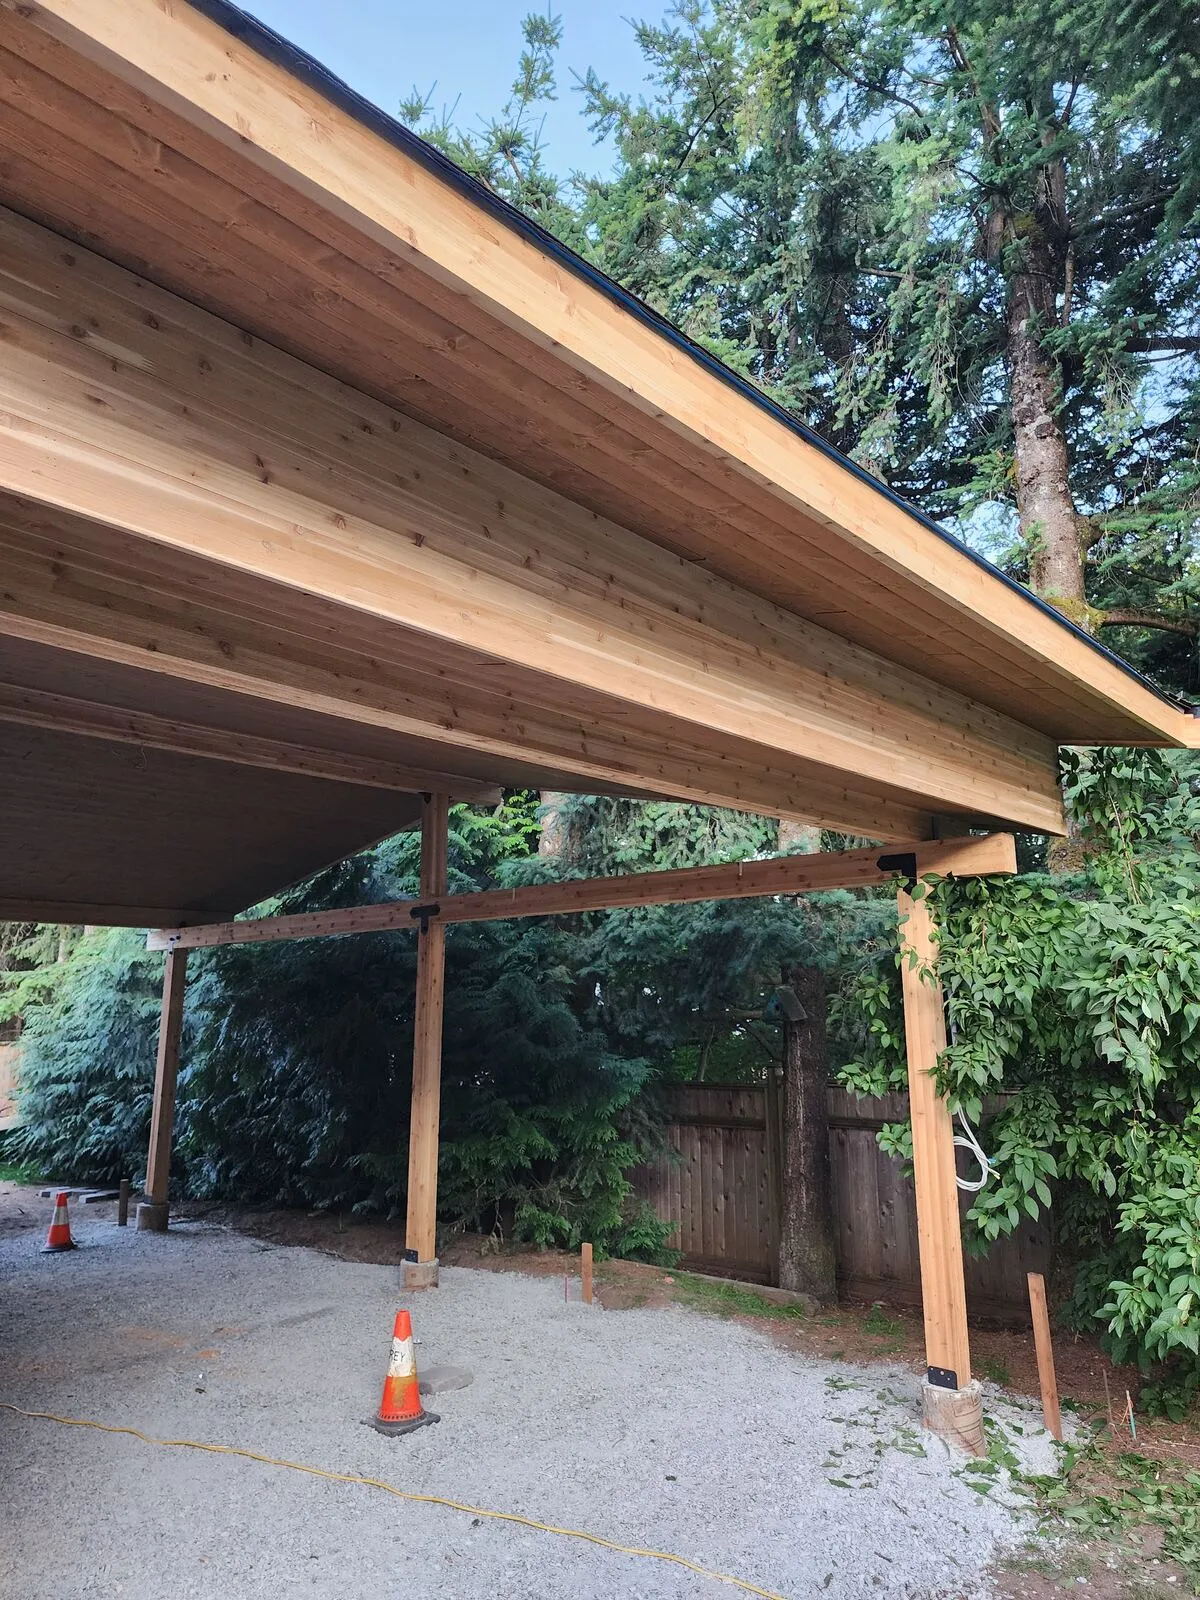
Heavy 6×6 cedar post-and-beam frame
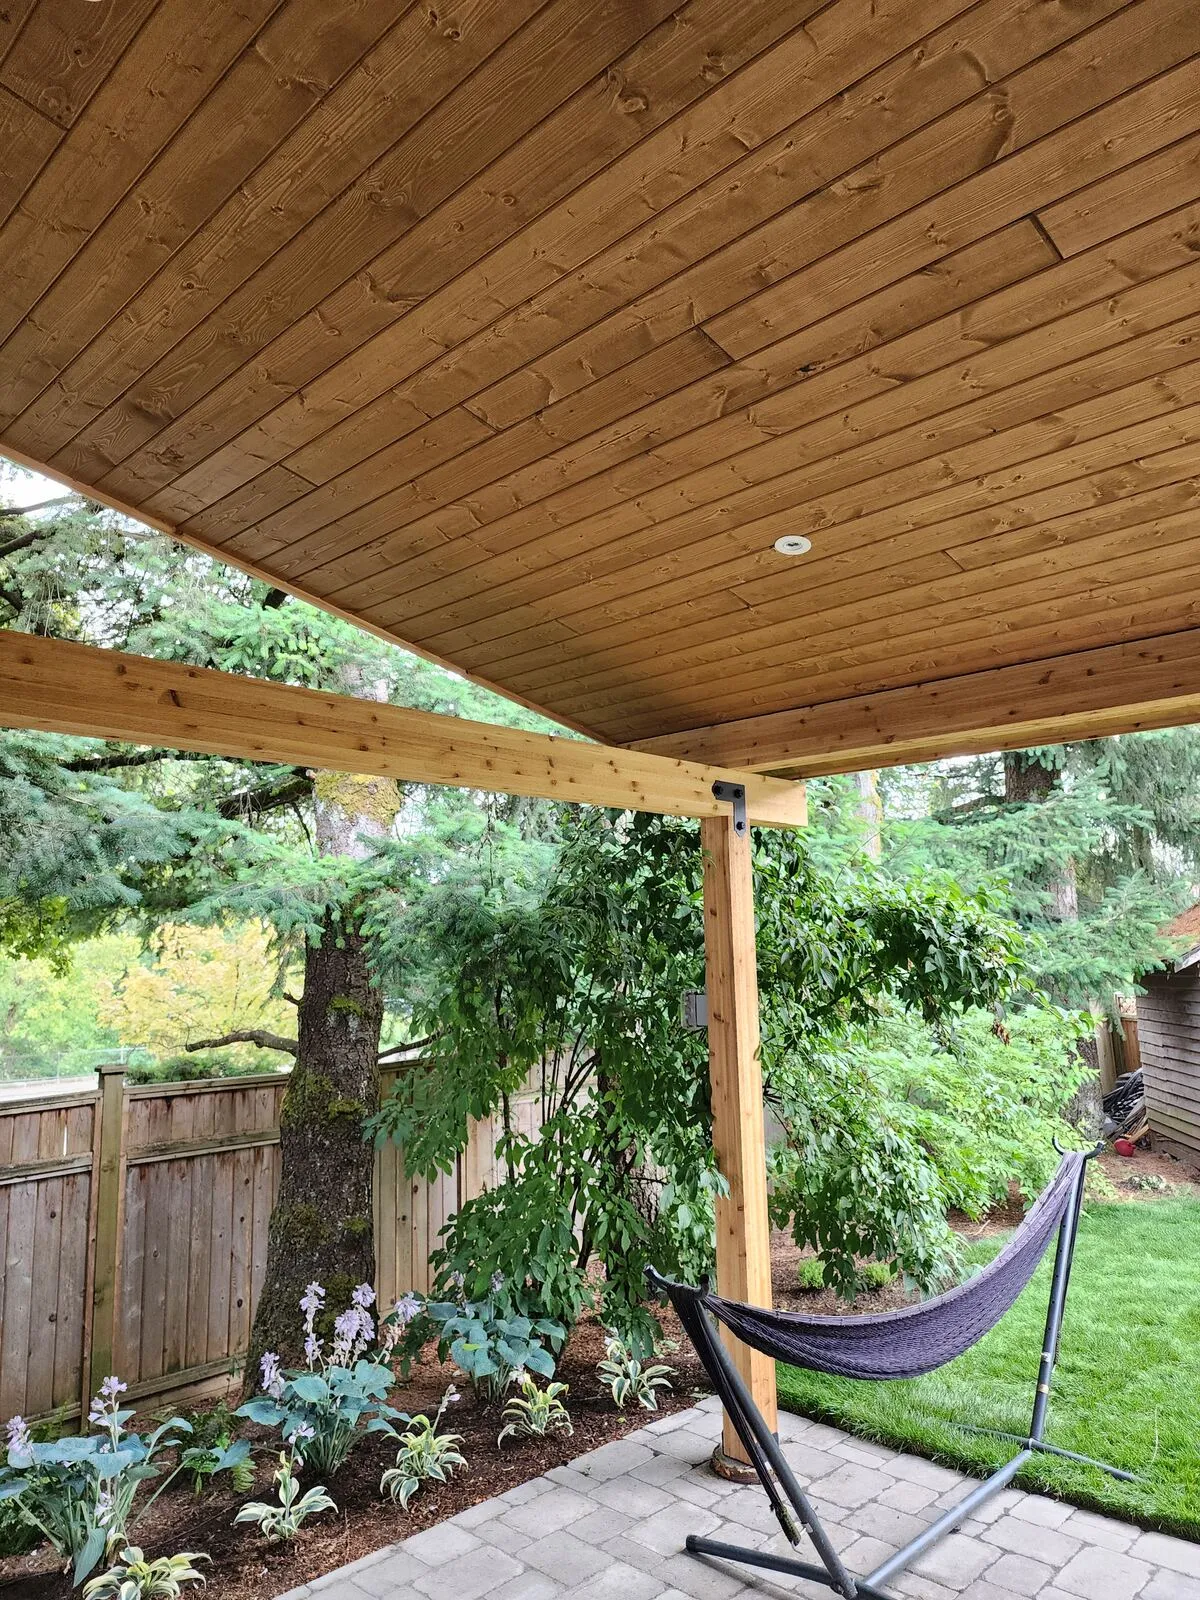
Once the footings cured we set the 6×6 western red cedar posts on engineered black metal post bases — those bases lift the posts off the concrete so end-grain never sits in water, which is what kills cedar posts over time. Beams came in next, joined to the posts with black steel knife-plate brackets concealed in saw kerfs through the beams. The result is a frame that's structural first and decorative second — the brackets and post bases are part of the look.
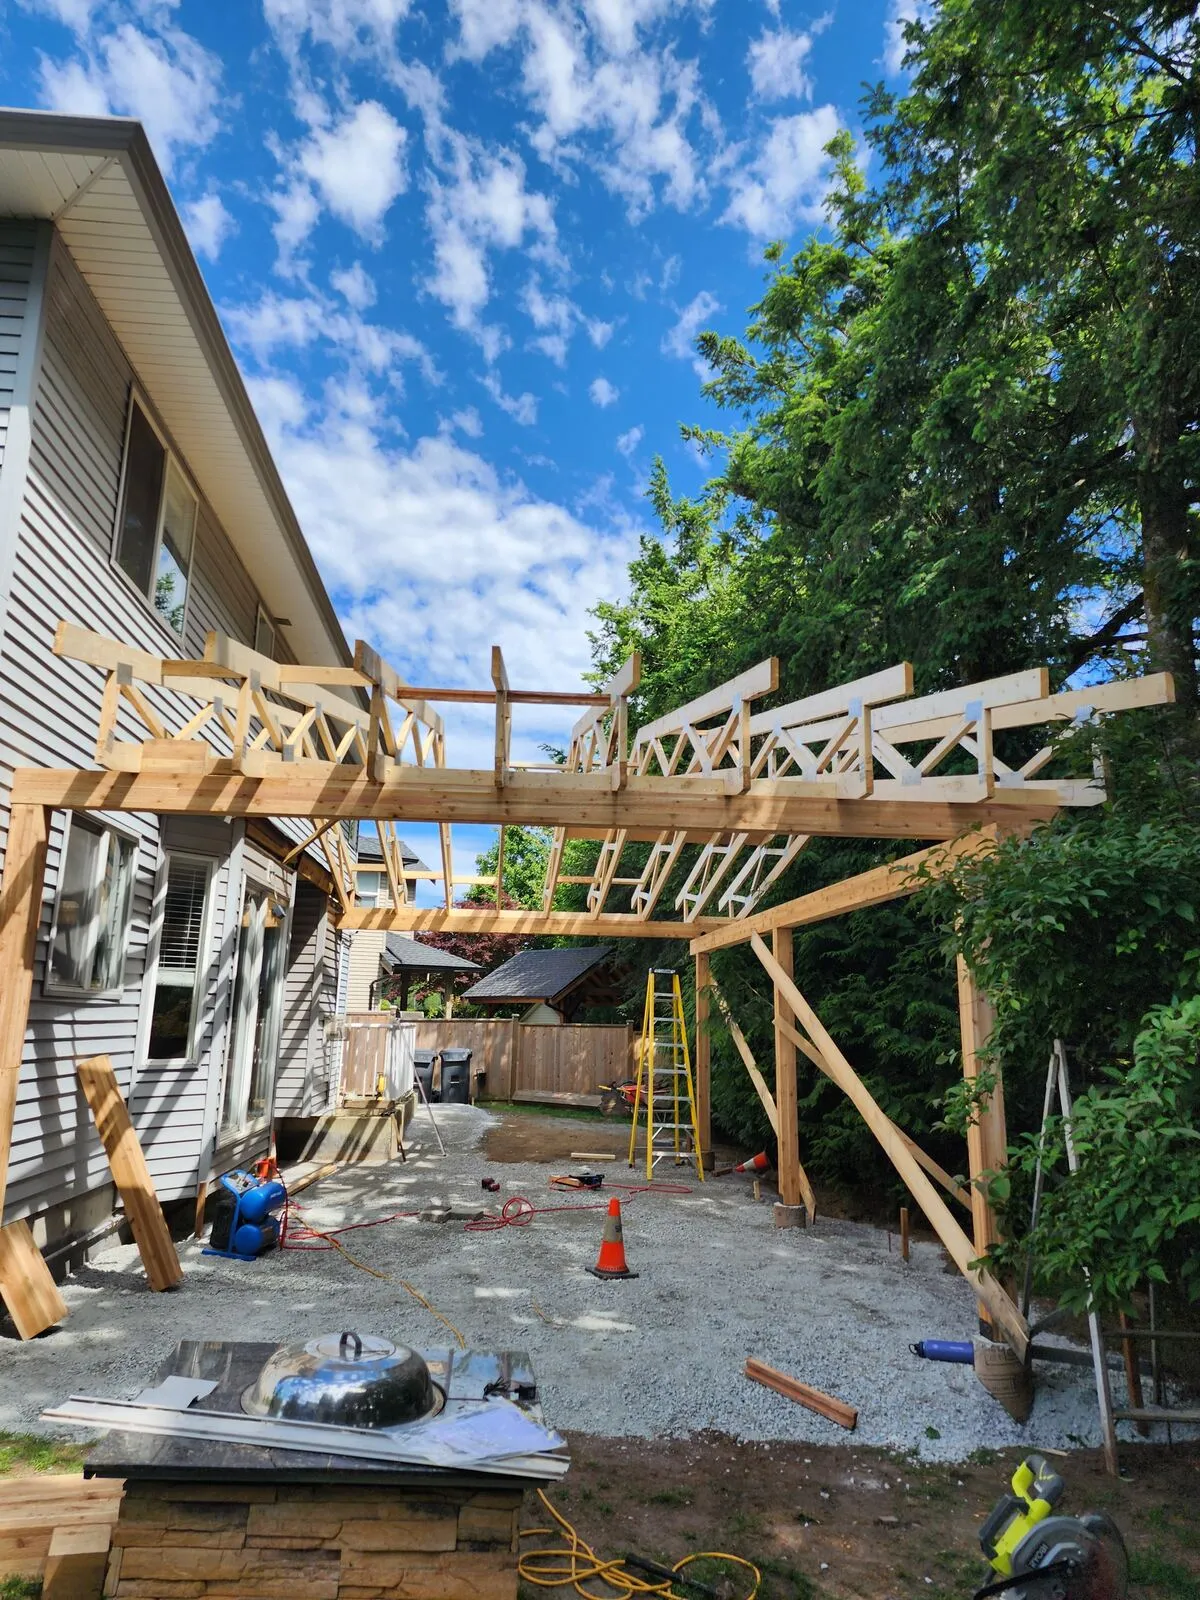
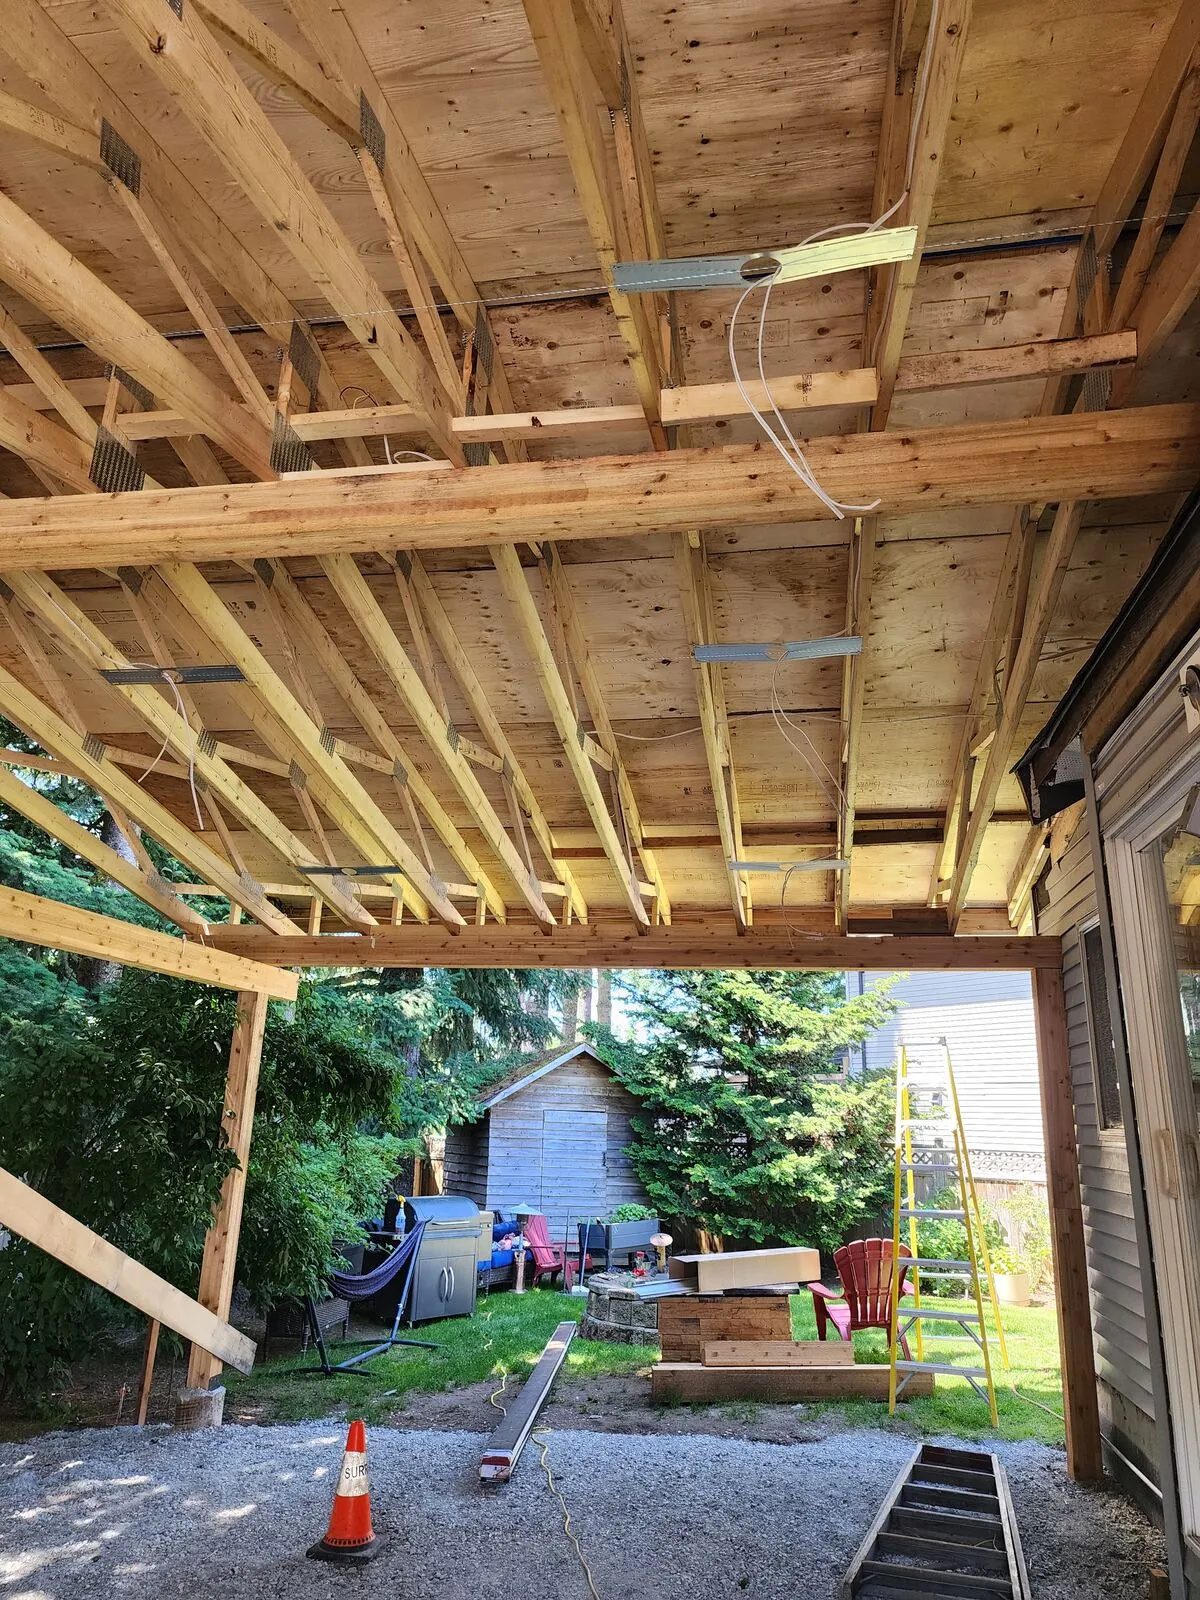
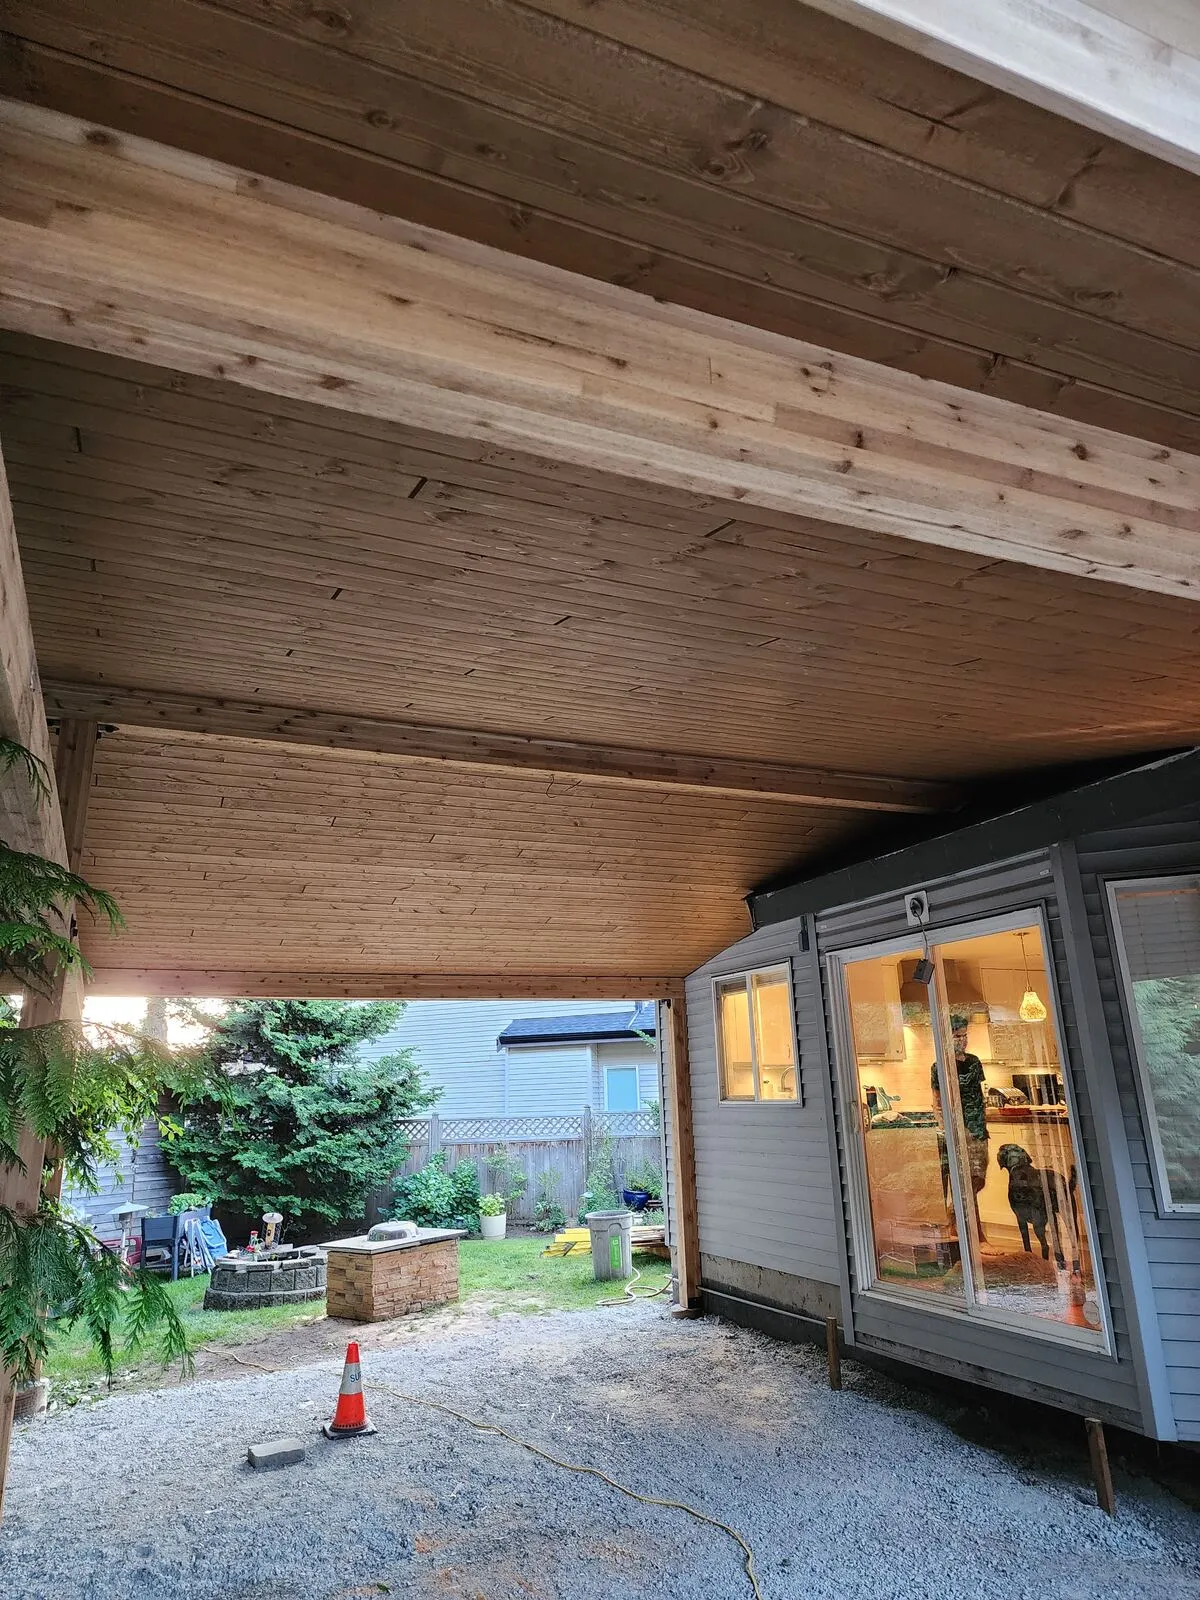
Engineered trusses and roof deck
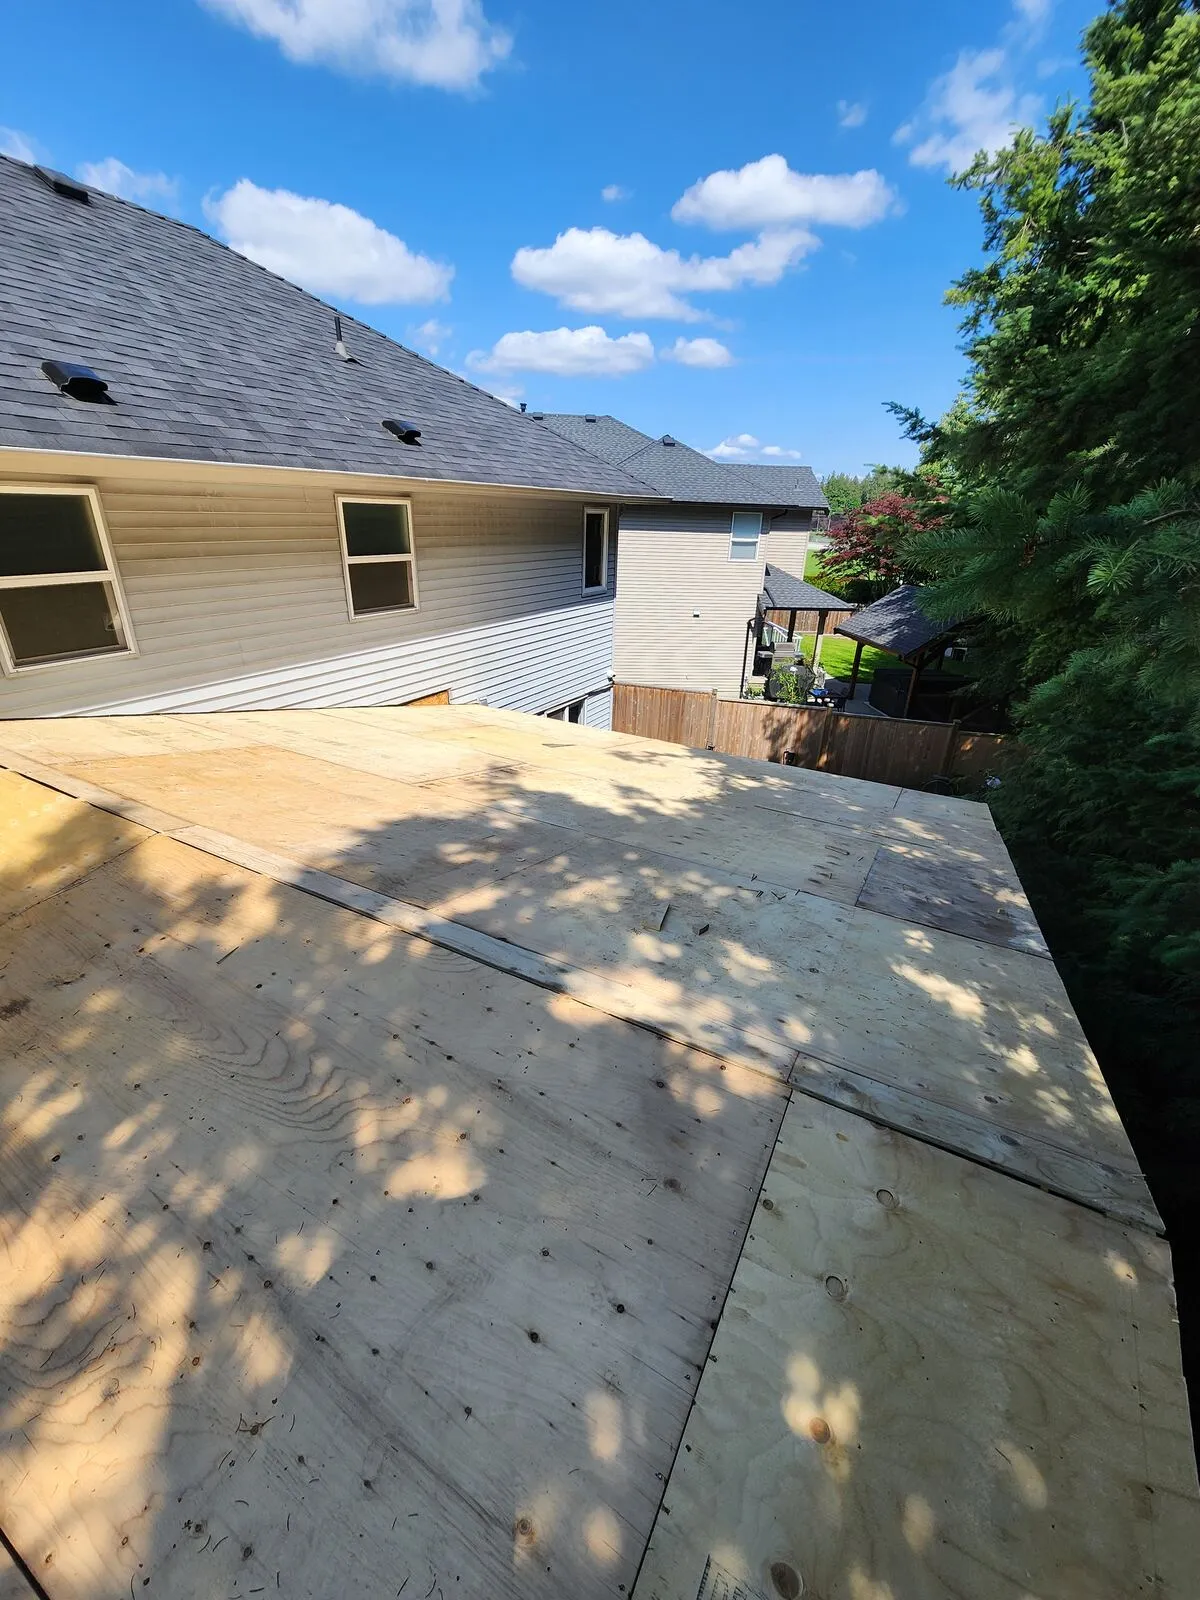
On top of the beams we set engineered open-web trusses to span the patio without intermediate posts. Trusses give you a strong, light roof structure and let us keep the underside open for a clean cedar ceiling. Once the trusses were tied down with hurricane ties, we sheathed the top in 5/8" plywood and ran a peel-and-stick underlayment so the structure was watertight before we touched the finish work.
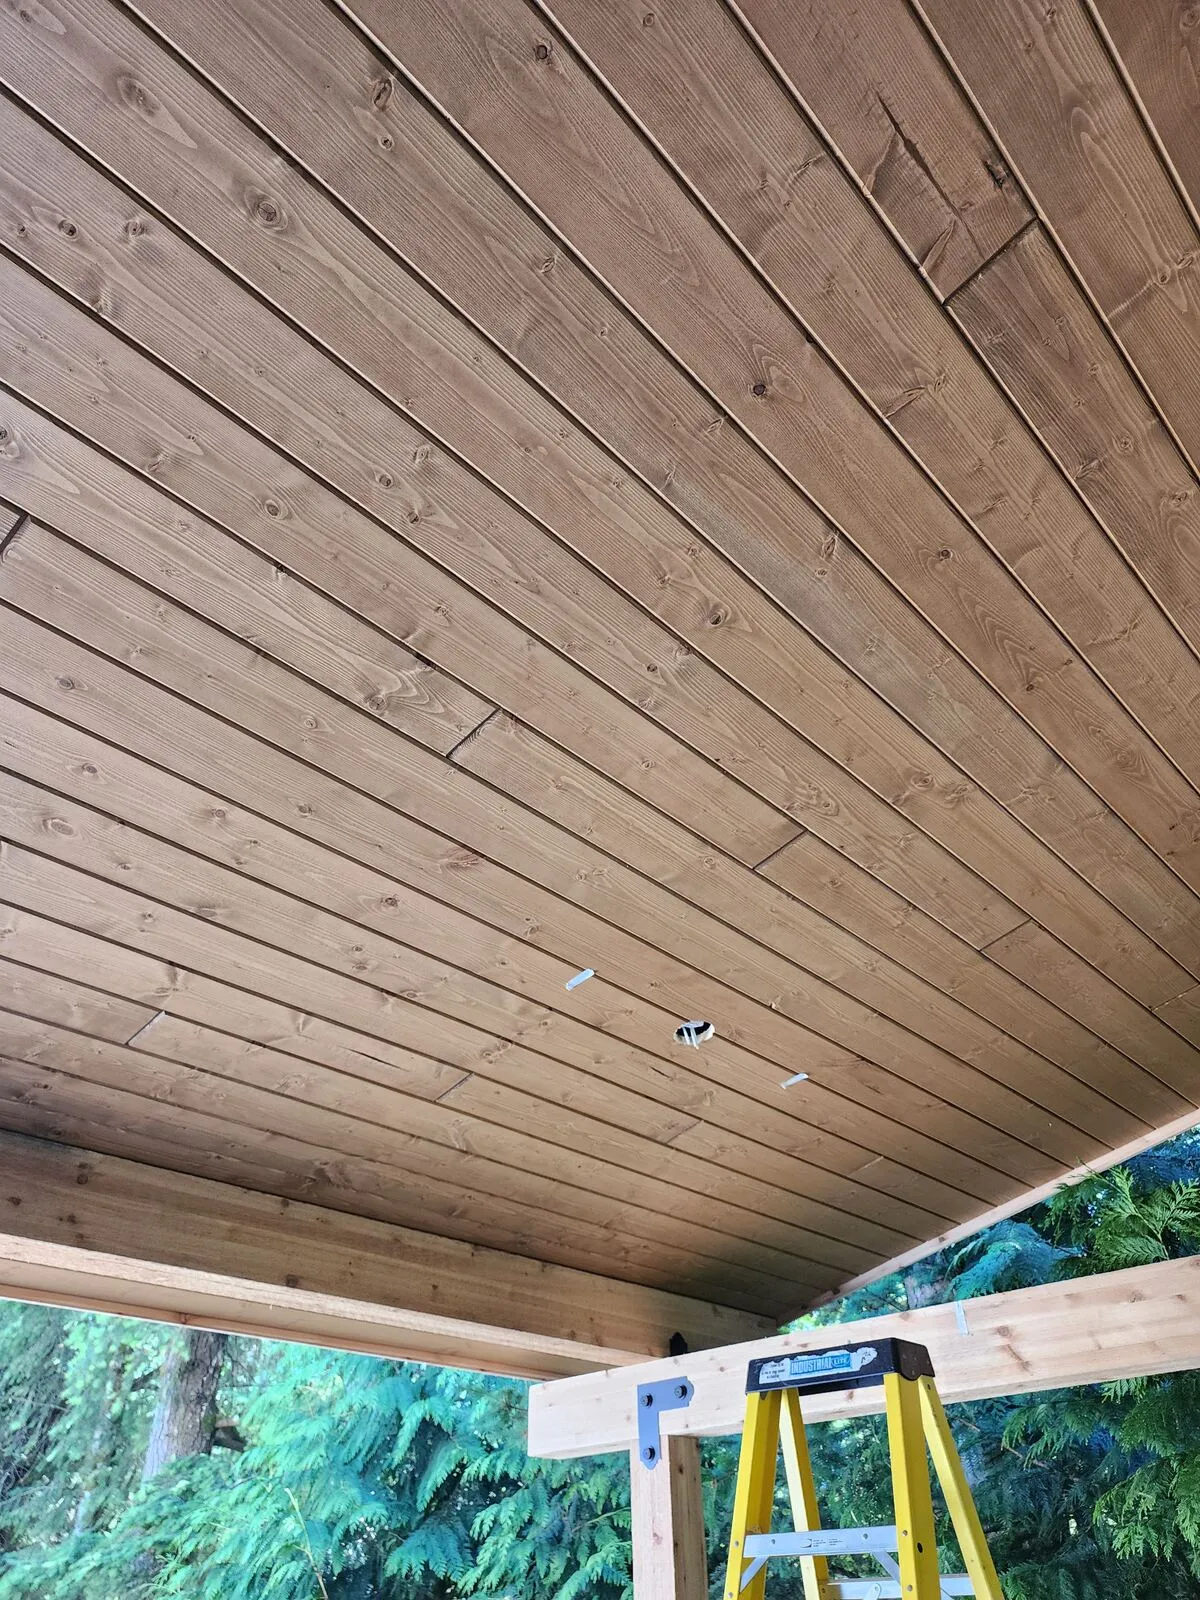
Cedar tongue-and-groove ceiling
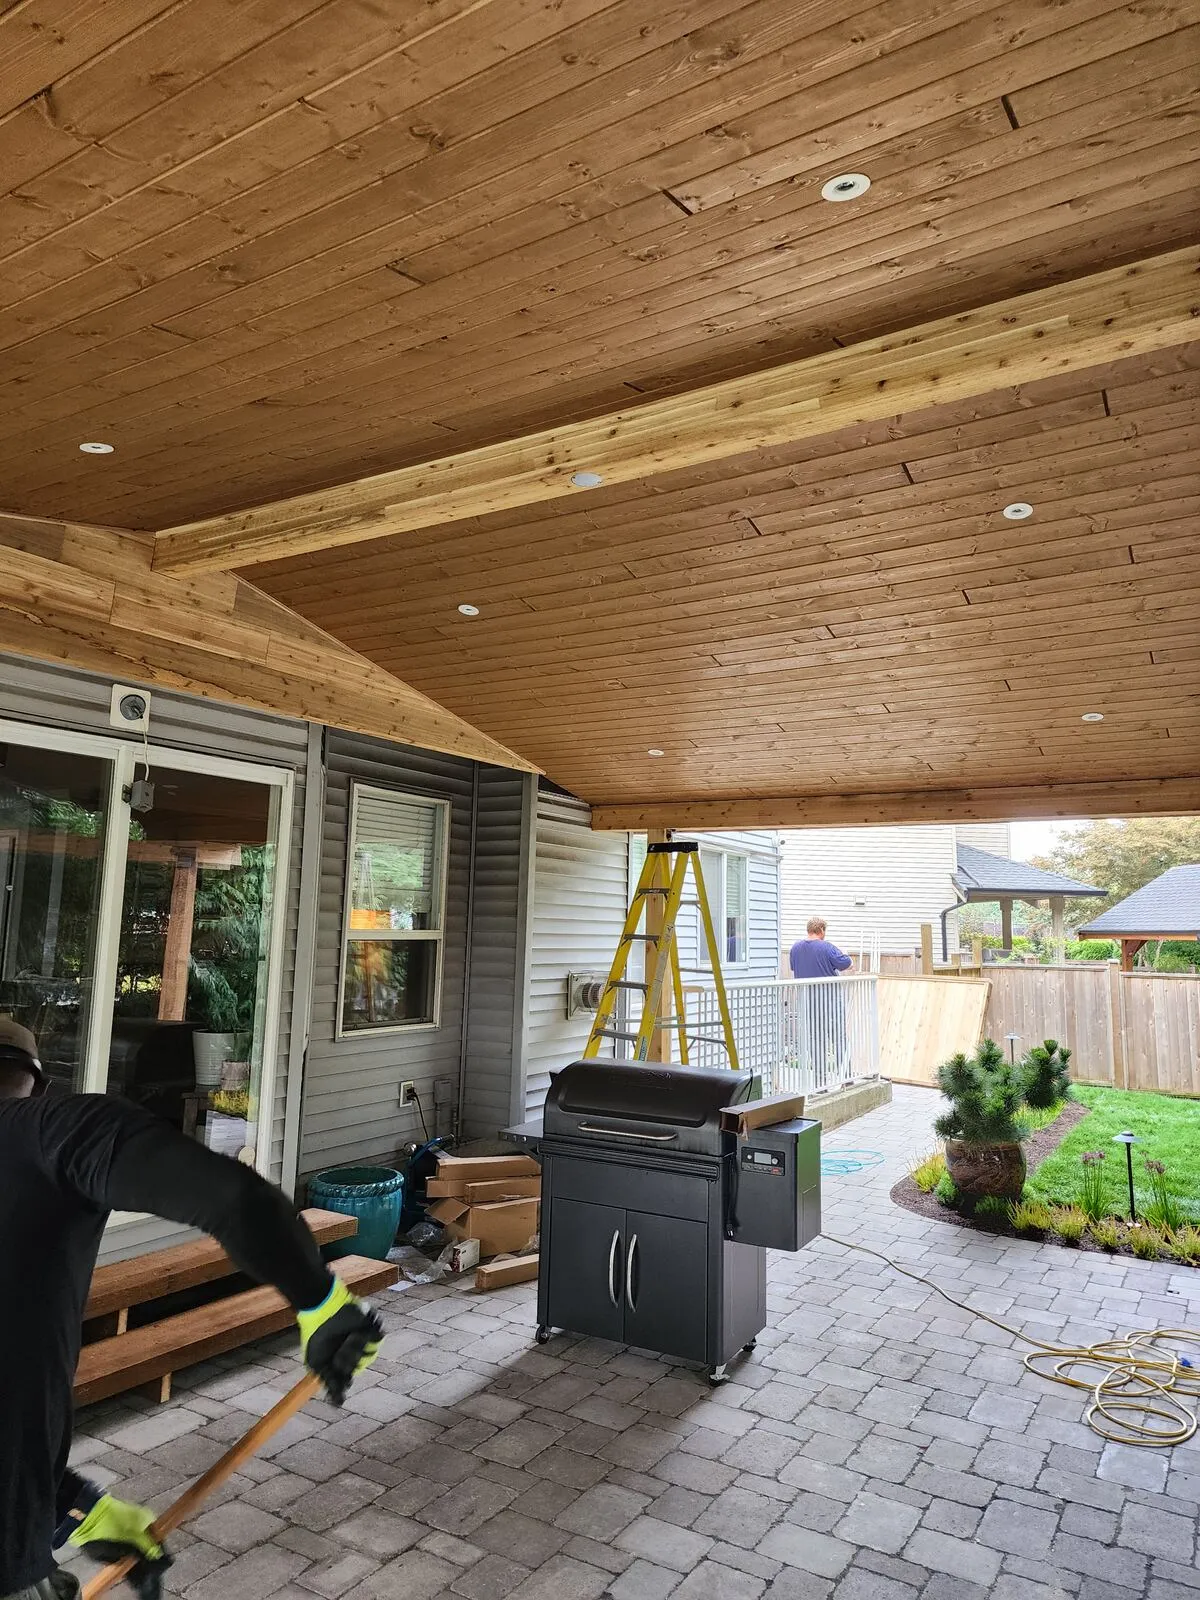
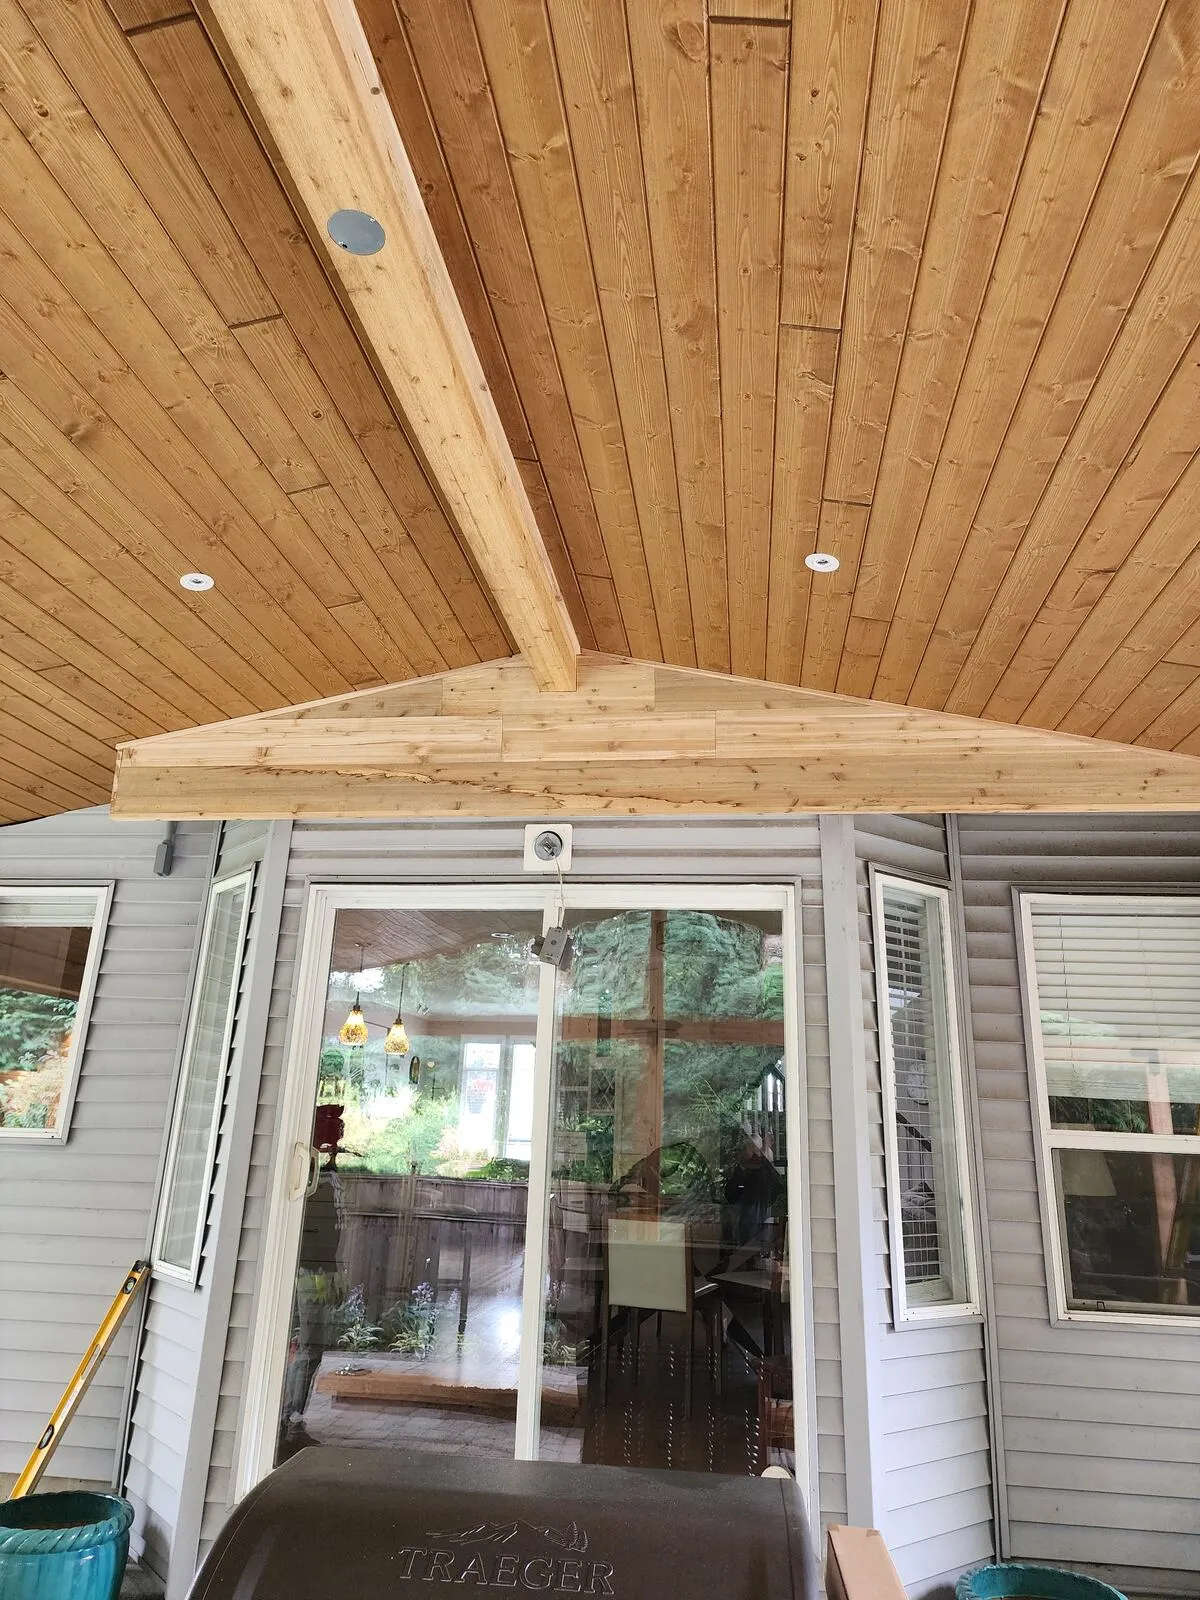
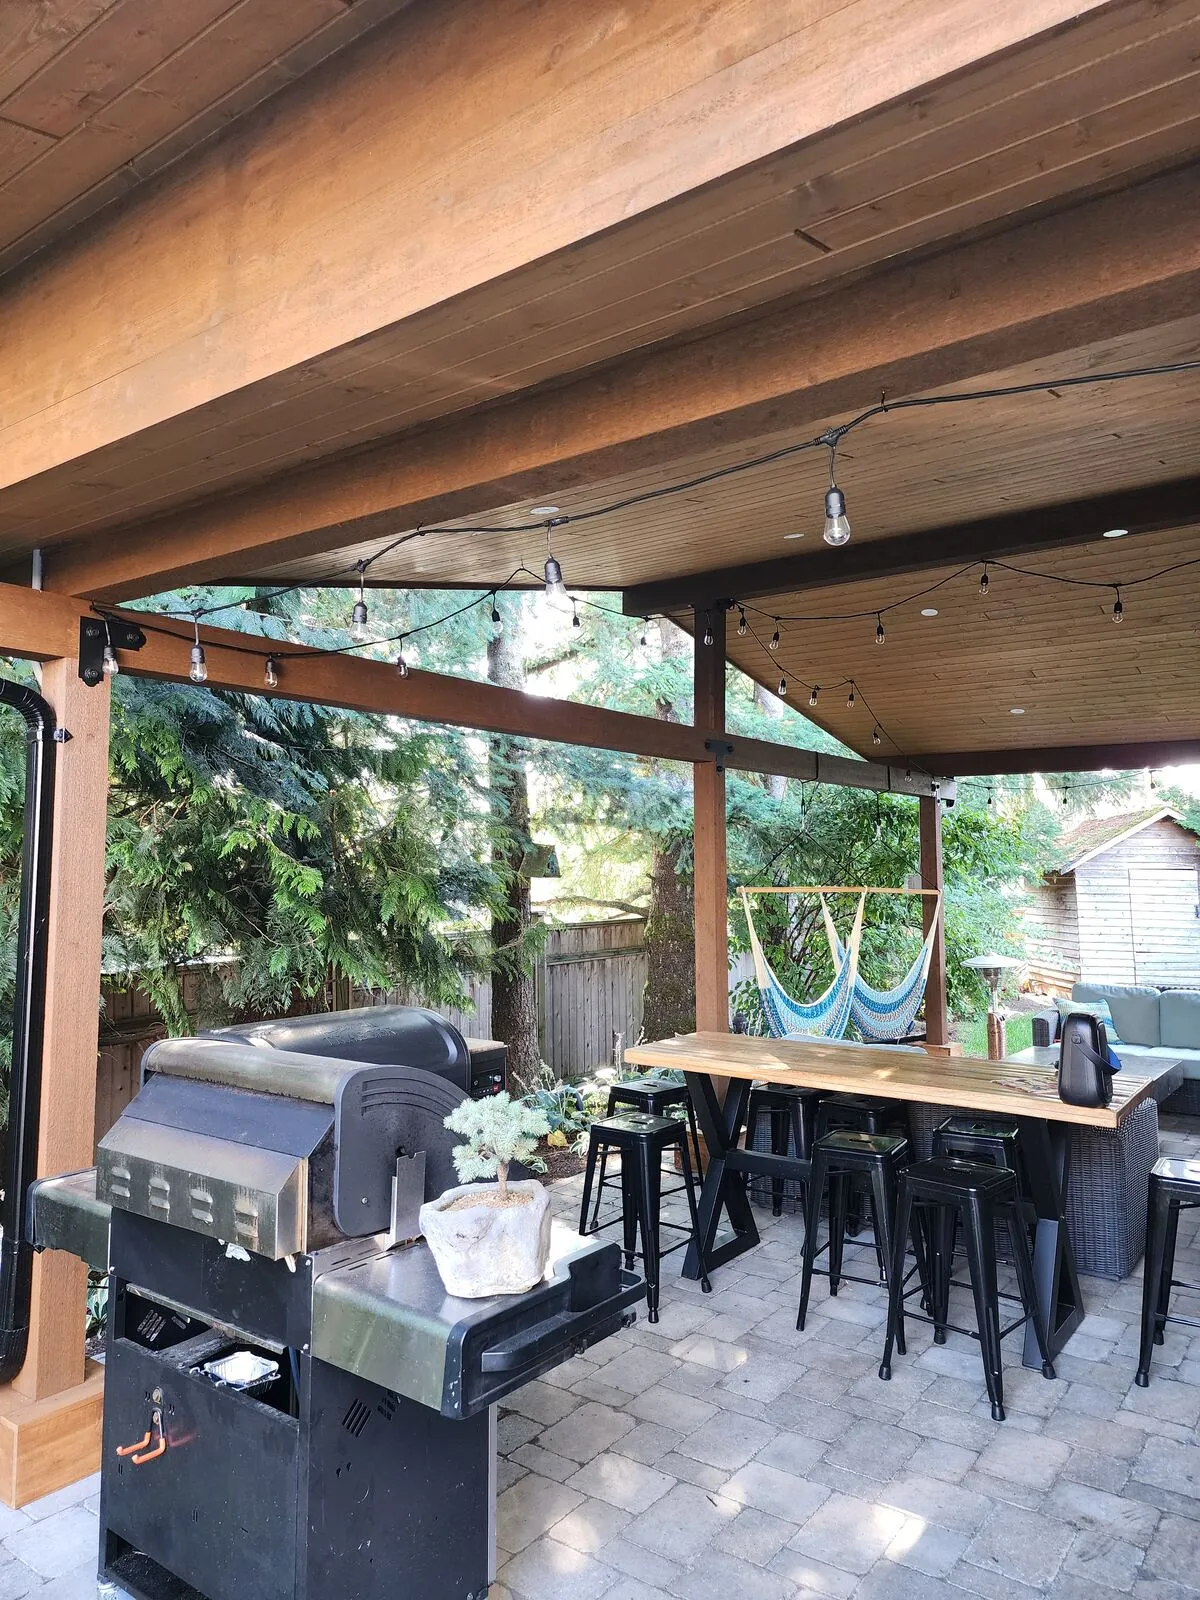
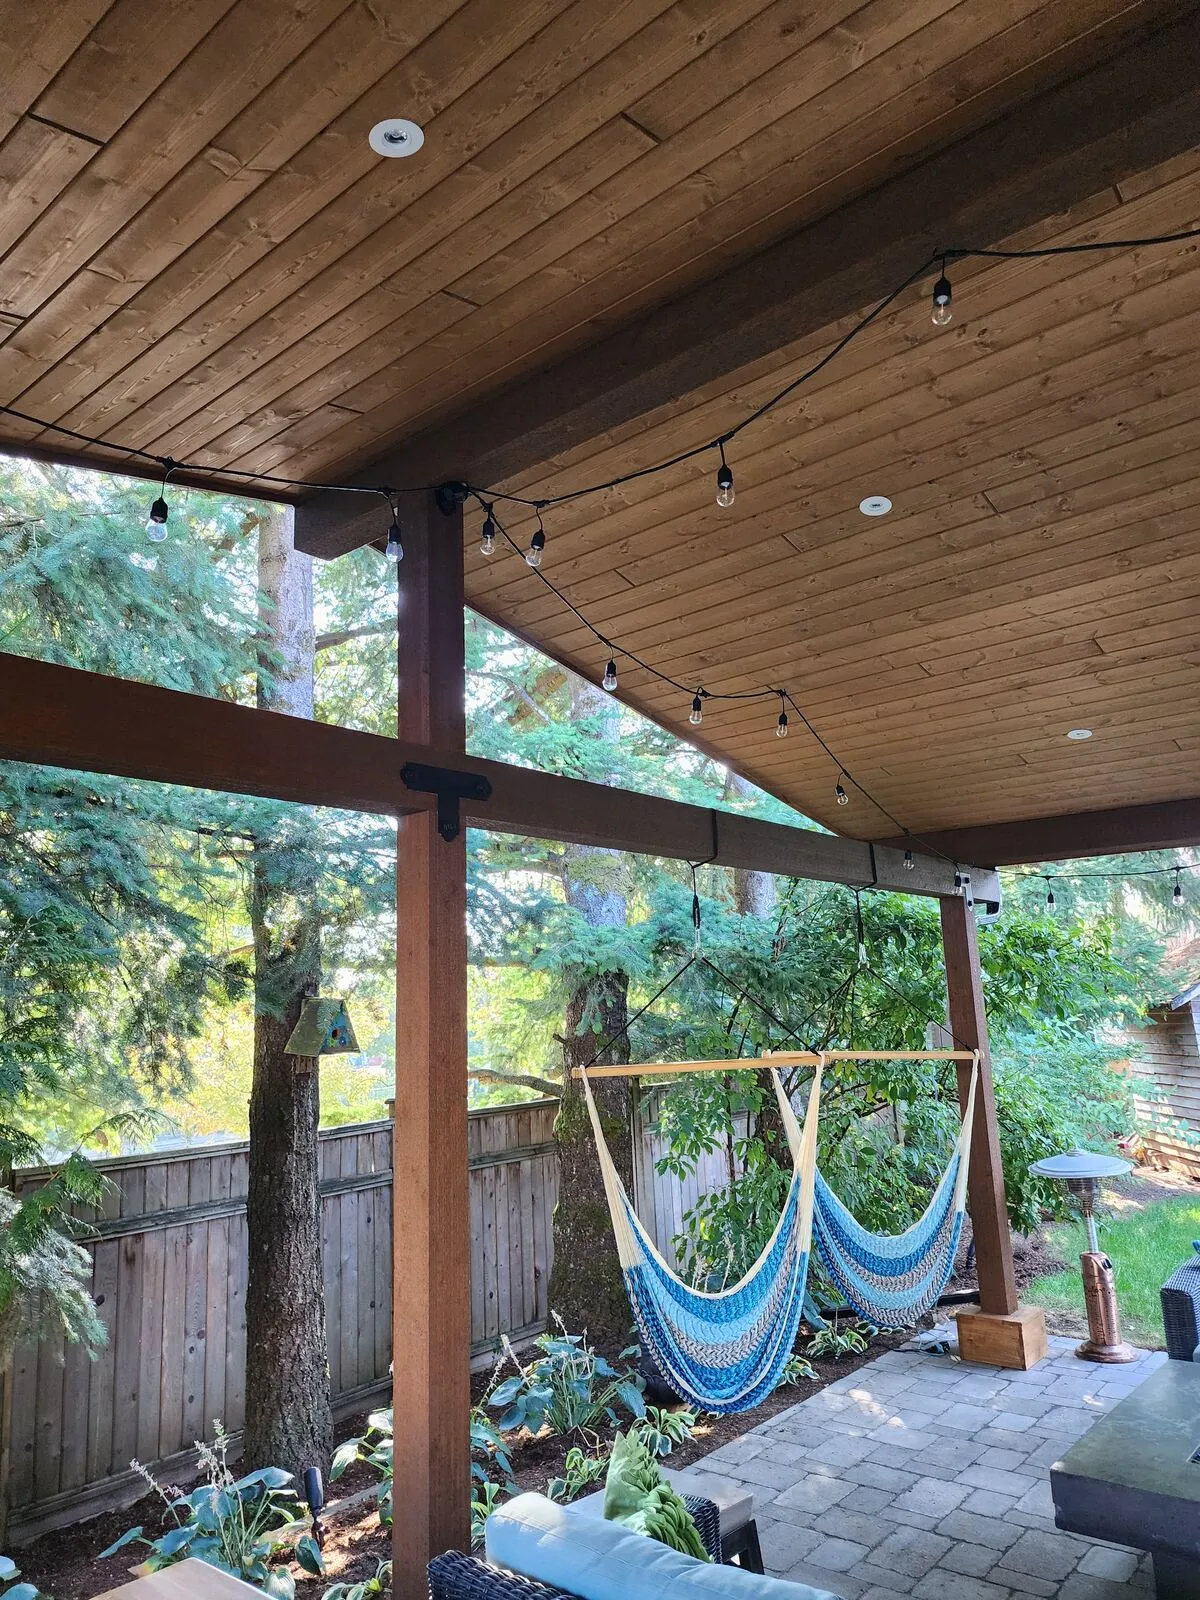
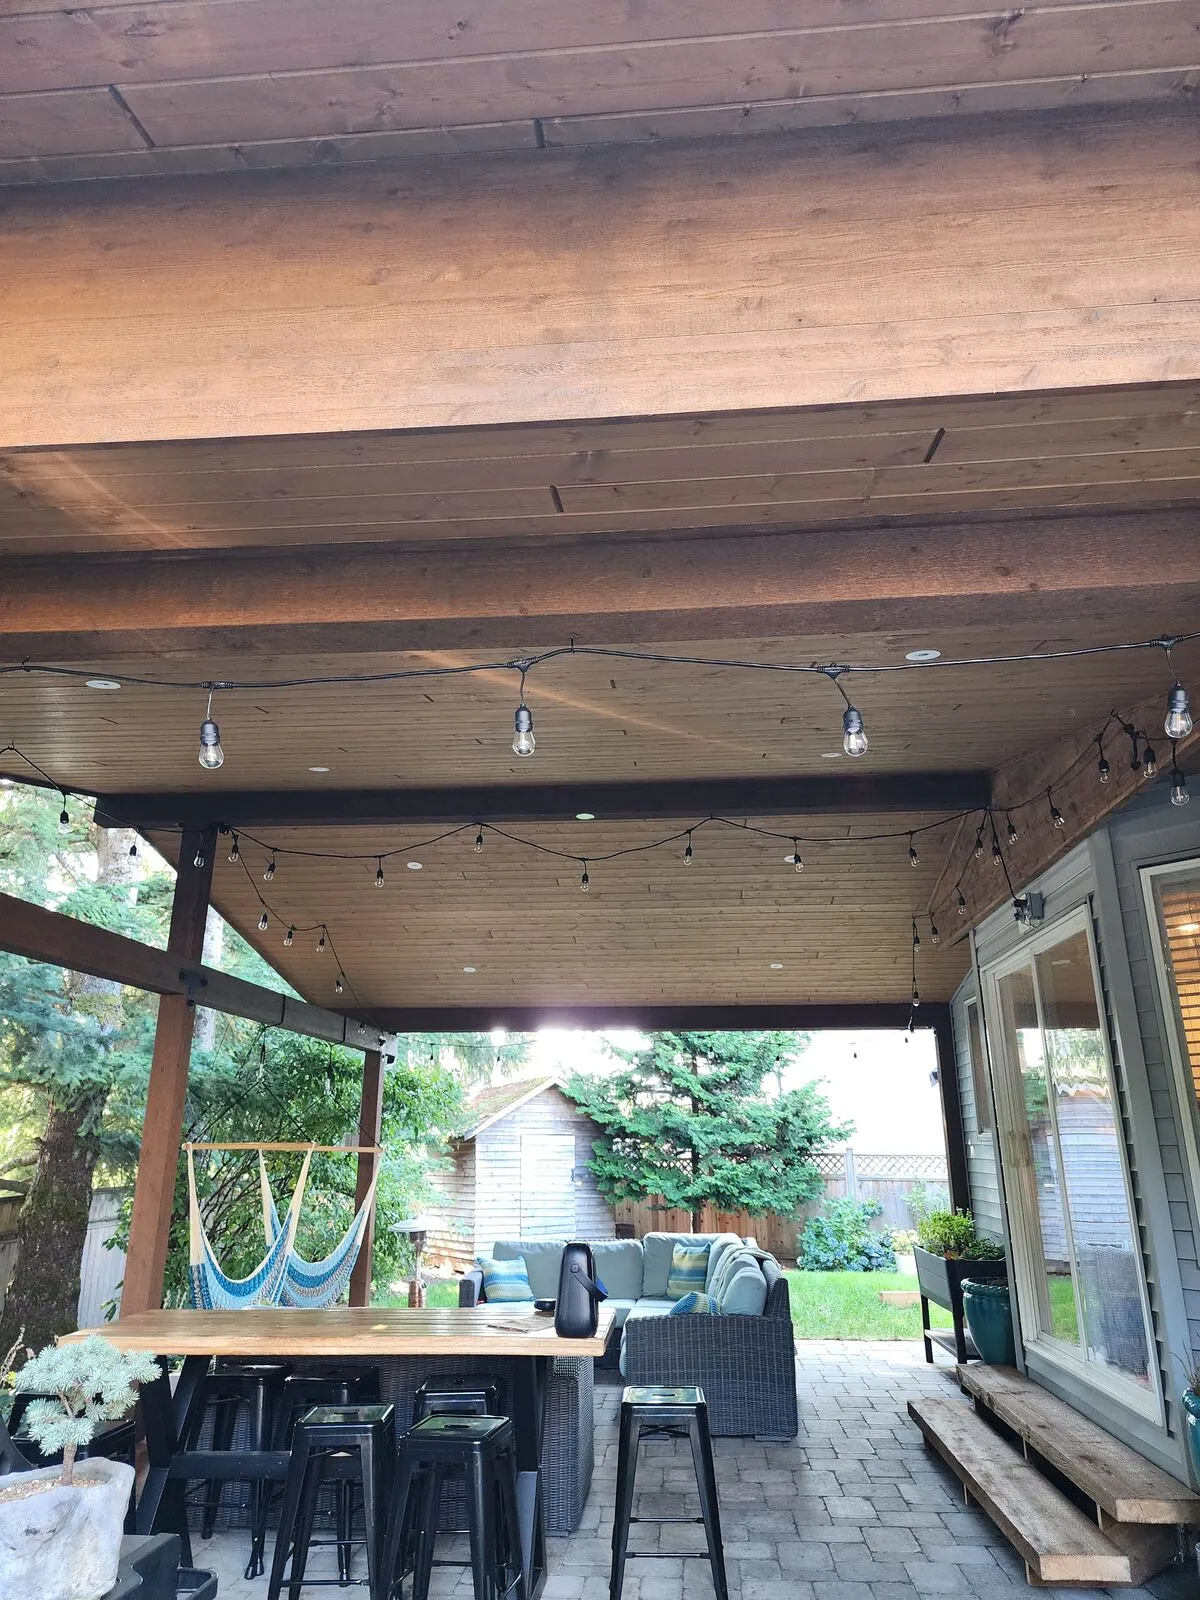
With the roof above watertight we worked from underneath, finishing the ceiling in western red cedar tongue-and-groove. Boards were blind-nailed through the tongue so no fasteners show on the finished face, and we picked the run direction to draw the eye out toward the yard. The hips and valleys where the ceiling planes meet get extra attention — every board ends on a clean mitre line so the geometry of the roof reads from underneath. Recessed LED pot lights were planned into the layout before any boards went up.
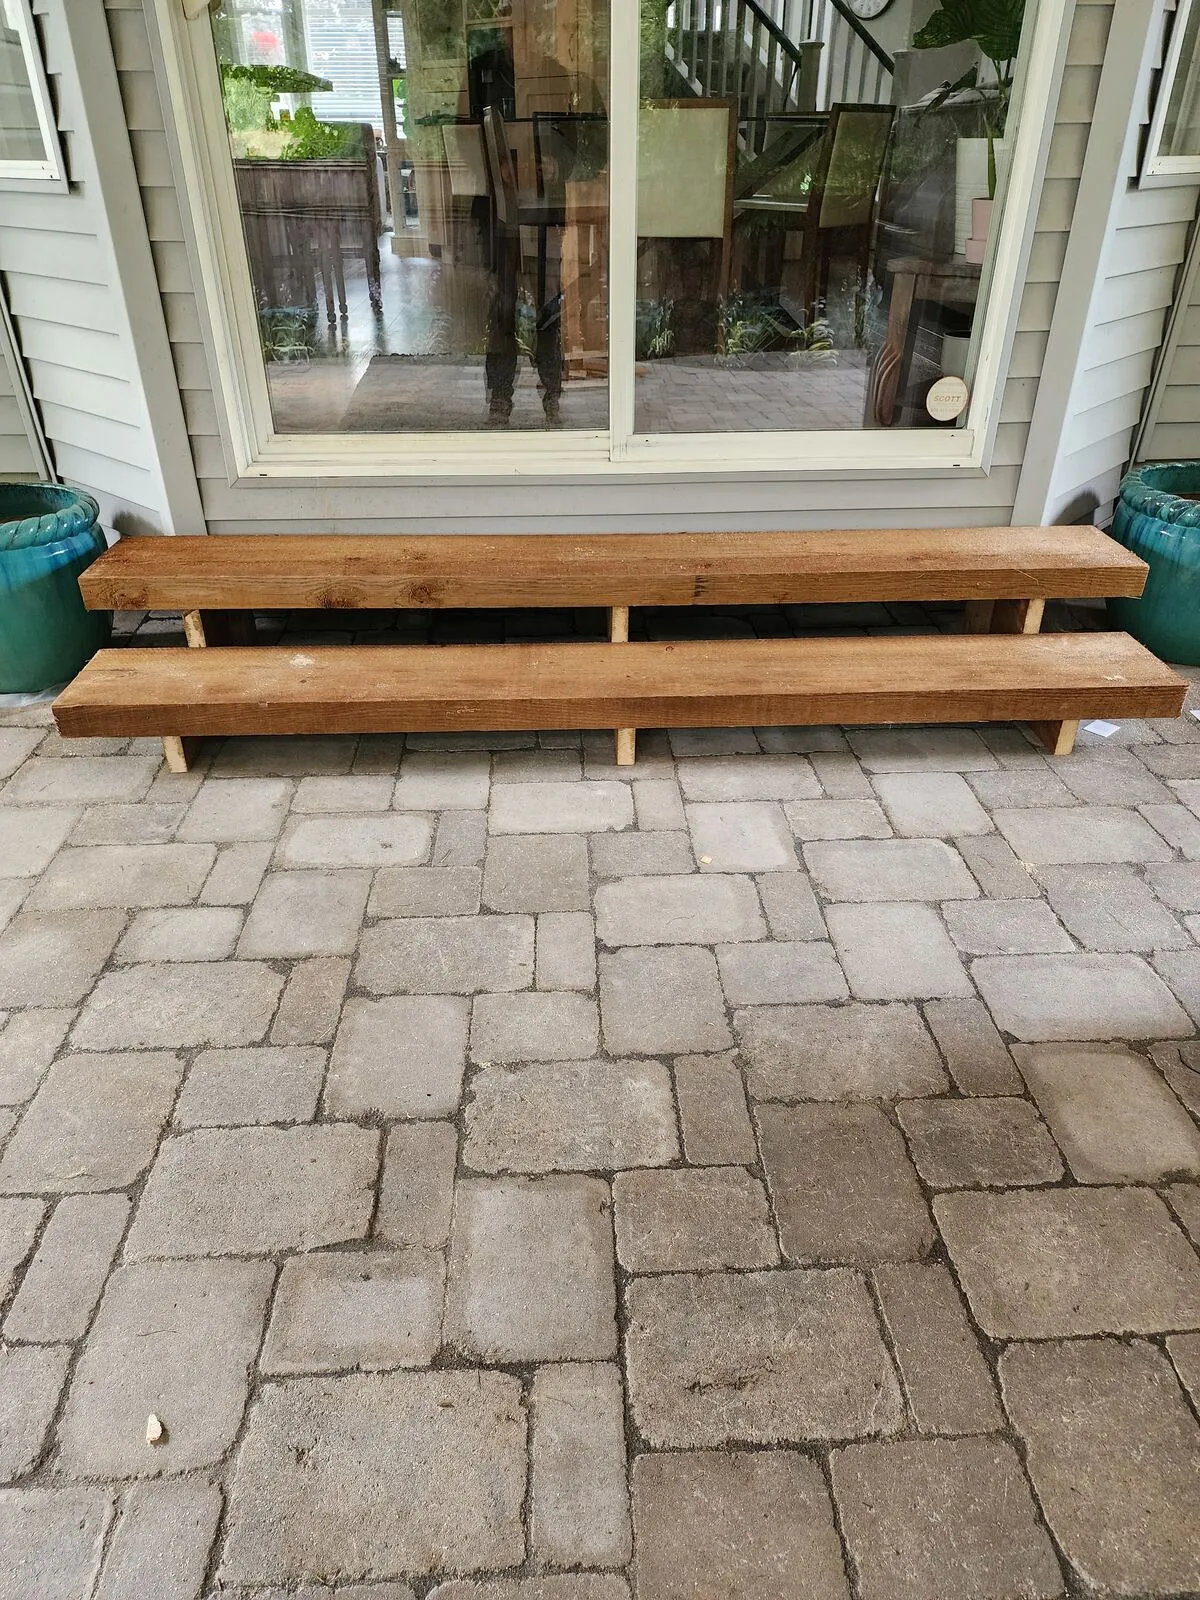
Custom solid-cedar bench steps off the slider
Rather than drop a stock pre-fab step at the slider, we built a pair of solid cedar timber bench steps from scratch — heavy 4×6 cedar treads on hidden cedar posts, sized to span the slider and double as casual seating. They sit free of the house so the pavers and slider flashing can drain properly, and they tie the door visually to the rest of the cedar in the structure.
Shingled roof, gutters and downspouts
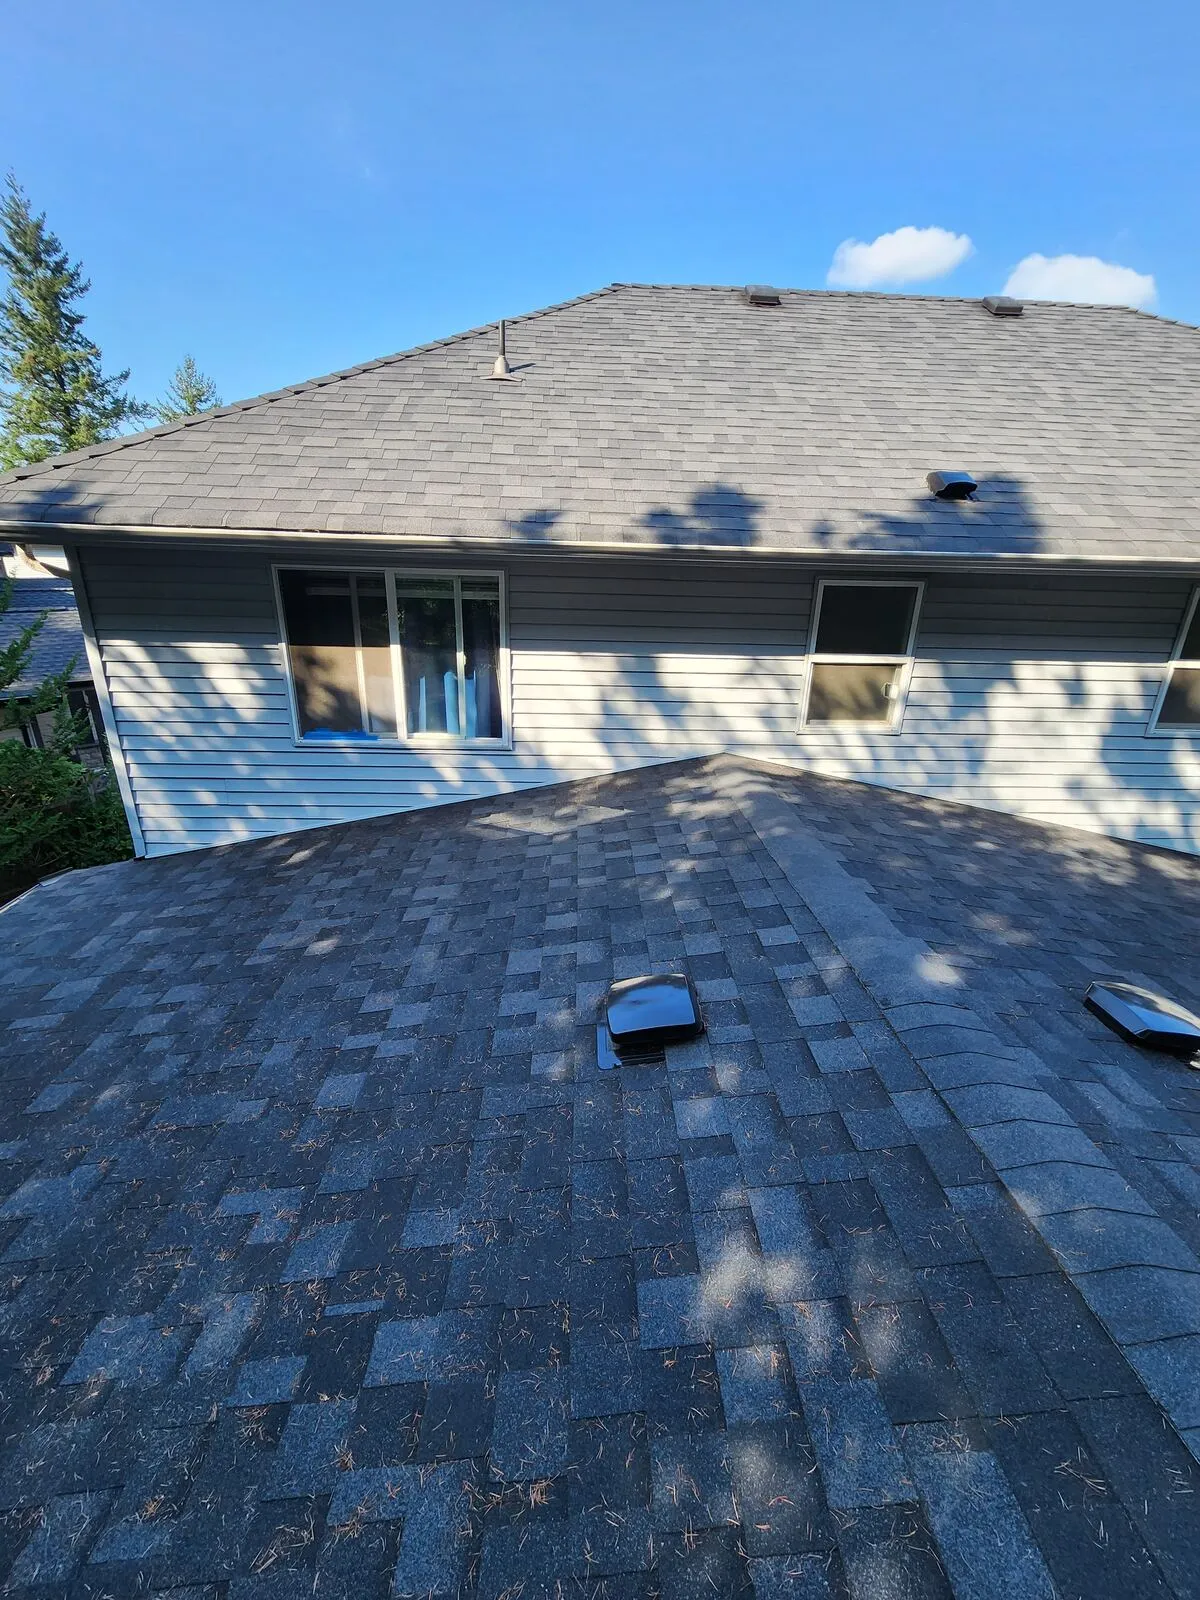
Above the cedar ceiling, the structure is a real weather-tight roof — architectural asphalt shingles laid over the underlayment, tied cleanly into the existing house roof line, with black aluminum gutters and downspouts running water away from the foundation. From the second-storey window upstairs the new roof reads as part of the original house rather than a bolt-on patio cover.
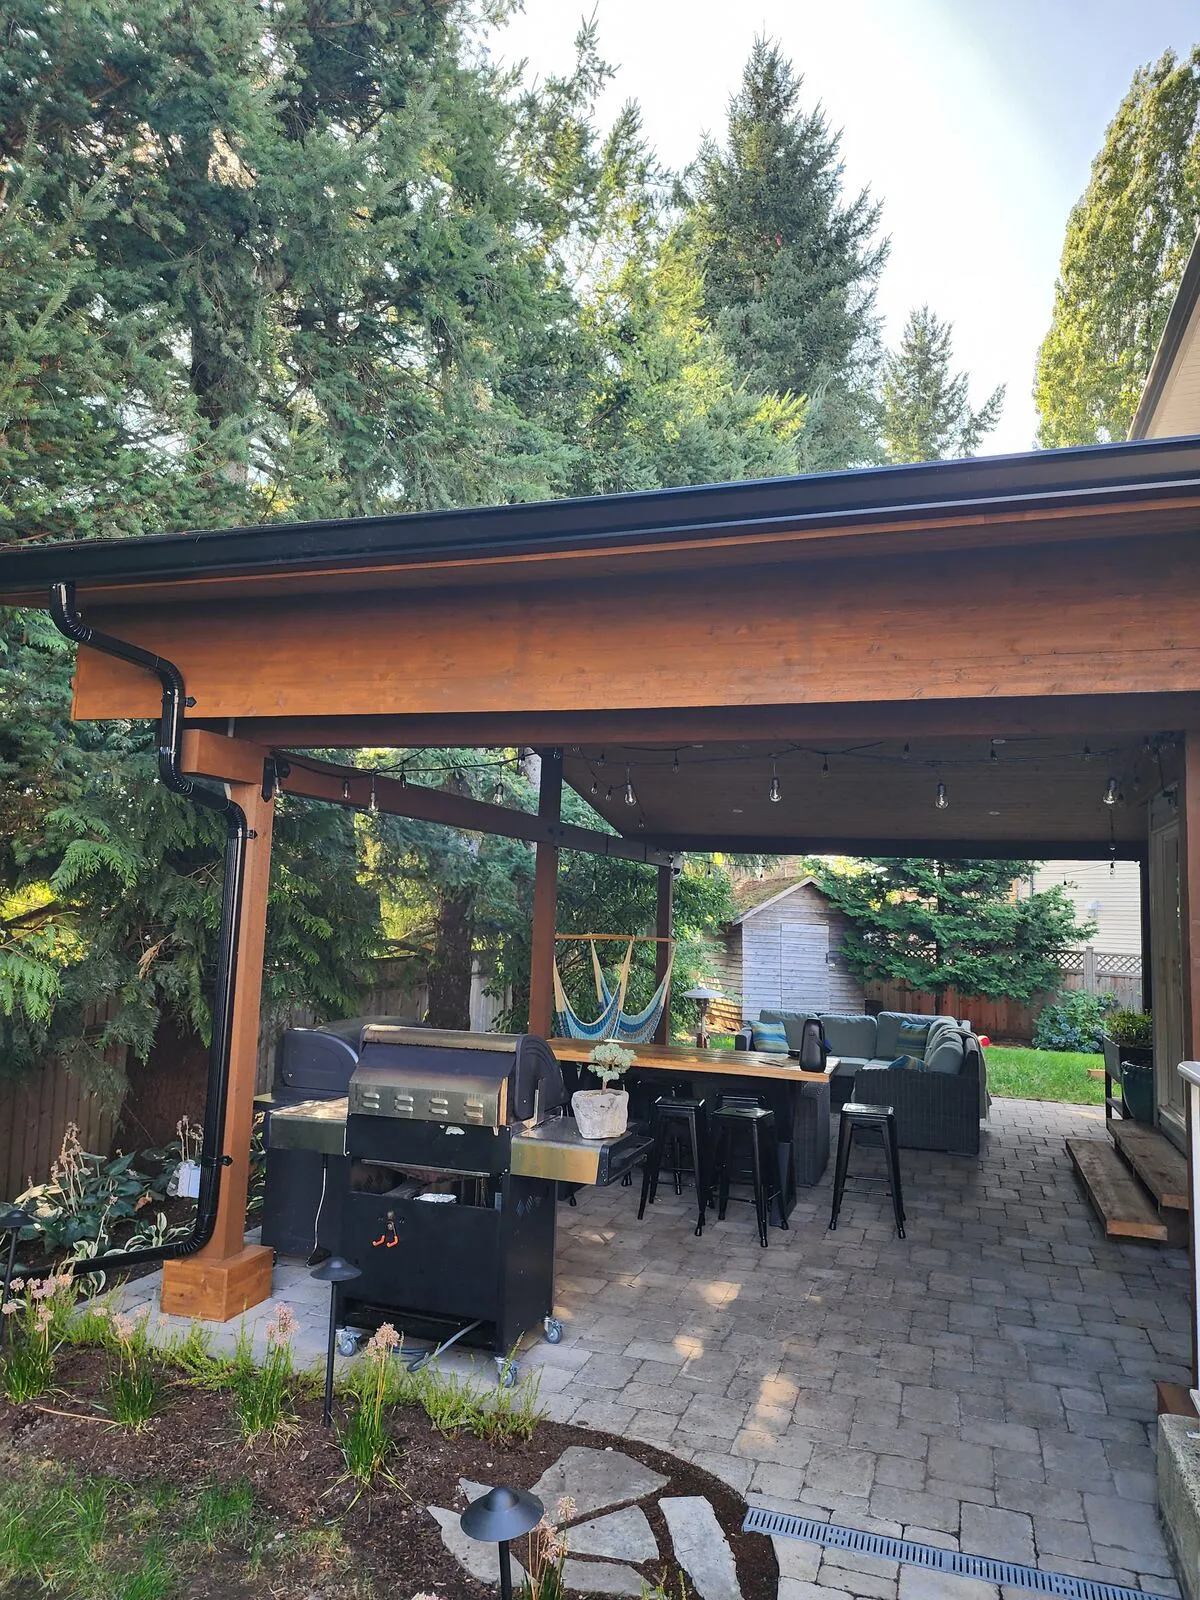
Stain, string lights and the finished outdoor room
Once everything was structurally complete, the cedar got a warm amber semi-transparent stain — it deepens the natural tone, evens out the colour between the new cedar and the structural beams, and gives us a maintainable finish that protects against UV without hiding the grain. Recessed LED pot lights drop clean pools of light onto the dining and lounge areas, and Edison-bulb string lights swag across the lower beams for atmosphere. The family ended up with a full outdoor kitchen, dining bar, lounge and hammock corner — somewhere they actually live from May through October, and somewhere they can still sit out under cover in the wet months.