Two projects, one homeowner
The owners of this North Vancouver, BC property came to us with two unrelated jobs they wanted handled by one crew: build a proper backyard shed from the ground up to match the house, and replace the tired wooden stair that ran from their upper hot-tub deck down to the patio. We sequenced them as one project so the same finish carpenters were on site for both — the shed went in over the summer, the stair came out and got rebuilt in composite the following spring.
Shed, part one: framing on a poured concrete pad
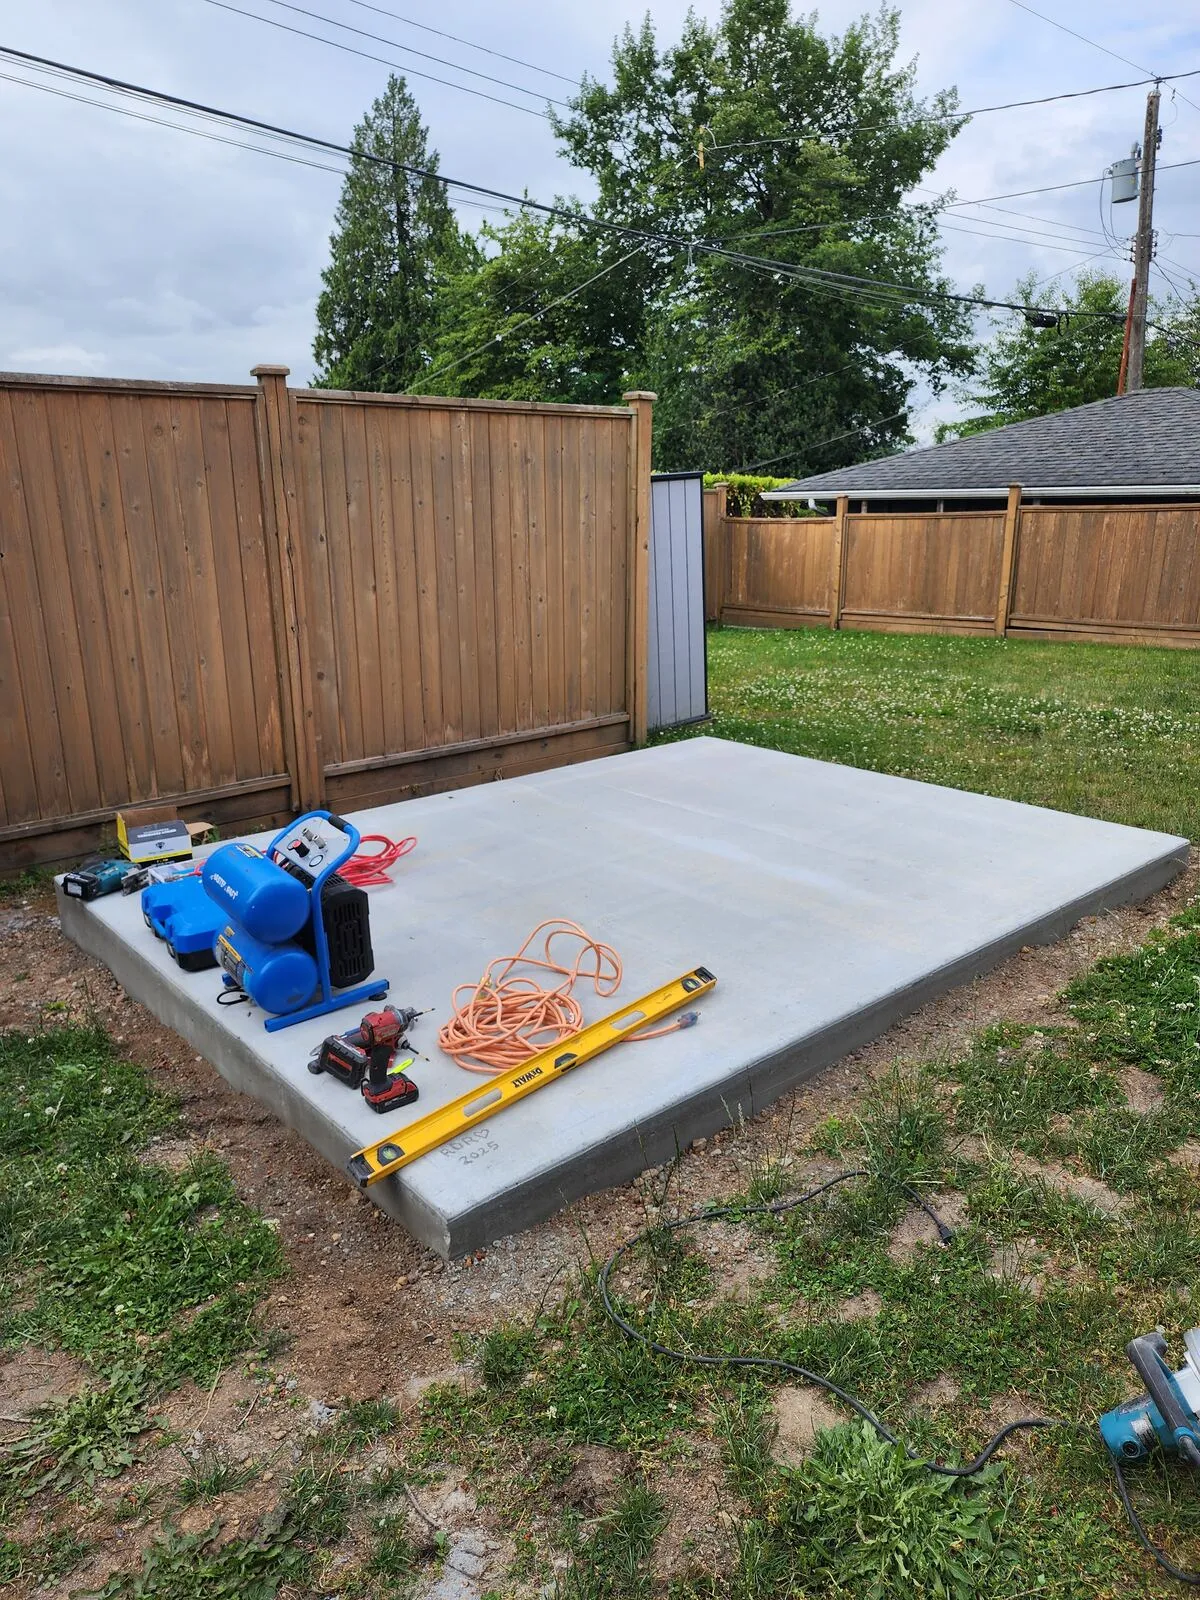
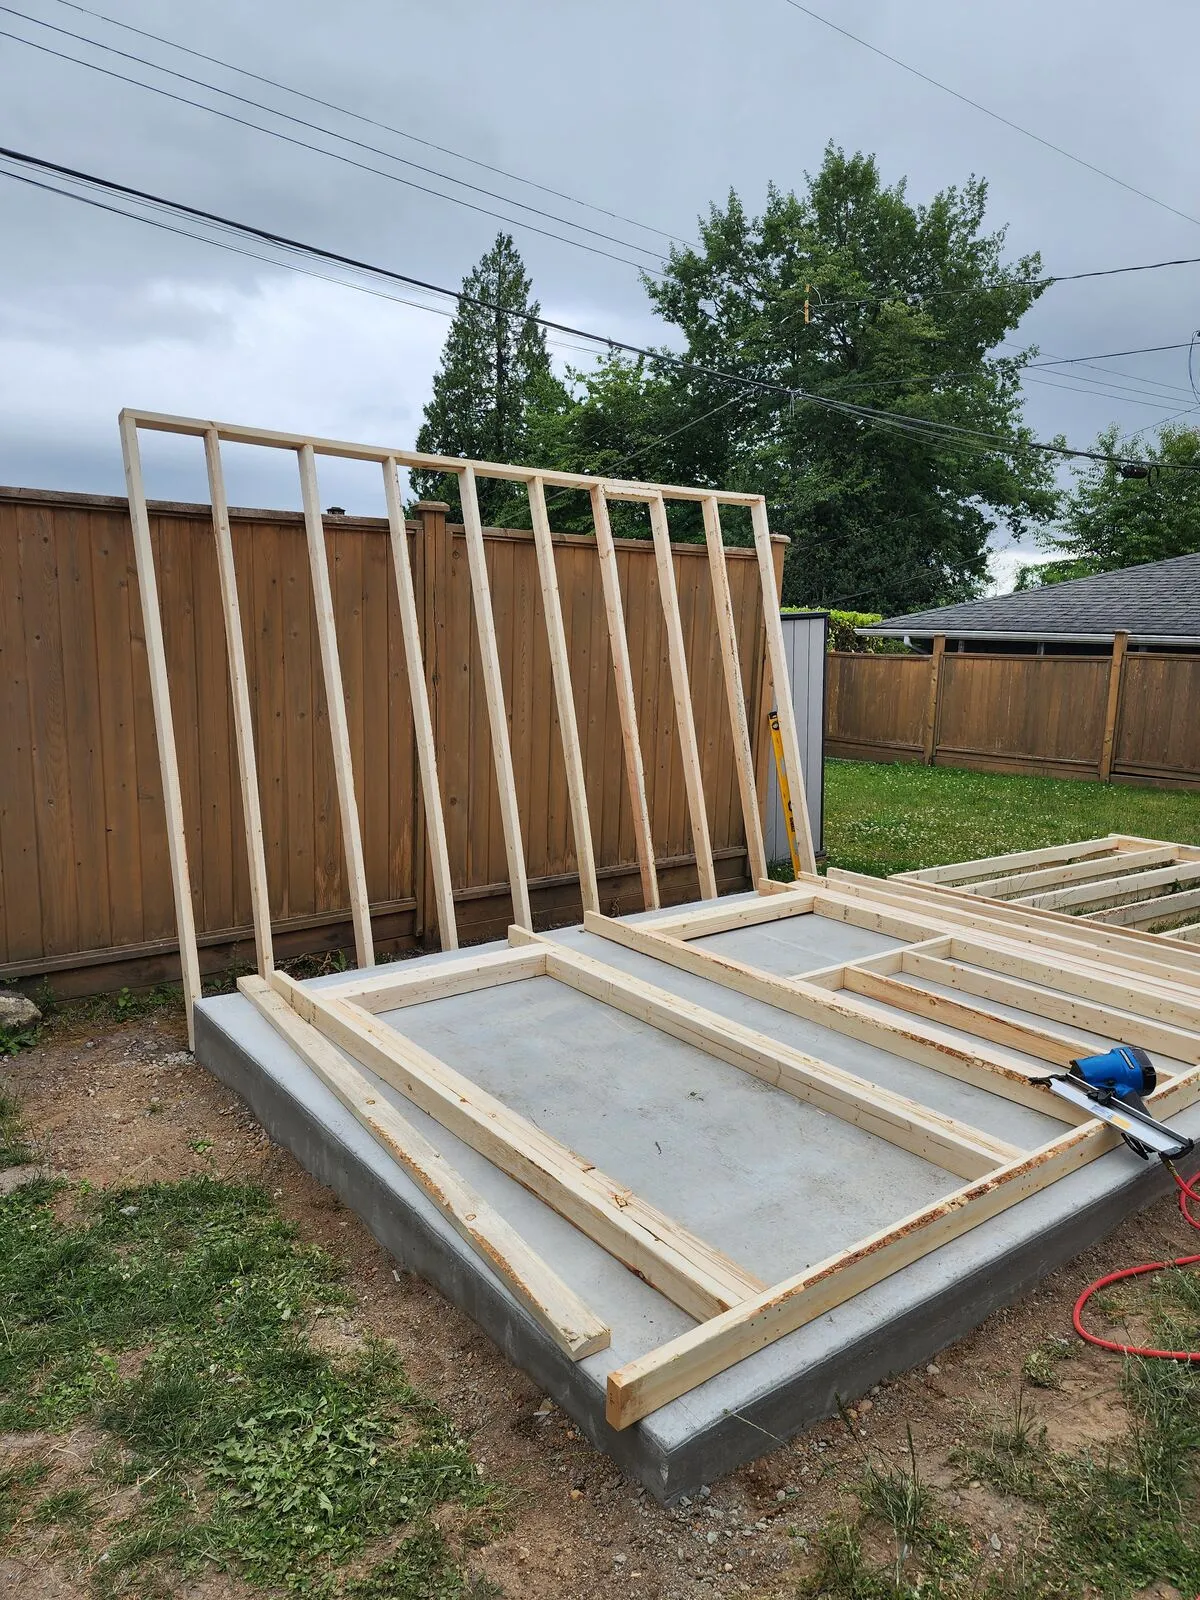
We started with a poured concrete pad as a permanent foundation — flat, level, free-draining and dimensioned to the shed footprint with room for a paver apron later. Pressure-treated sill plates went down first, then a conventional floor system, then 2x4 stud walls with double top plates and engineered headers over the door and window openings. Within a day or two of the pad curing, the shed had walls standing and the first sheet of exterior plywood going up.
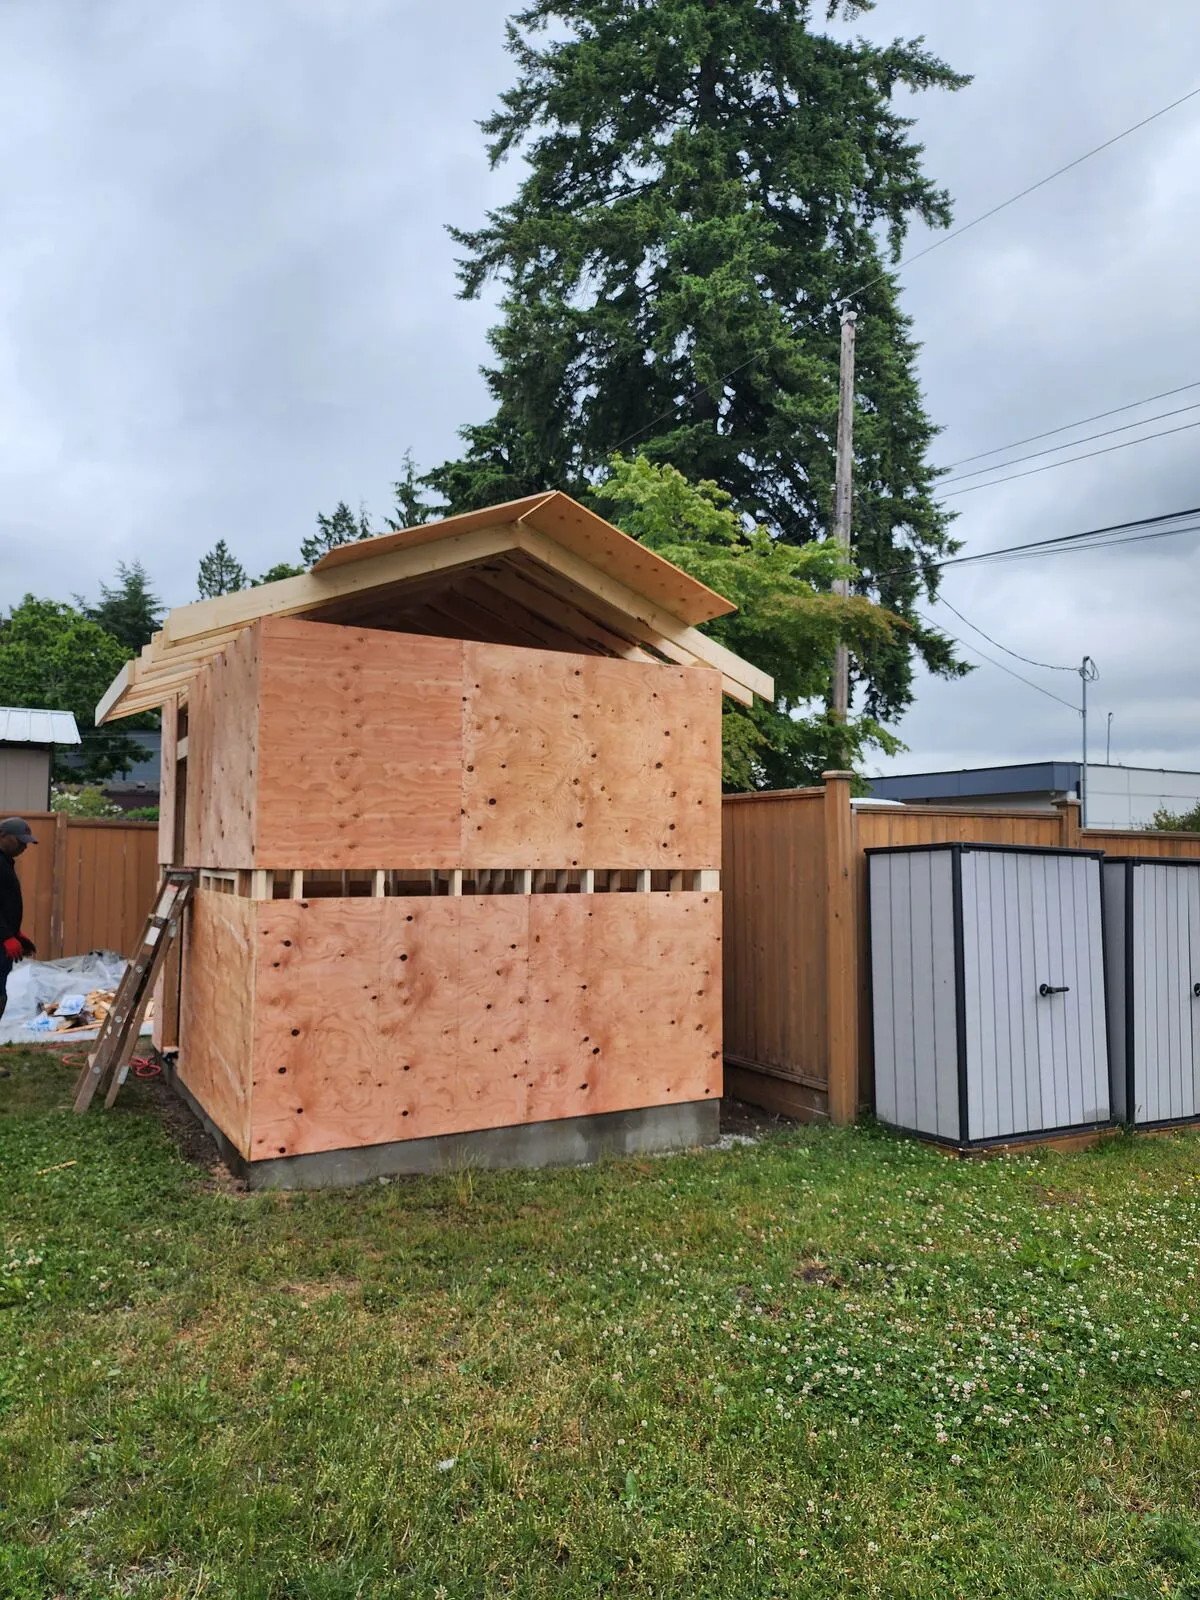
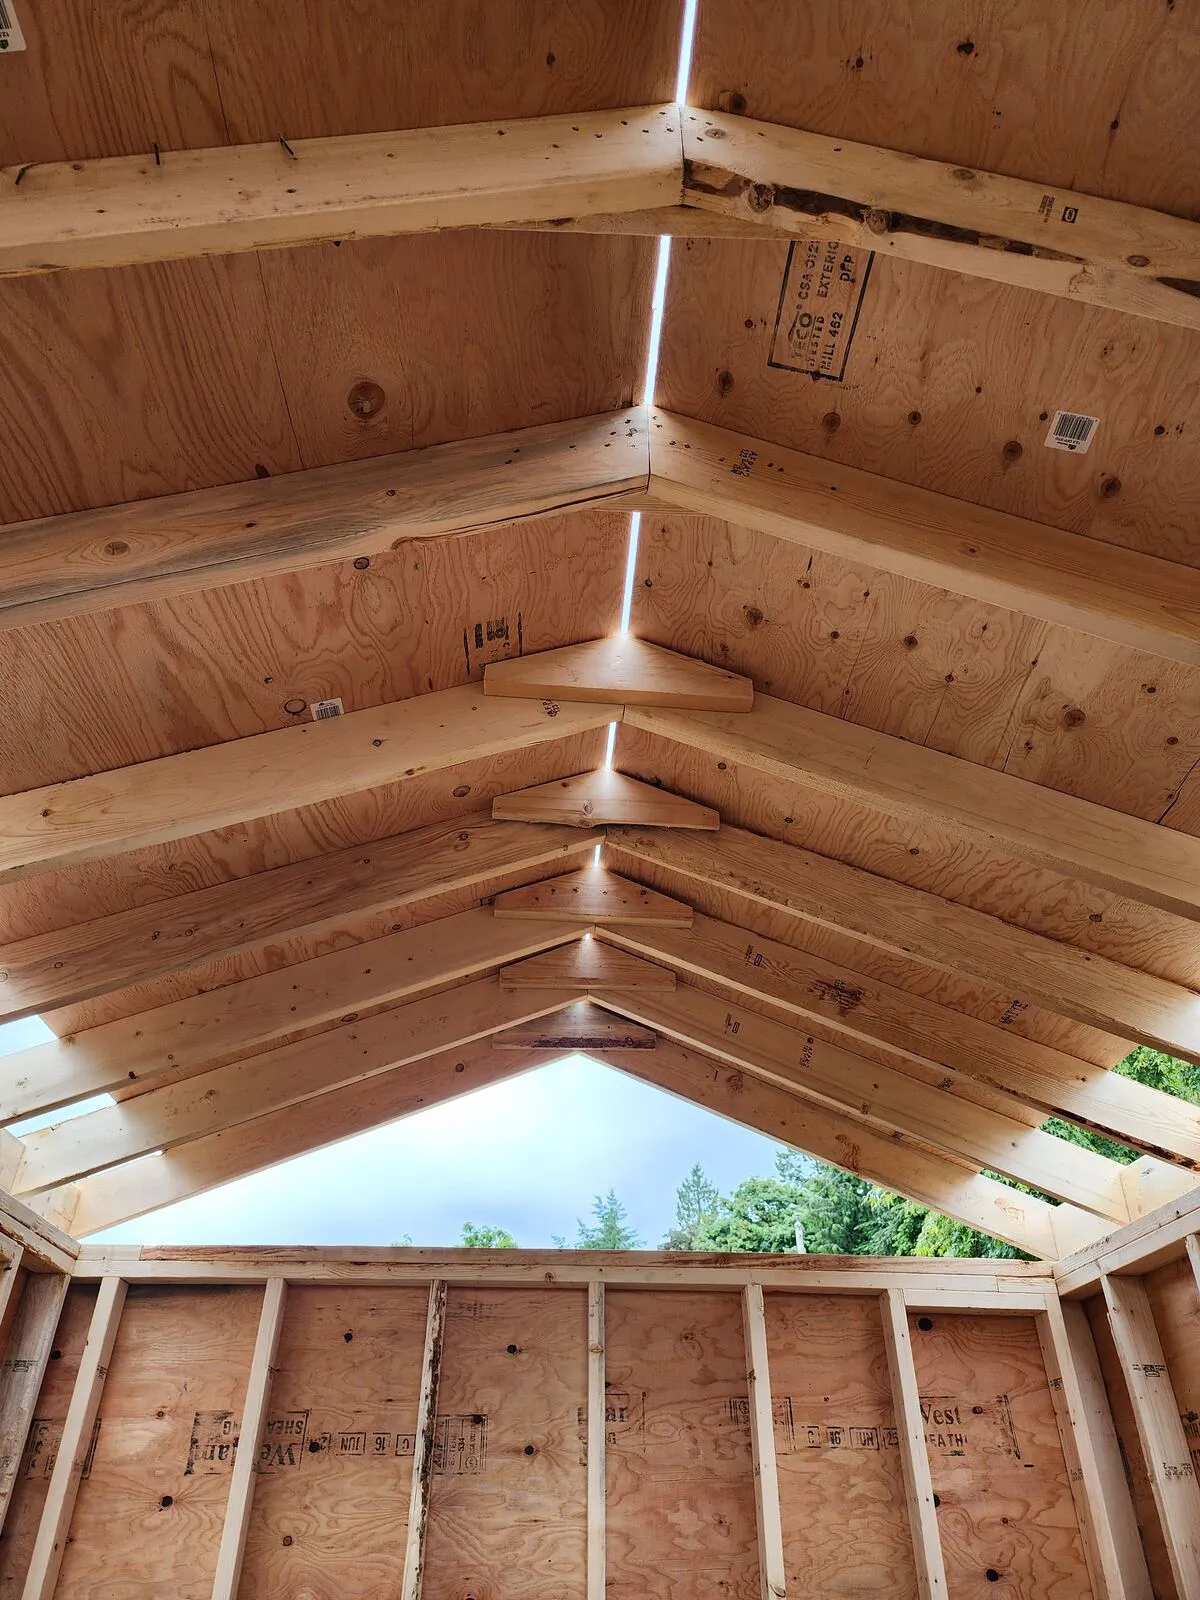
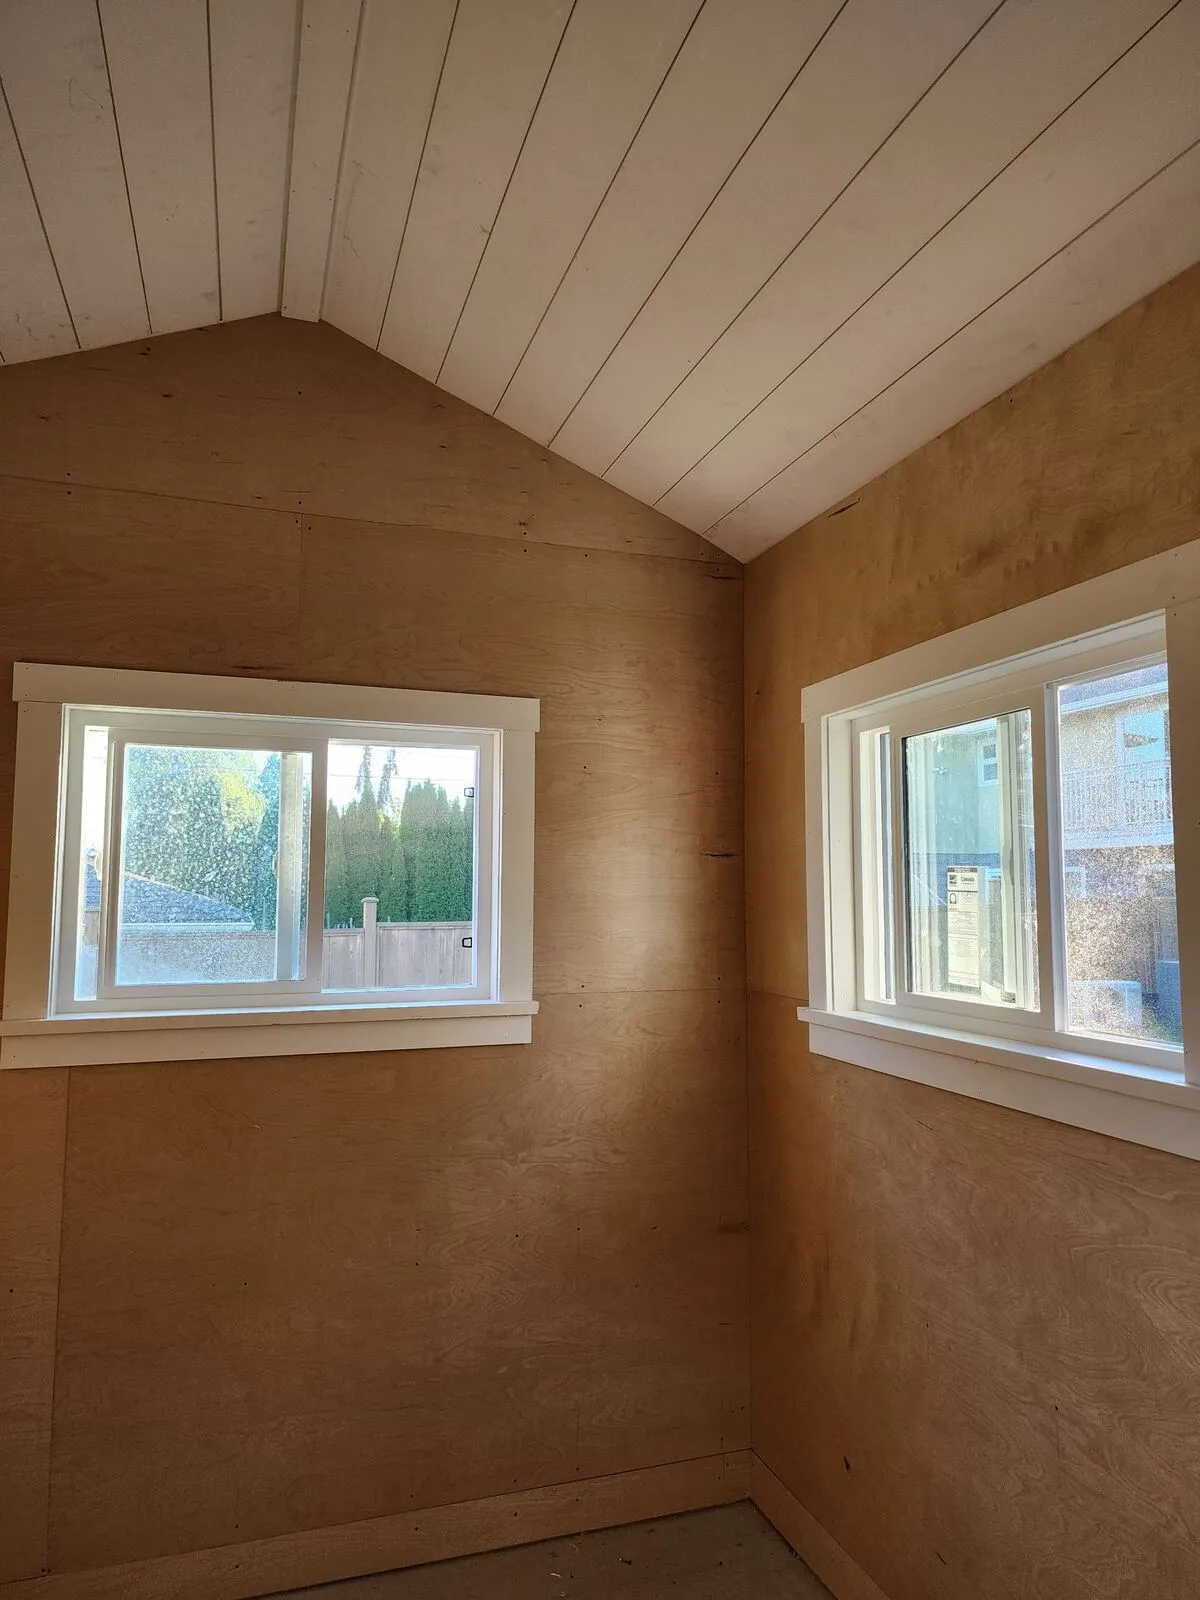
A vaulted gable roof — framed open on purpose
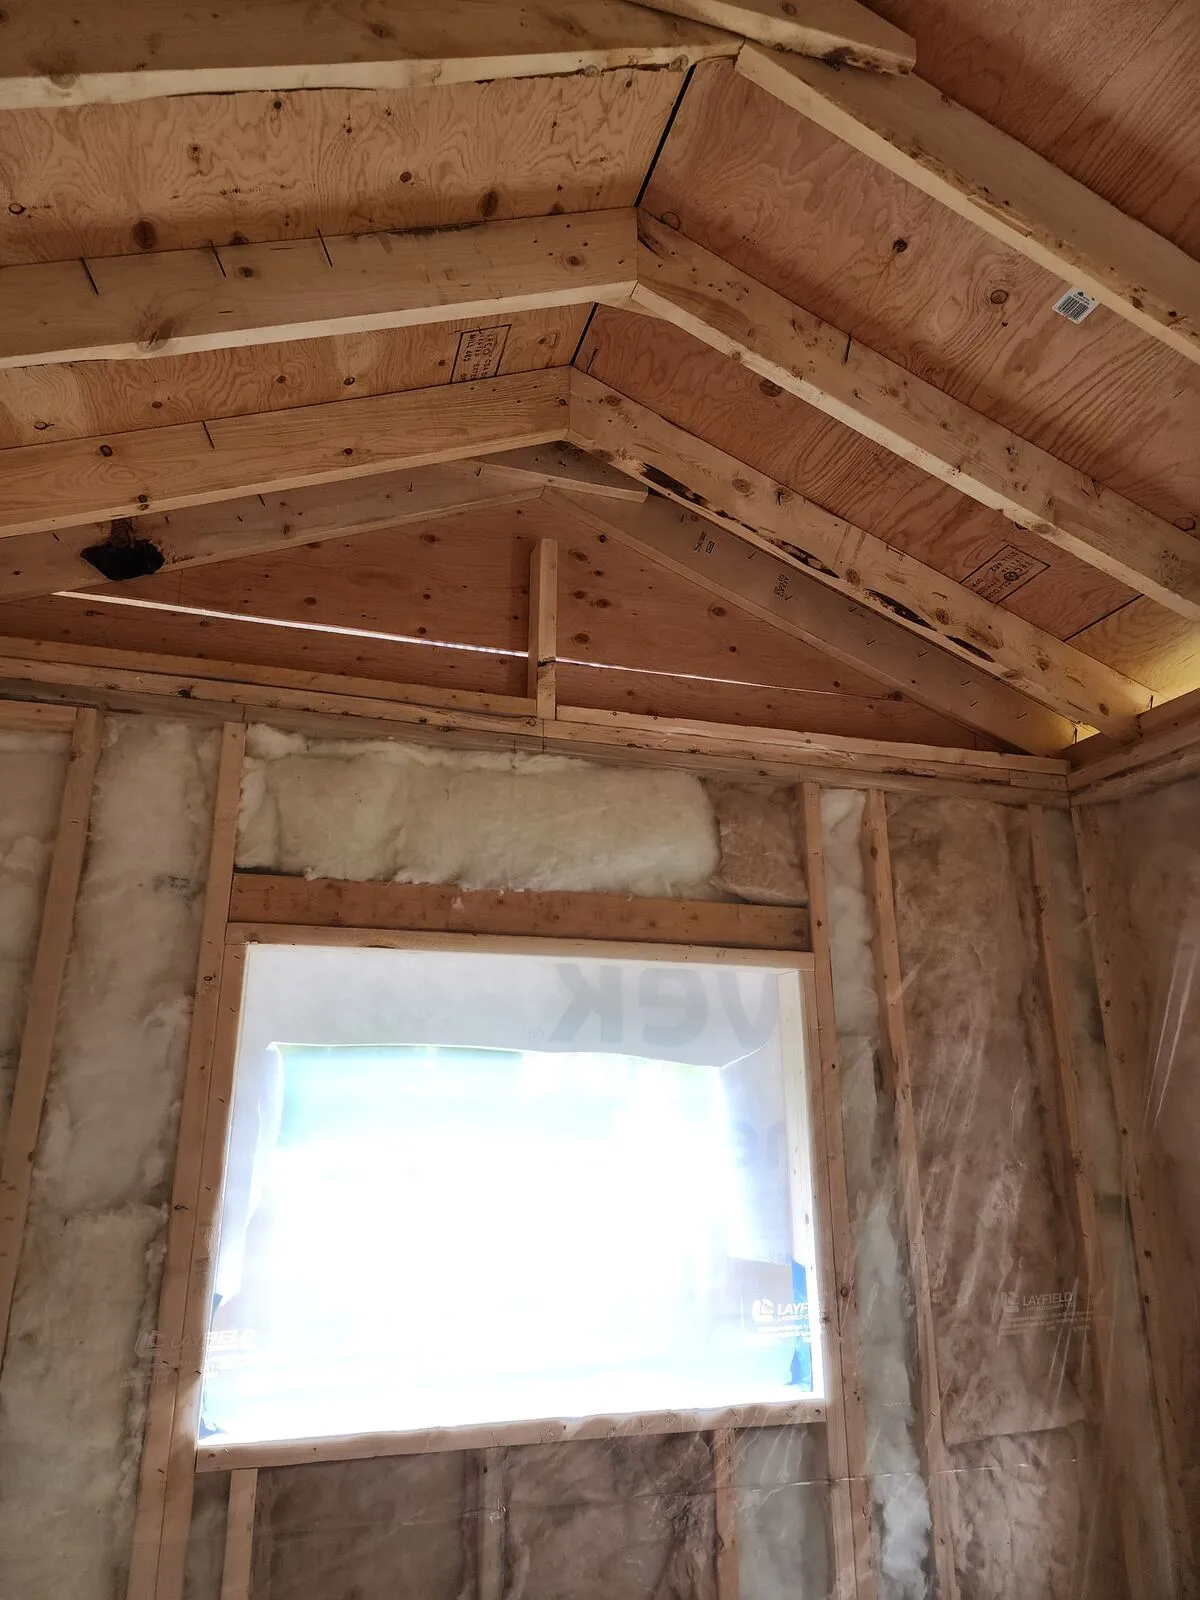
Rather than dropping a flat ceiling joist across the walls and capping the inside off at 8', we framed an open gable roof with site-cut rafters running ridge-to-wall. That gave the inside of the shed the full height of the roof as a vaulted cathedral ceiling — useful for tall storage like ladders and bikes, and far nicer to stand inside than a typical low-ceiling garden shed. The rafter bays got sheathed in plywood from outside and left exposed inside, ready for insulation.
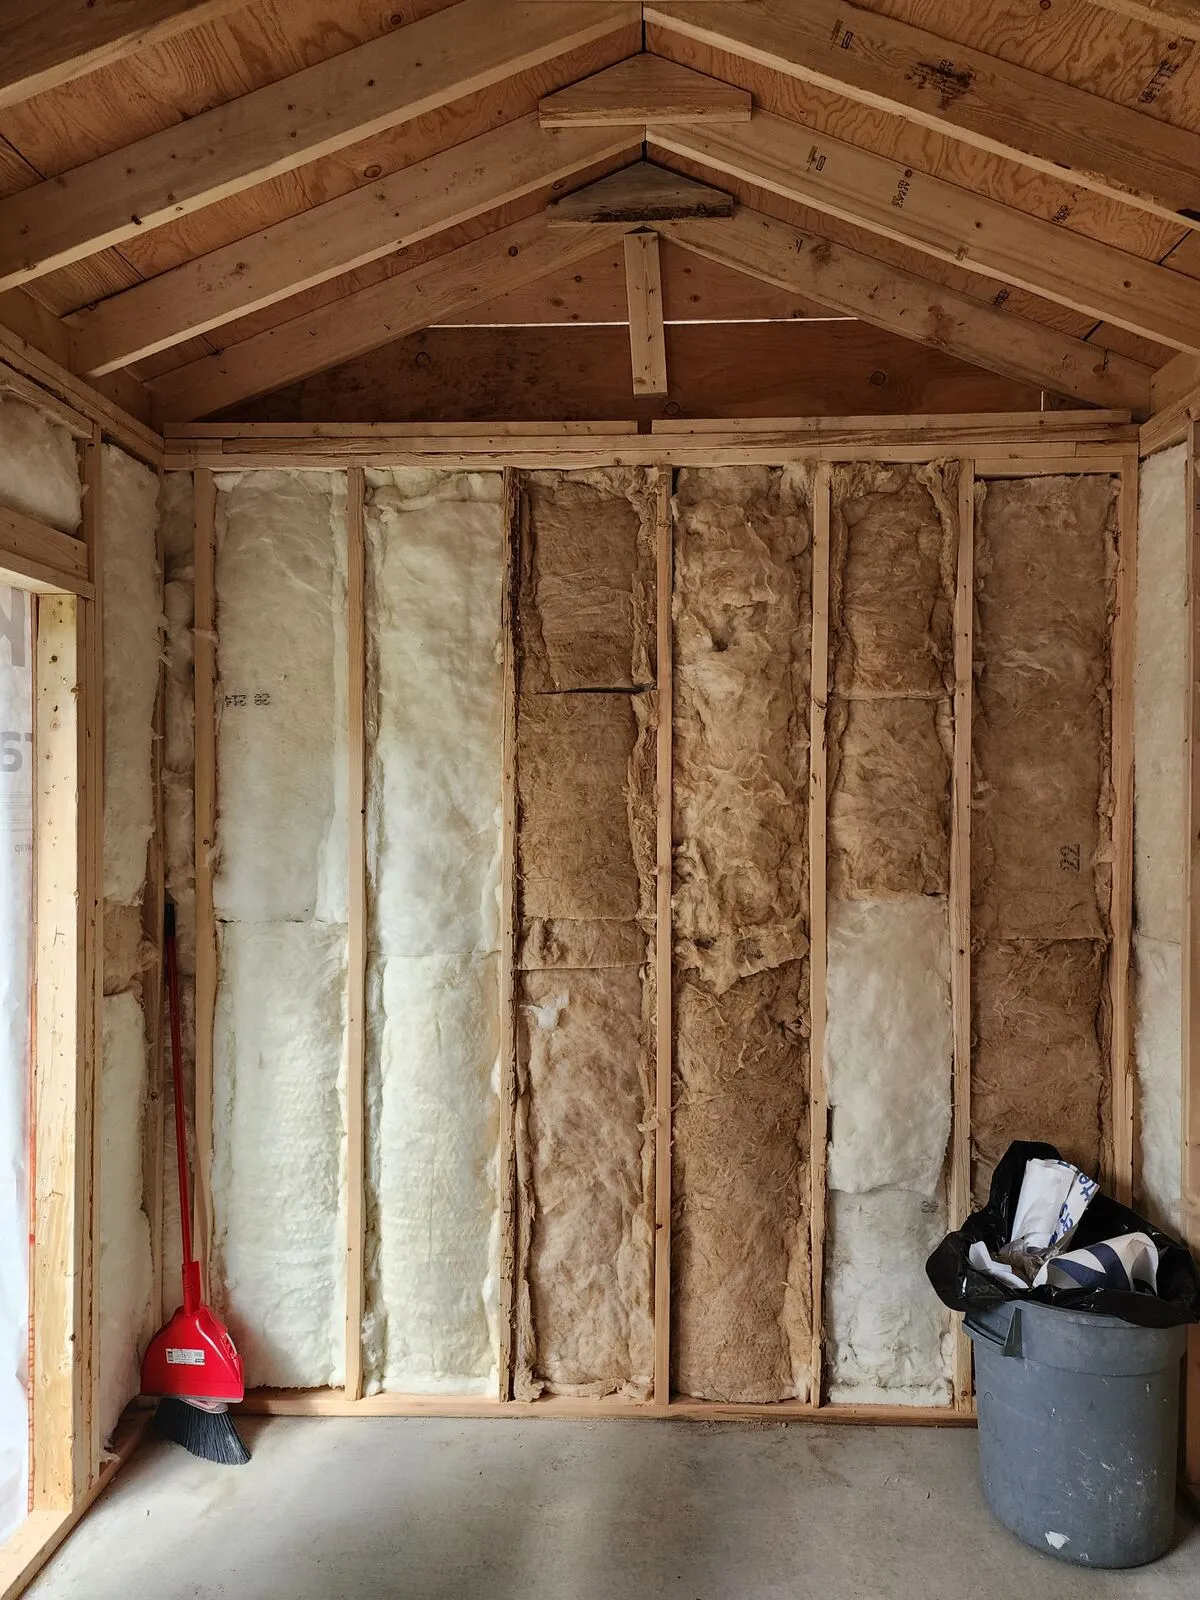
Insulating walls and rafter bays
Because this shed is going to see real Pacific Northwest weather and the owners wanted it usable in winter, every stud bay and every rafter bay got batt insulation packed in tight, sealed at the edges. Window and door openings were carefully air-sealed around their rough frames before any interior finish went on. The result is a shed that holds temperature like a small outbuilding, not a tin box — important once the interior plywood and shiplap went up.
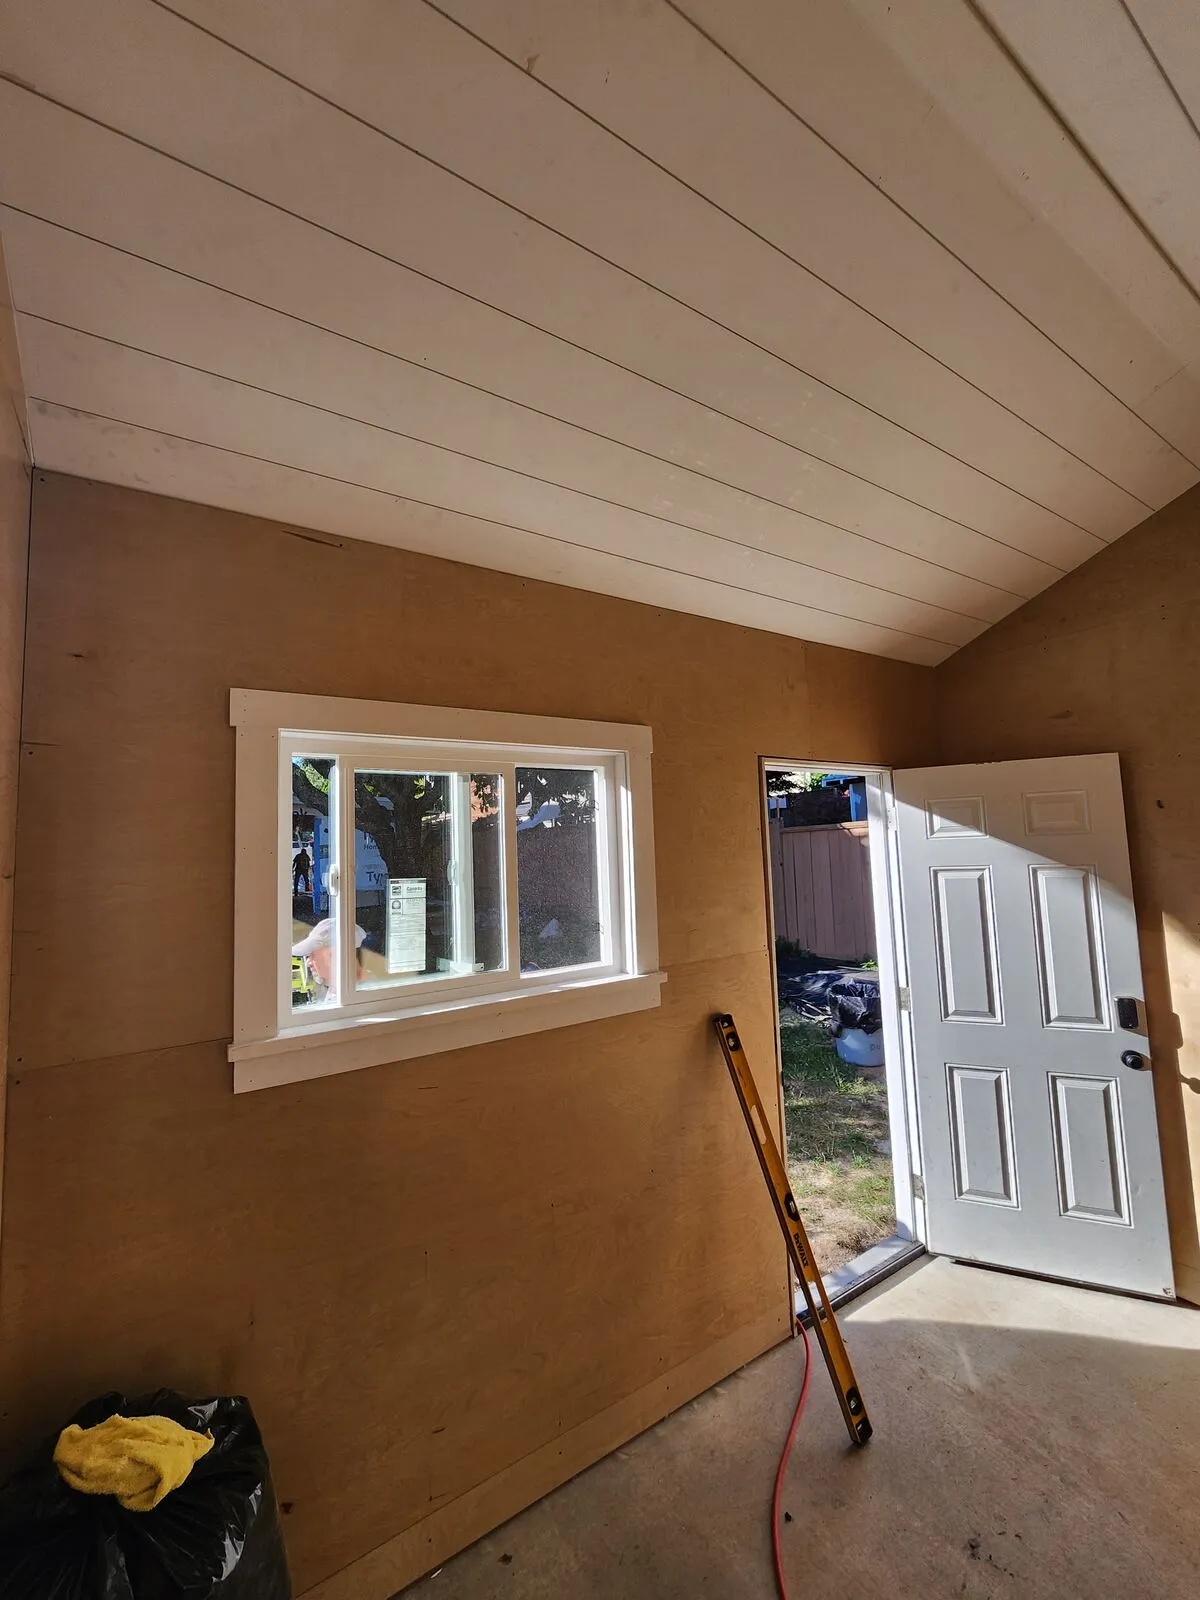
Finished interior: plywood walls and a painted shiplap vaulted ceiling
Inside, the walls were lined with exterior-grade plywood panels — durable, hangs anything from a single screw, and far more useful in a workshop-style shed than drywall. The vaulted ceiling got painted white tongue-and-groove shiplap running the length of the gable, which throws light around and makes the space feel a lot bigger than its footprint. With the door, slider window and two side windows trimmed out, it reads as a finished little room rather than an unfinished shell.
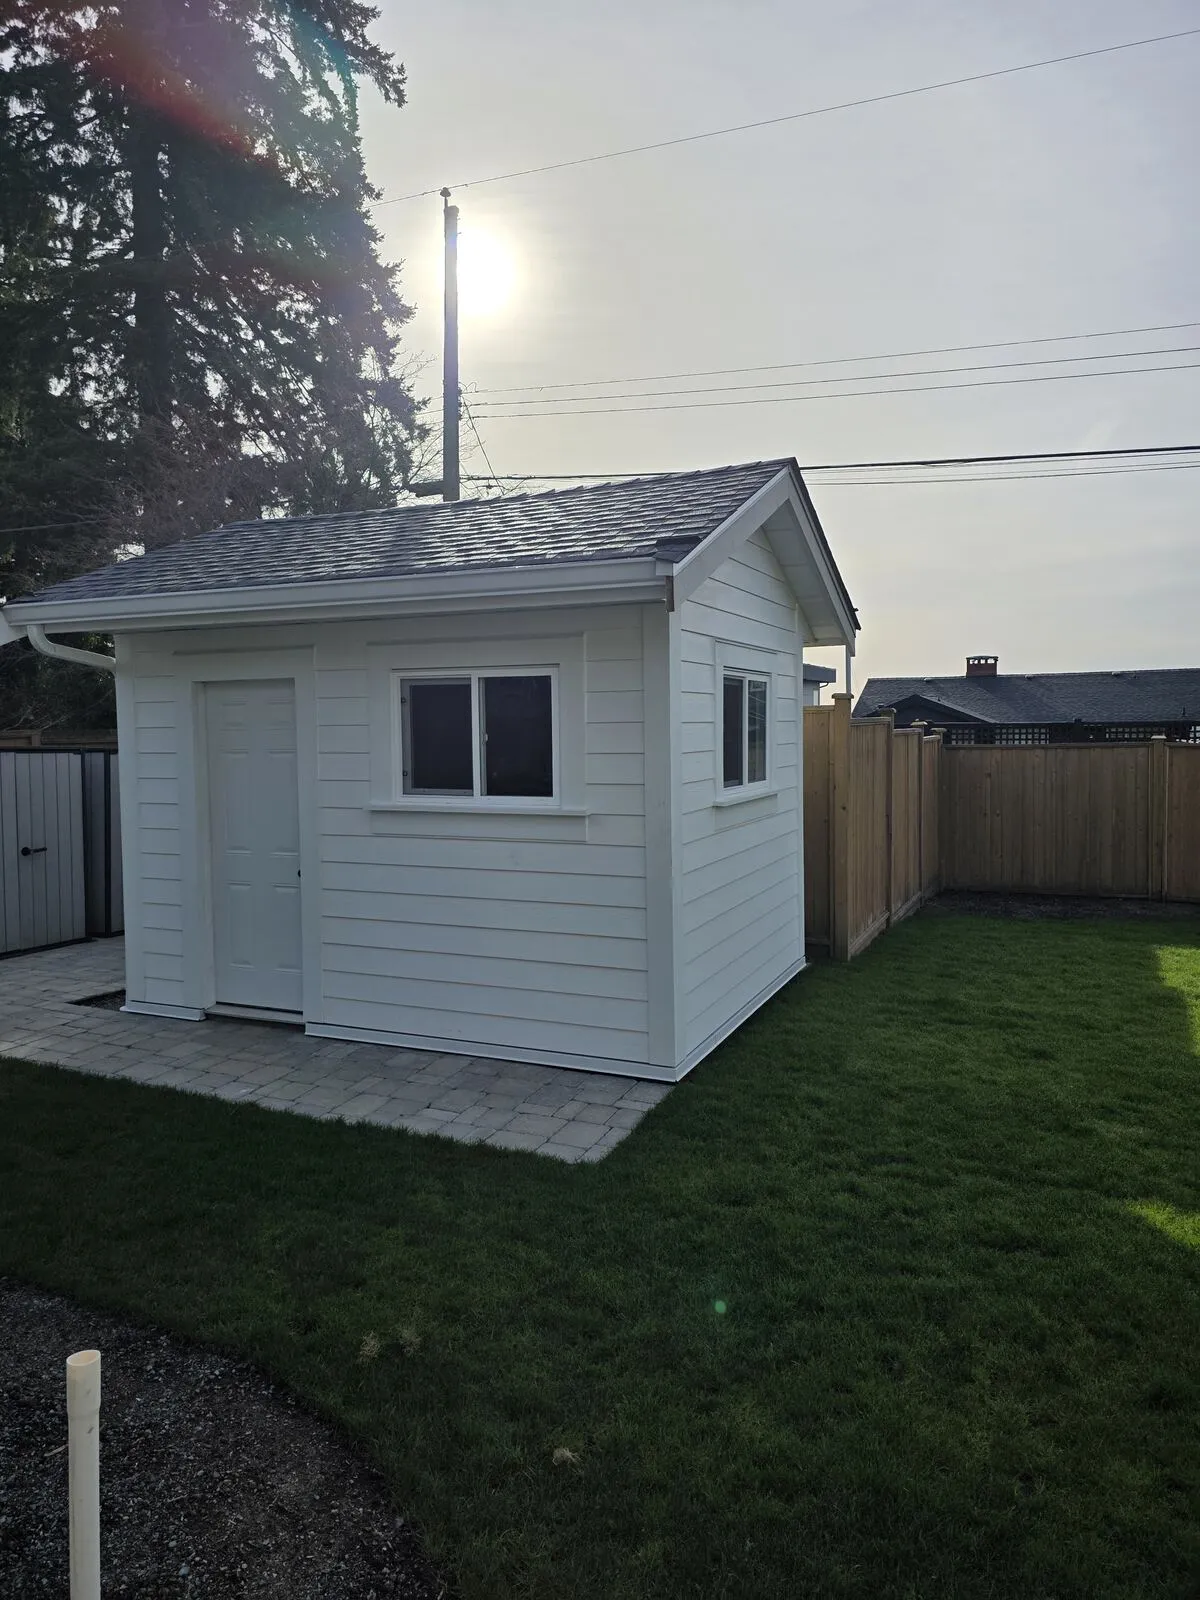
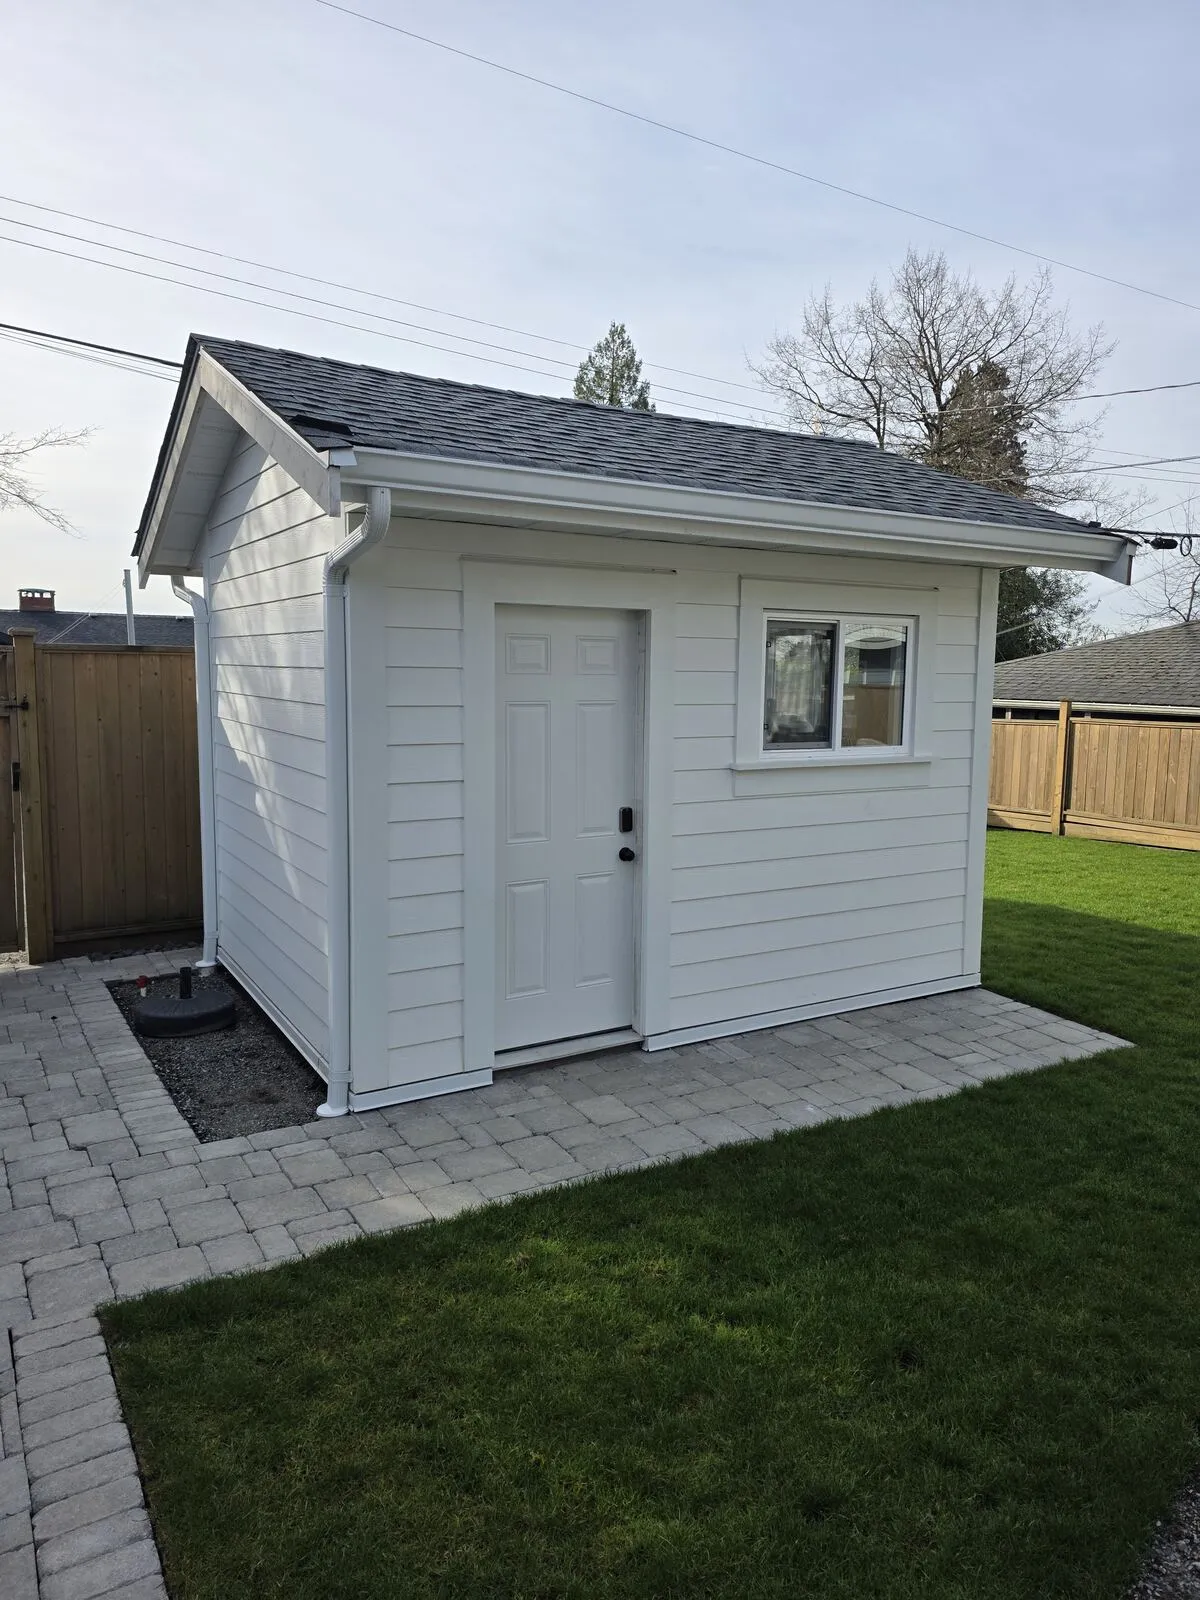
Hardie cladding, shingled roof, finished exterior
Outside, the shed got James Hardie fibre-cement lap siding painted clean white with corner trims and window/door surrounds, an asphalt shingle gable roof with proper drip edge and flashing, and a coordinated white slider window plus a panel door. The surrounding ground was levelled and laid with interlocking concrete pavers so the finished shed sits on a tidy patio rather than wet grass. The end result reads as a small purpose-built outbuilding that belongs with the house — not a pre-fab kit dropped on the lawn.
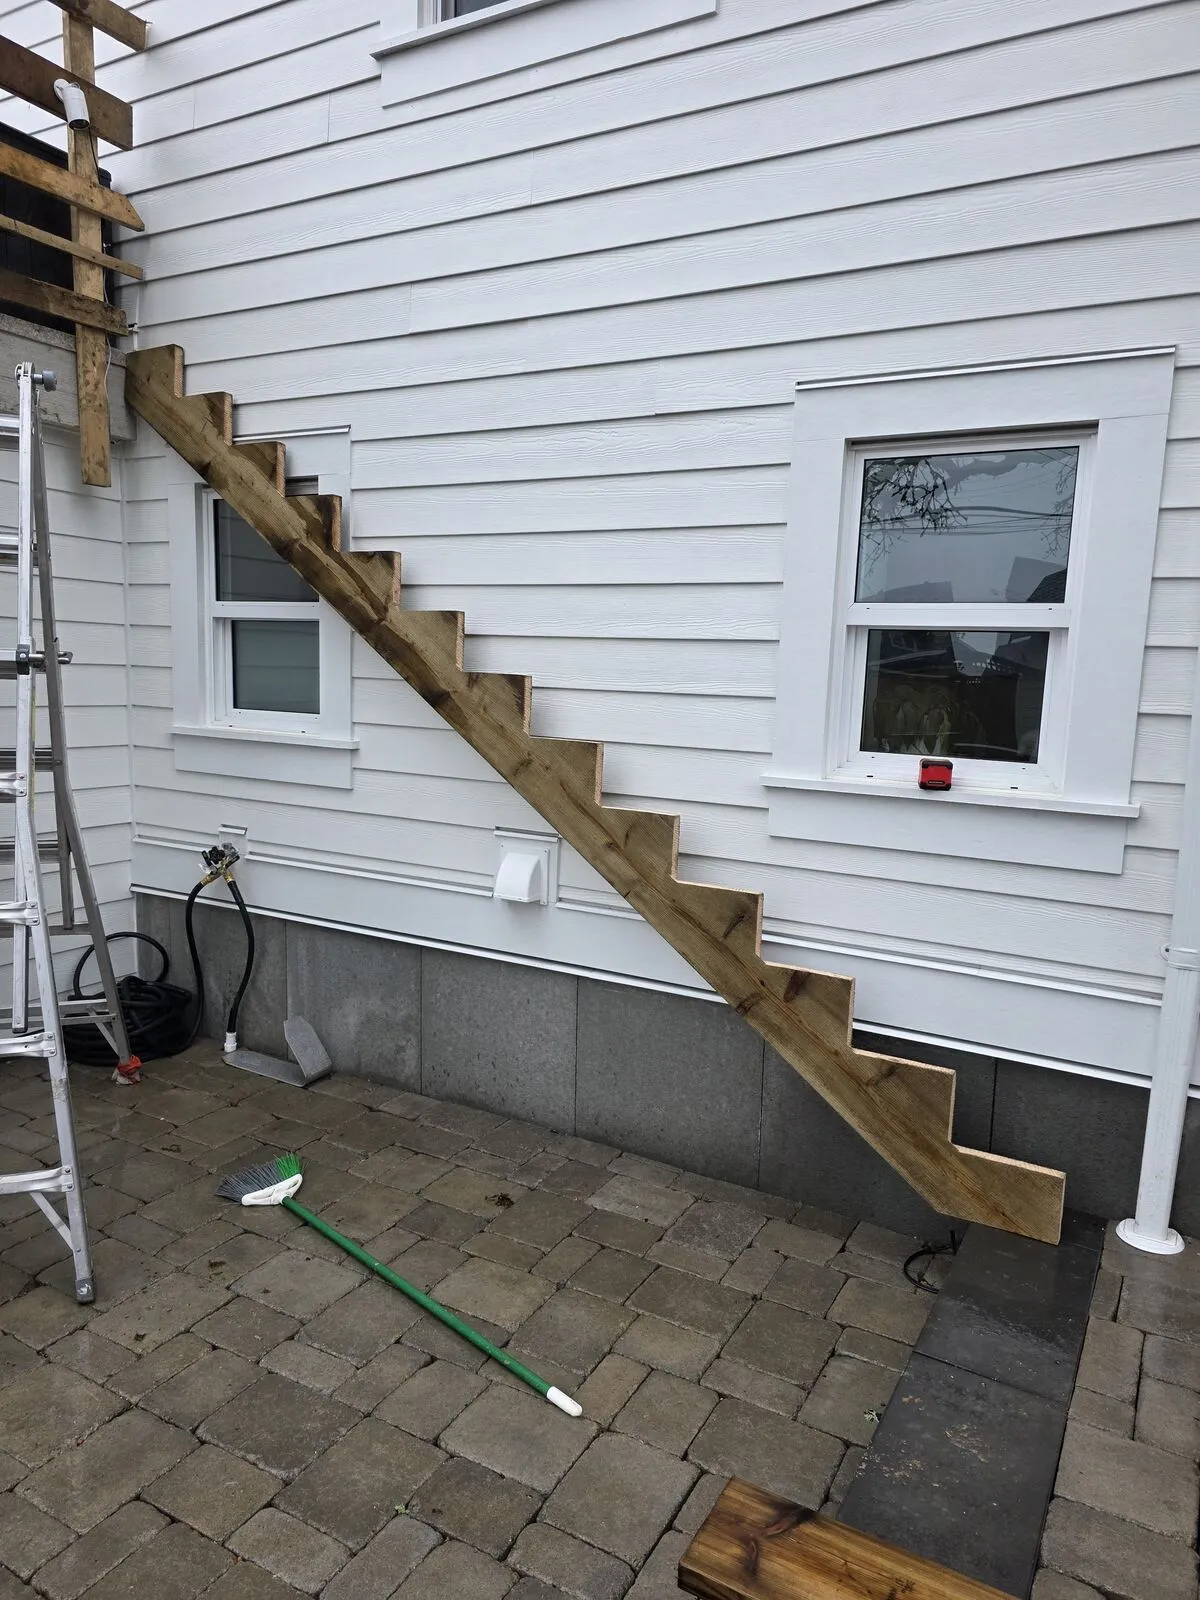
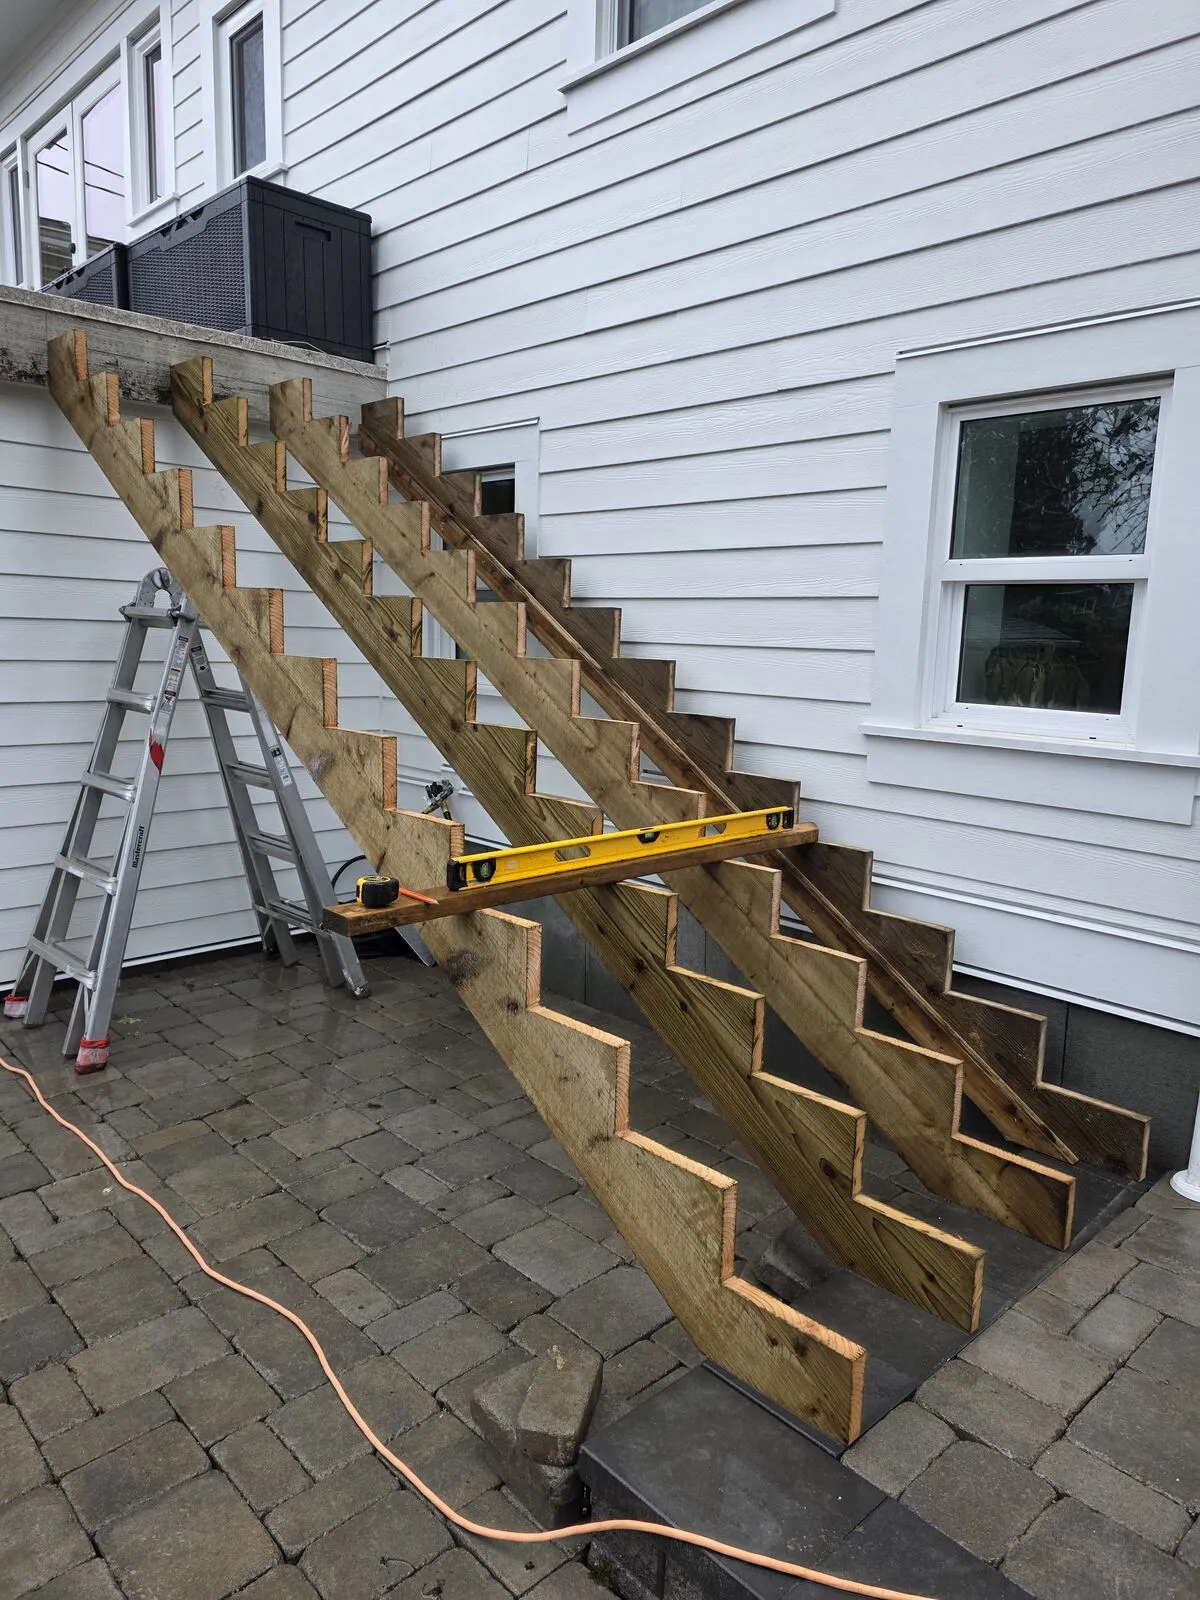
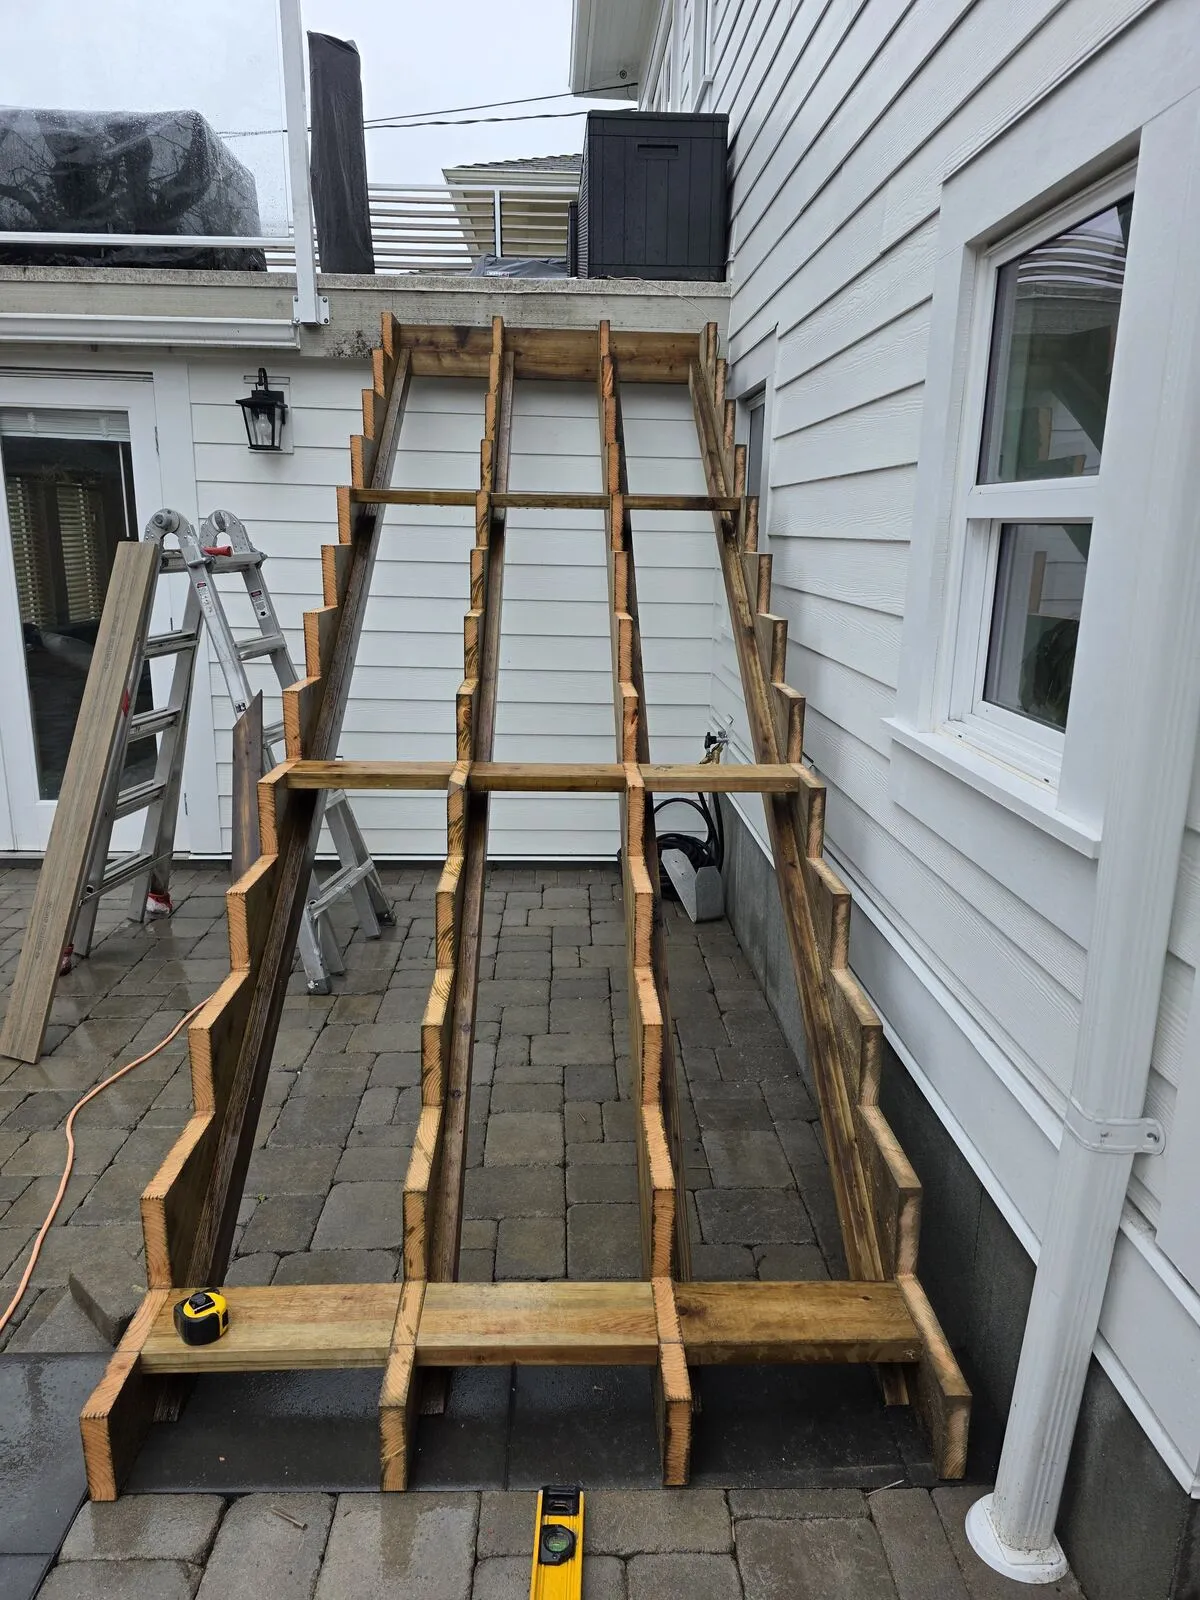
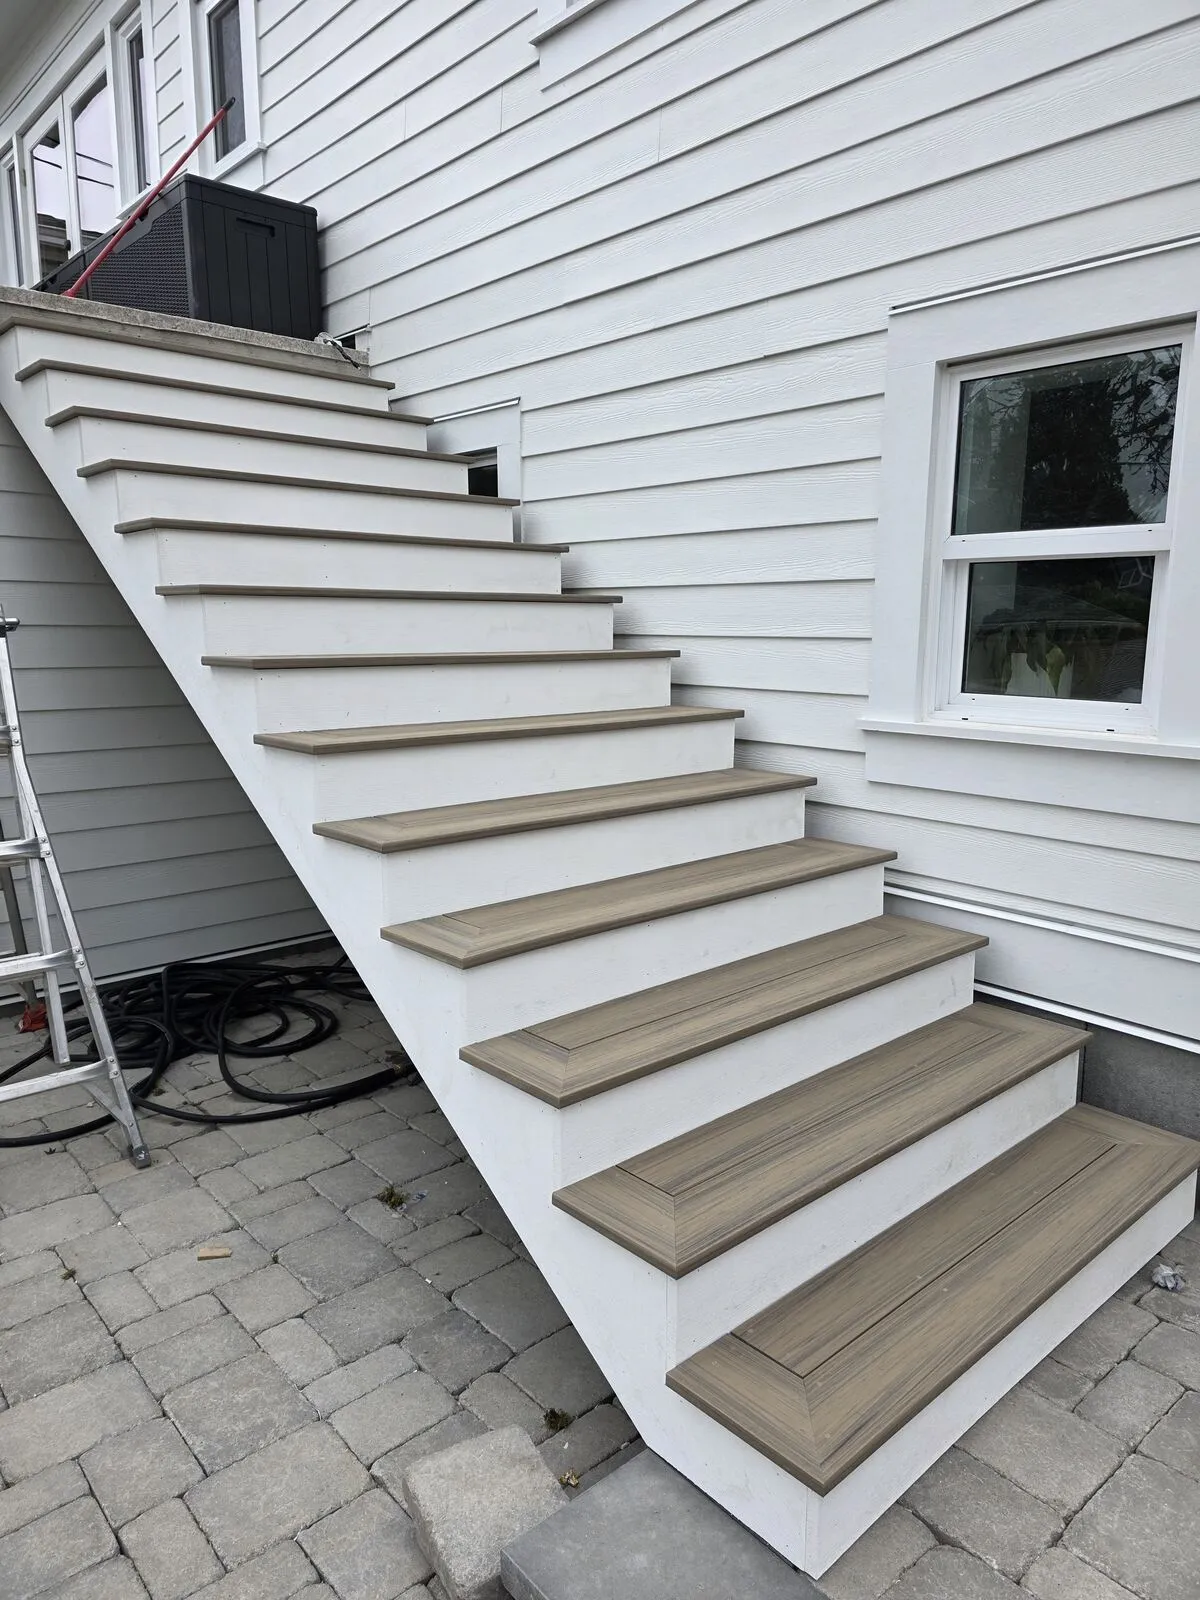
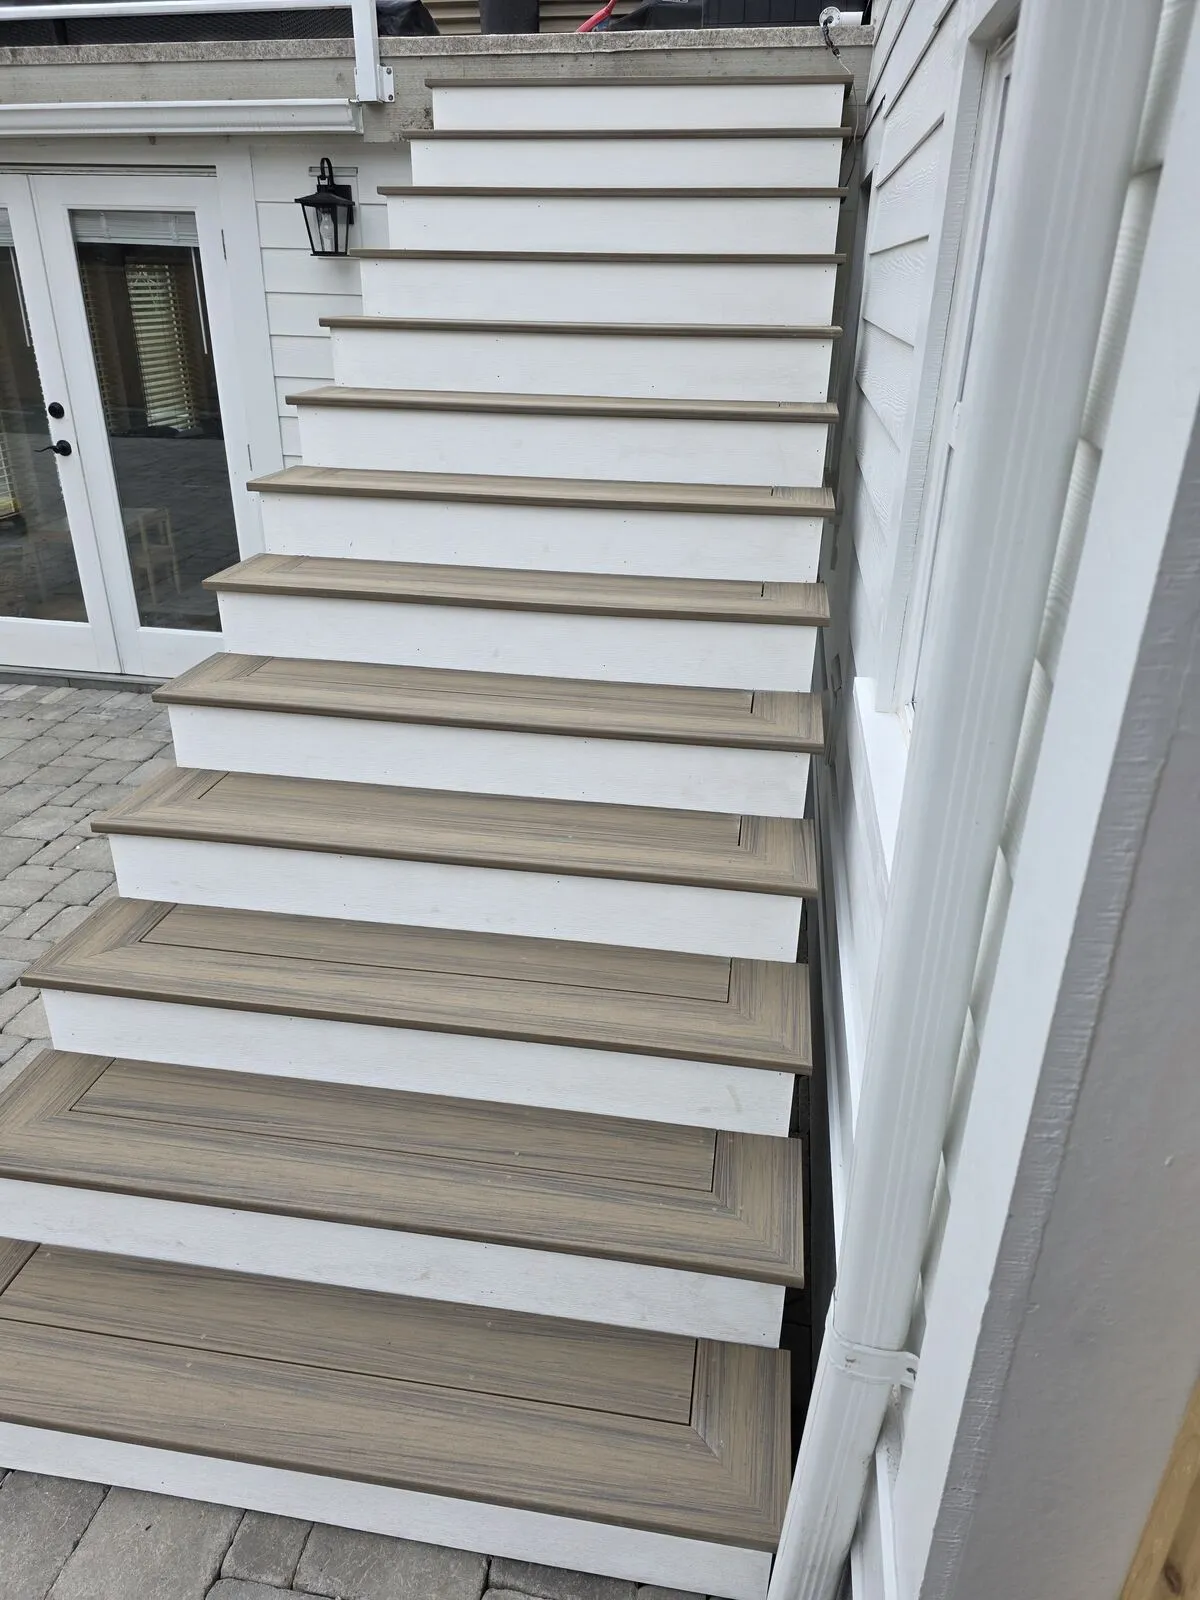
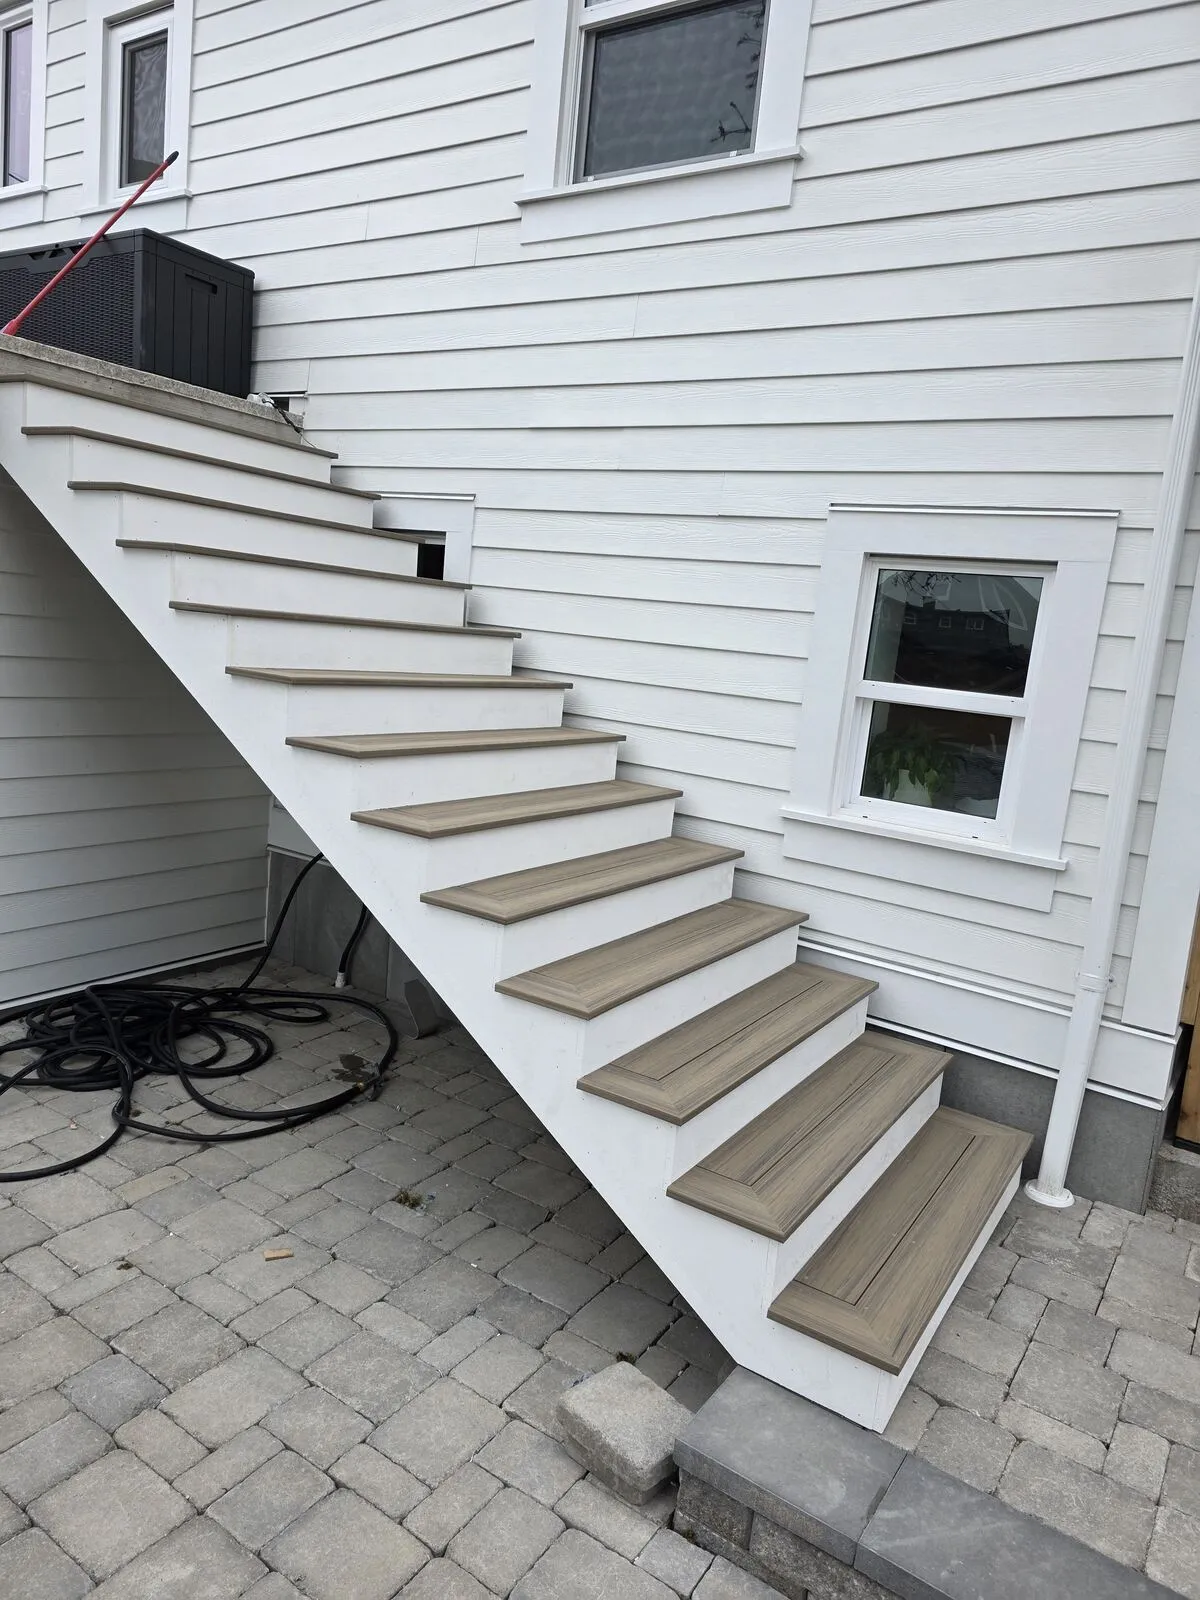
Composite stairs: stringers down from the upper deck
On the other side of the house, the existing wooden stair from the upper hot-tub deck down to the patio was past its life — soft treads, weathered stringers, and one bouncy run nobody wanted to use at night. We pulled the old stair off entirely, sistered new pressure-treated 2x12 stringers off the upper deck rim joist with lag bolts and joist hangers, and dialled in the rise and run so every step lands the same. With the stringers up and inspected, the run was ready for the AZEK and composite finish.
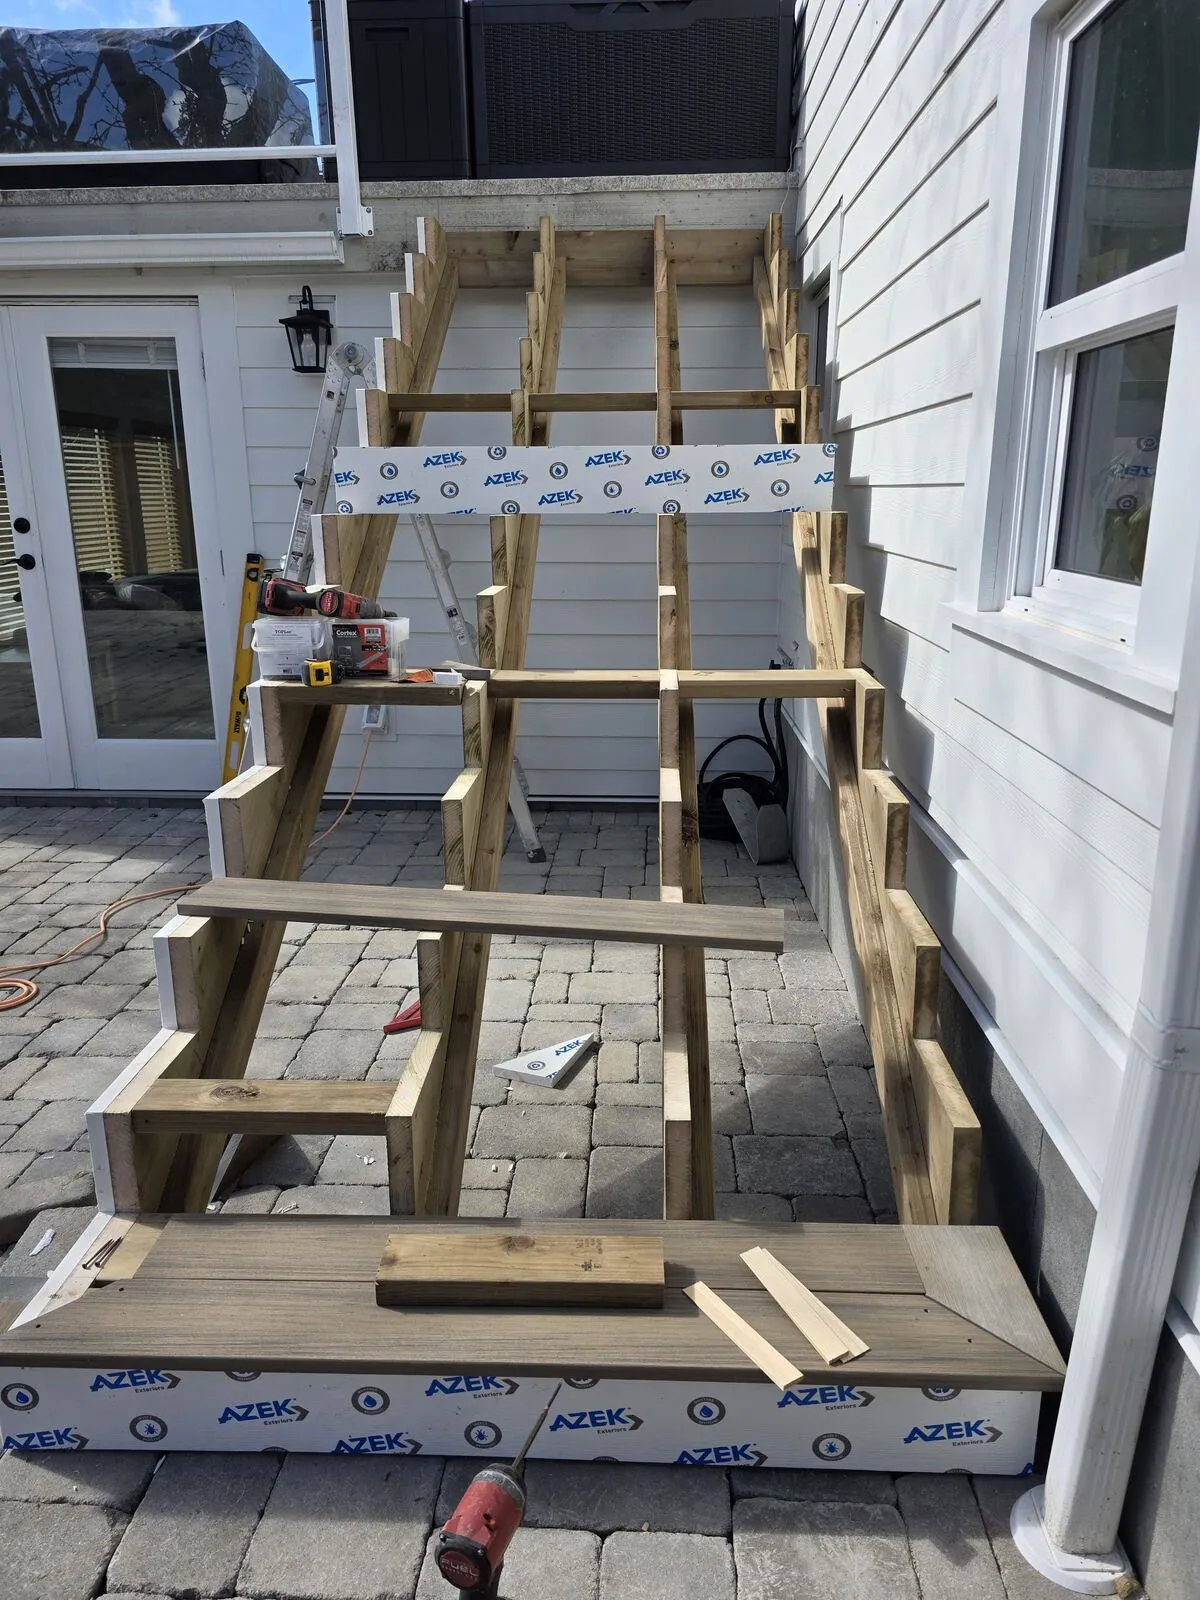
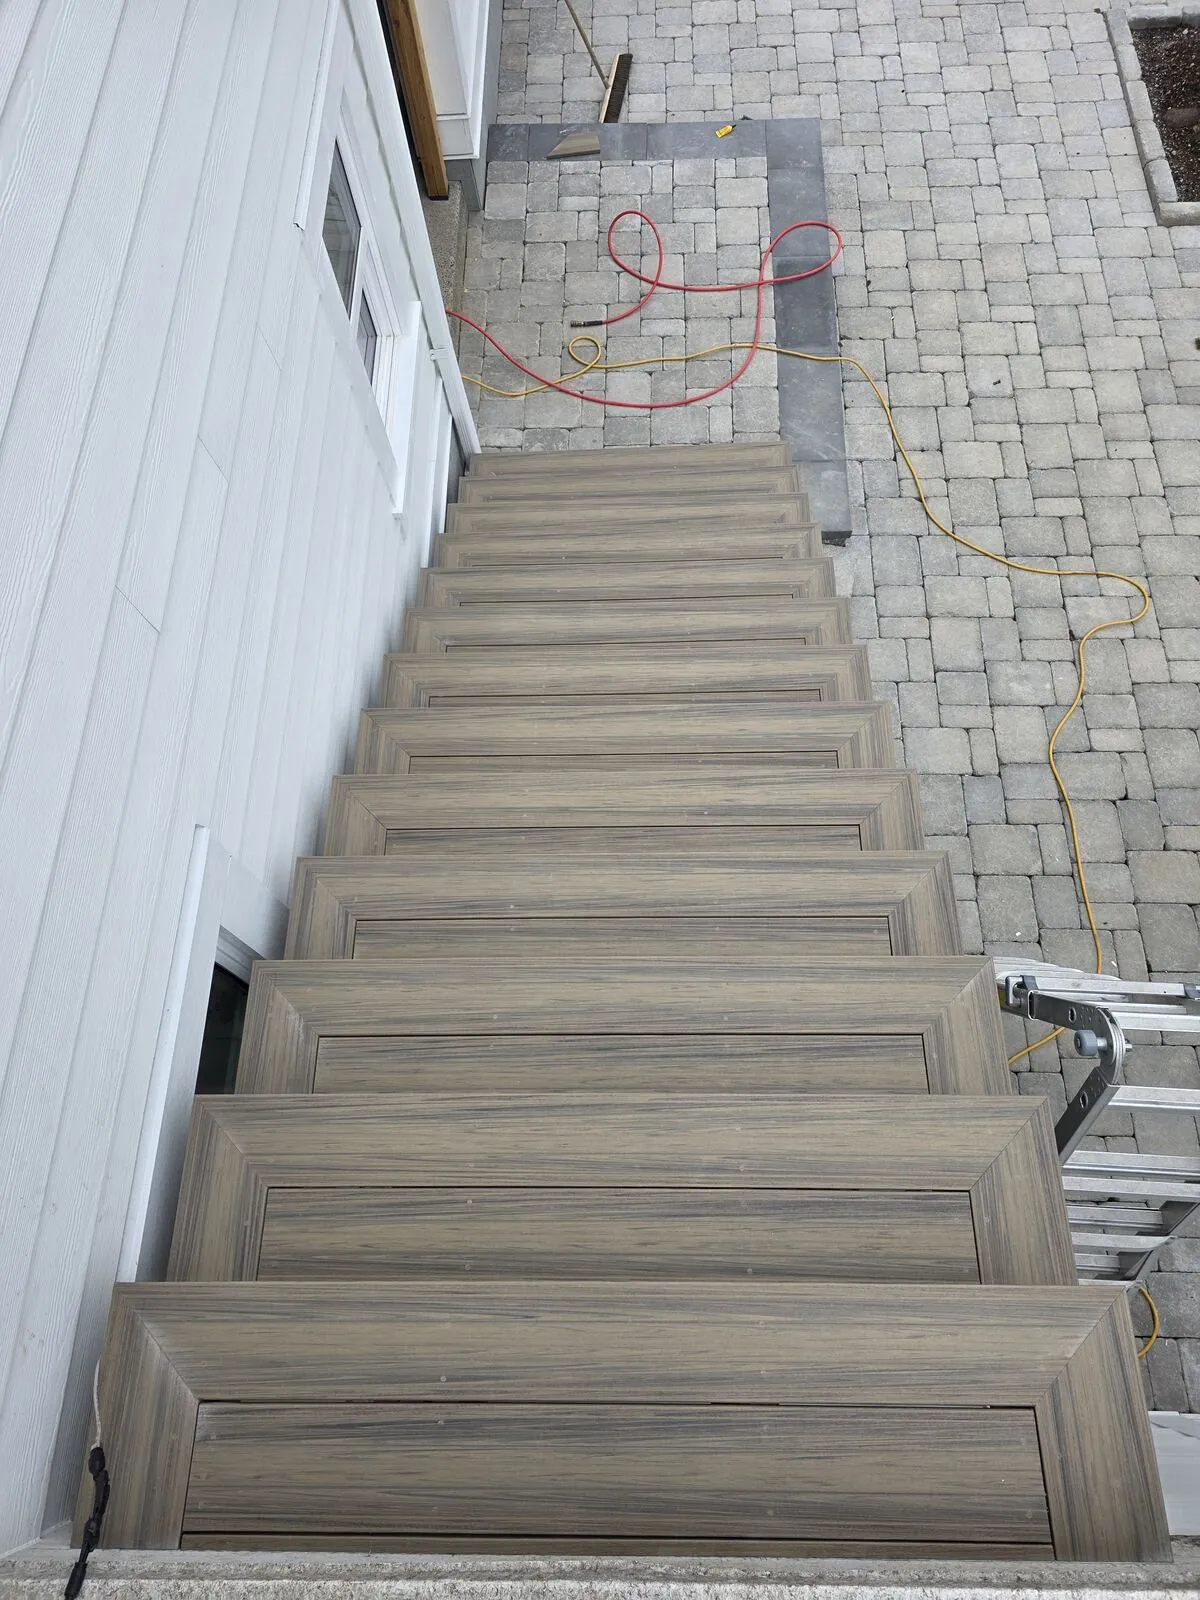
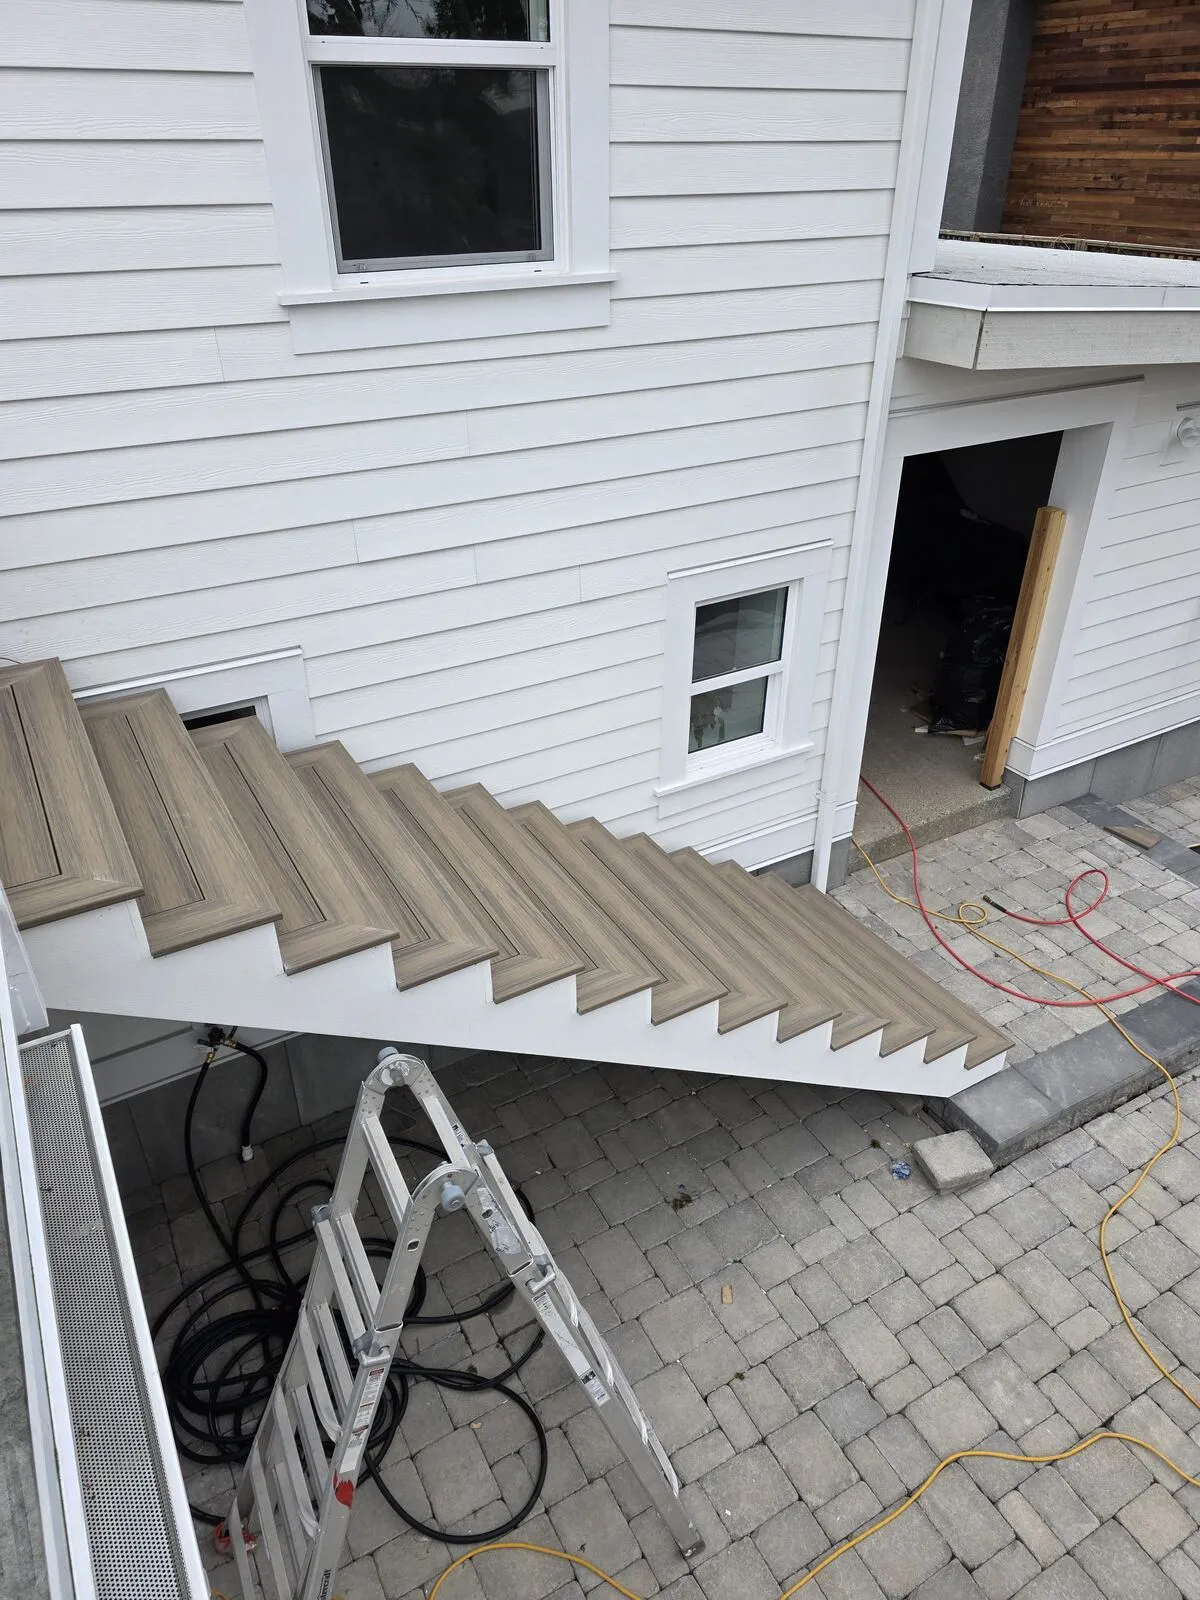
AZEK trim, picture-frame treads, finished stair
From there the stair was wrapped: AZEK PVC riser boards and a continuous AZEK fascia along the outside stringer so no pressure-treated lumber is visible from the patio side, then grooved composite treads installed with hidden fasteners in a picture-frame layout — a continuous border band around each tread with the field boards running the short direction inside it. It's the same detail we run on the deck surfaces themselves, which ties the stair visually into the upper deck instead of looking like an add-on. Done and handed back: a long, rot-proof composite stair the owners can use barefoot out of the hot tub without worrying about splinters or the next refinish.