The brief: three jobs in one house
The Abbotsford homeowners asked us to take on a whole-house update in a single mobilization. Inside, the original closed-off kitchen had to be opened up to the living room with a true open-concept feel, the existing kitchen carefully removed and reinstalled in the basement as a secondary suite kitchen, and a brand-new Shaker kitchen built in the original footprint. The living room's dated beige-tile fireplace was to be stripped and rebuilt as a floor-to-ceiling tiled feature wall with a linear gas insert. Outside, the dated pony walls on the upper deck were to come out, the structural posts wrapped in rough cedar, the upper deck waterproofed with vinyl membrane and a composite landing built at the front entry. One scope, one crew, sequenced so the family could keep living in the house.
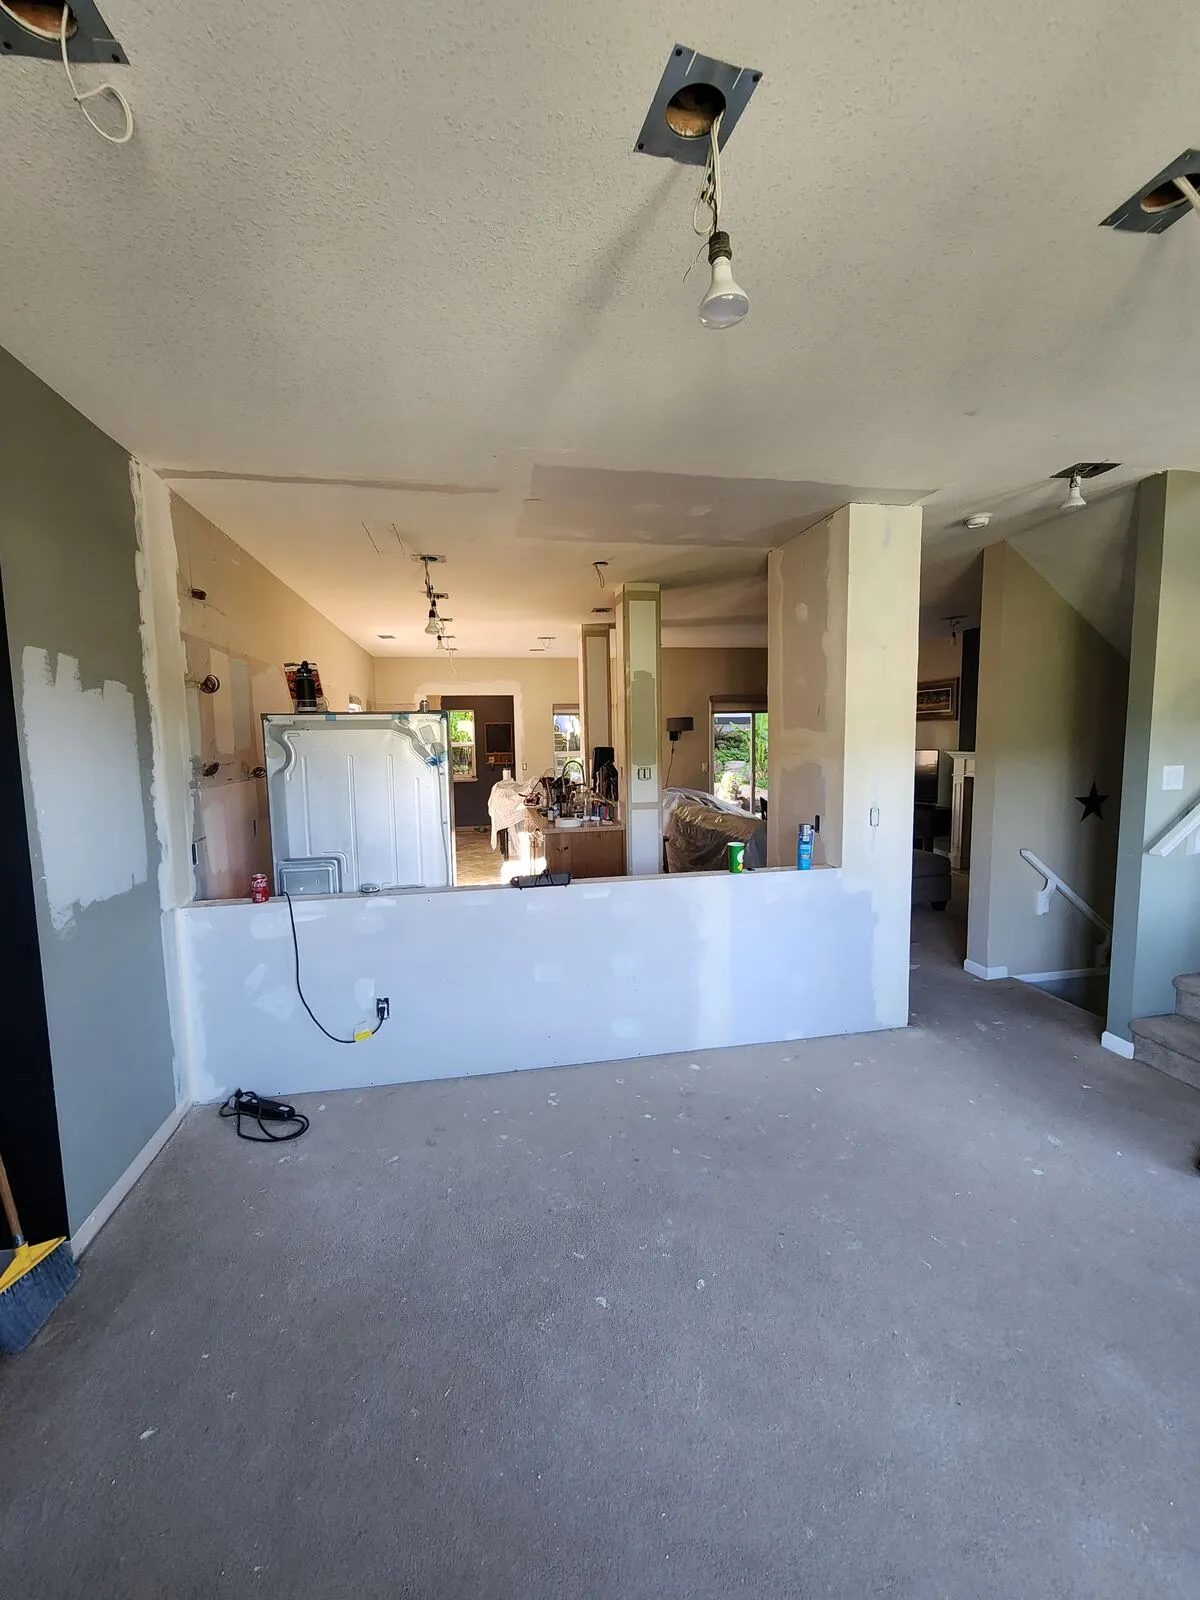
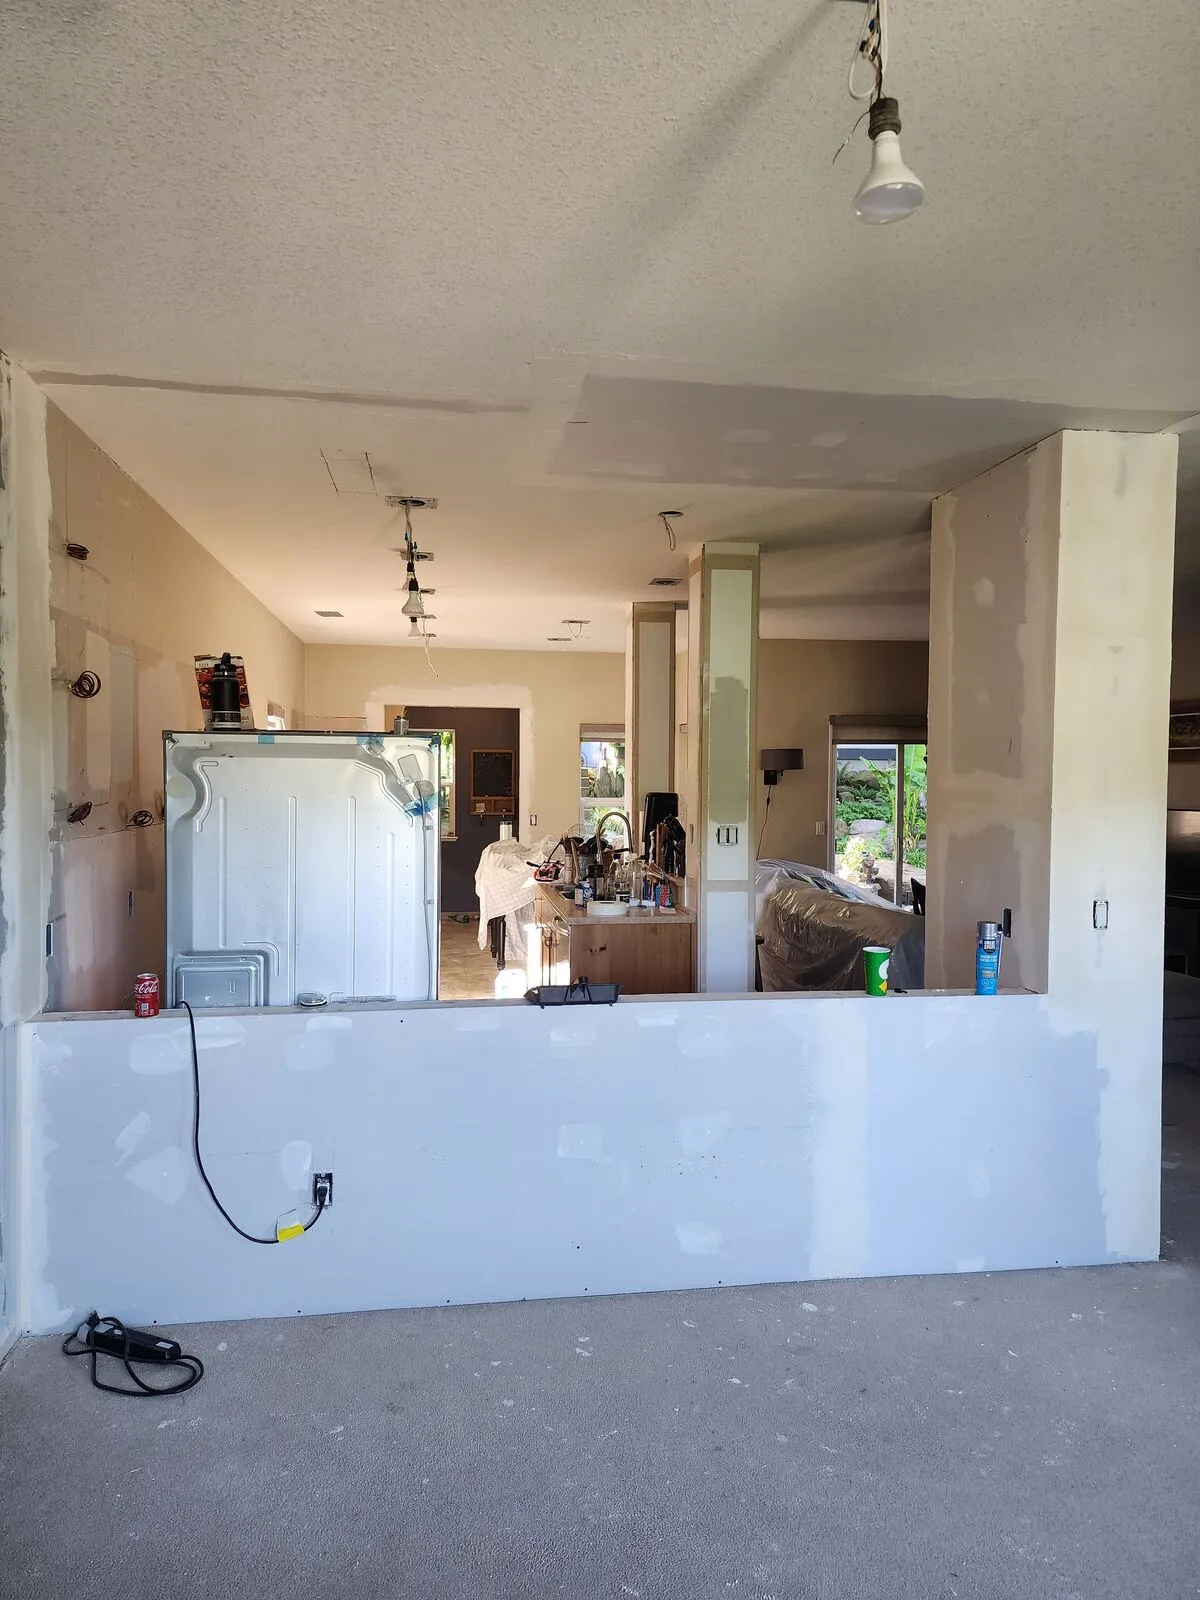
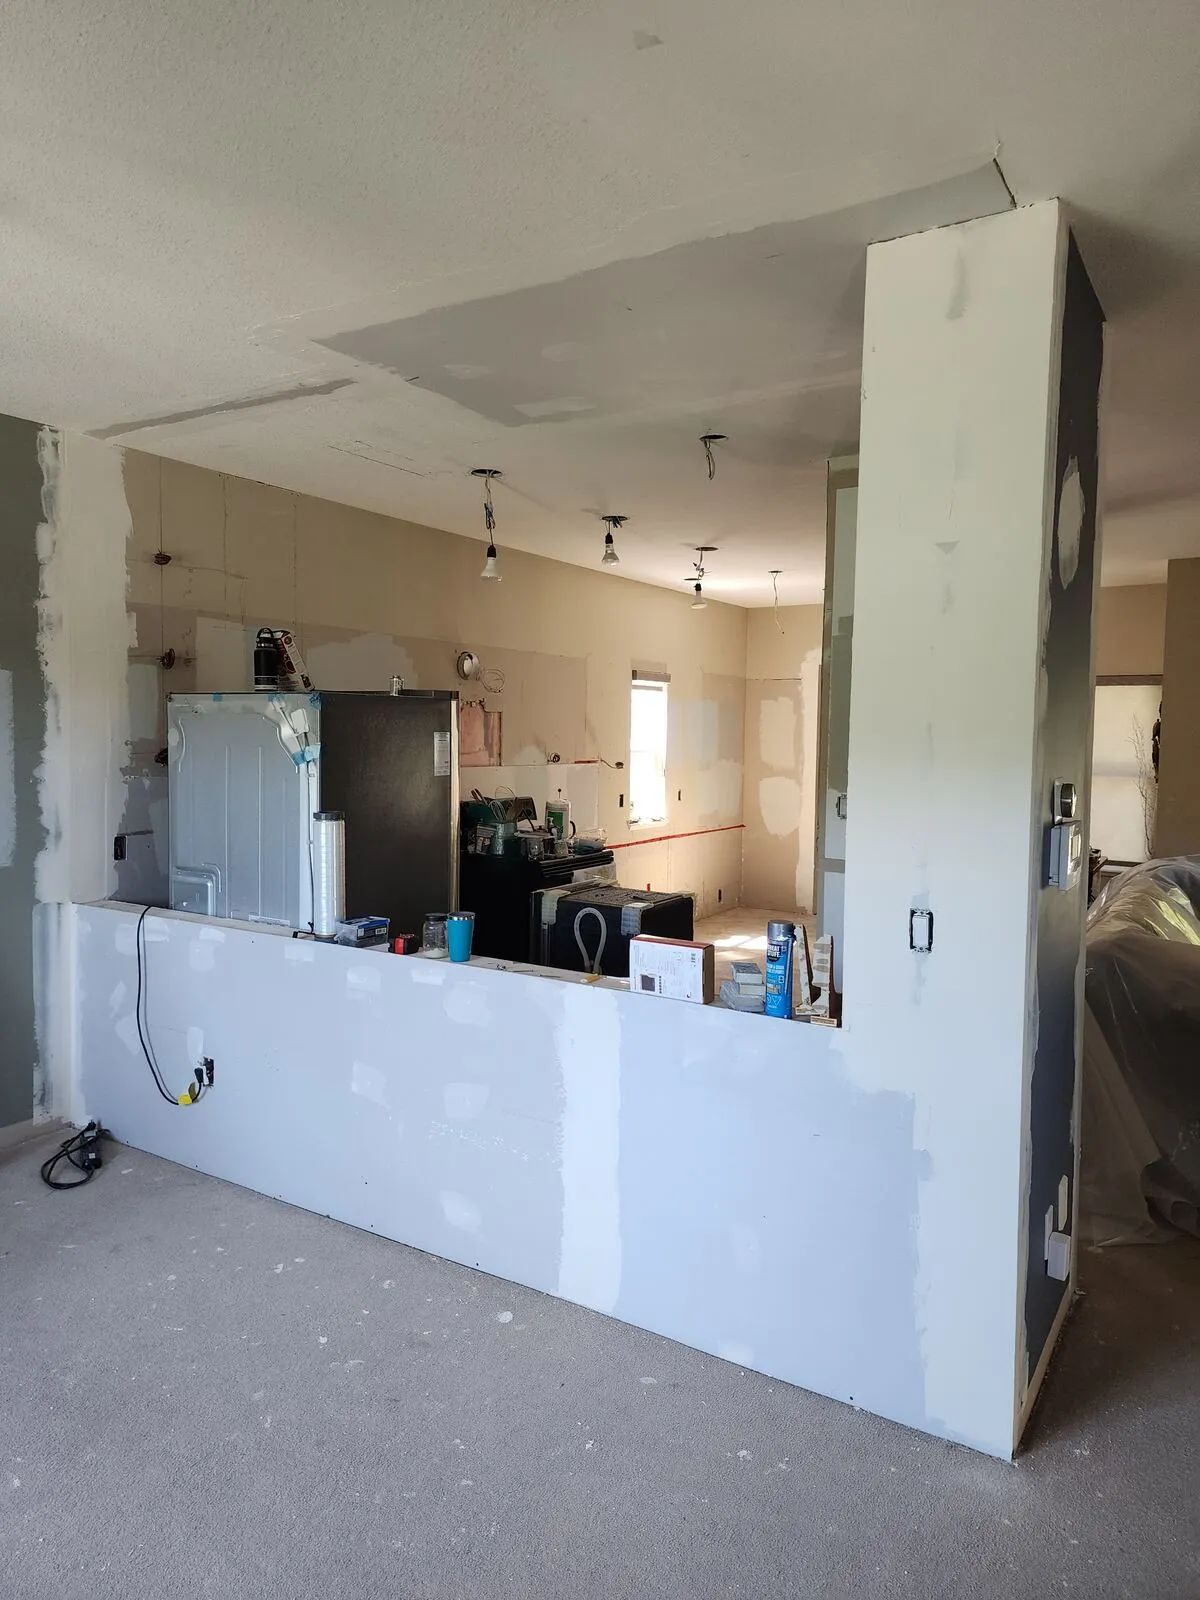
Opening the wall: load-bearing demo with services relocated inside
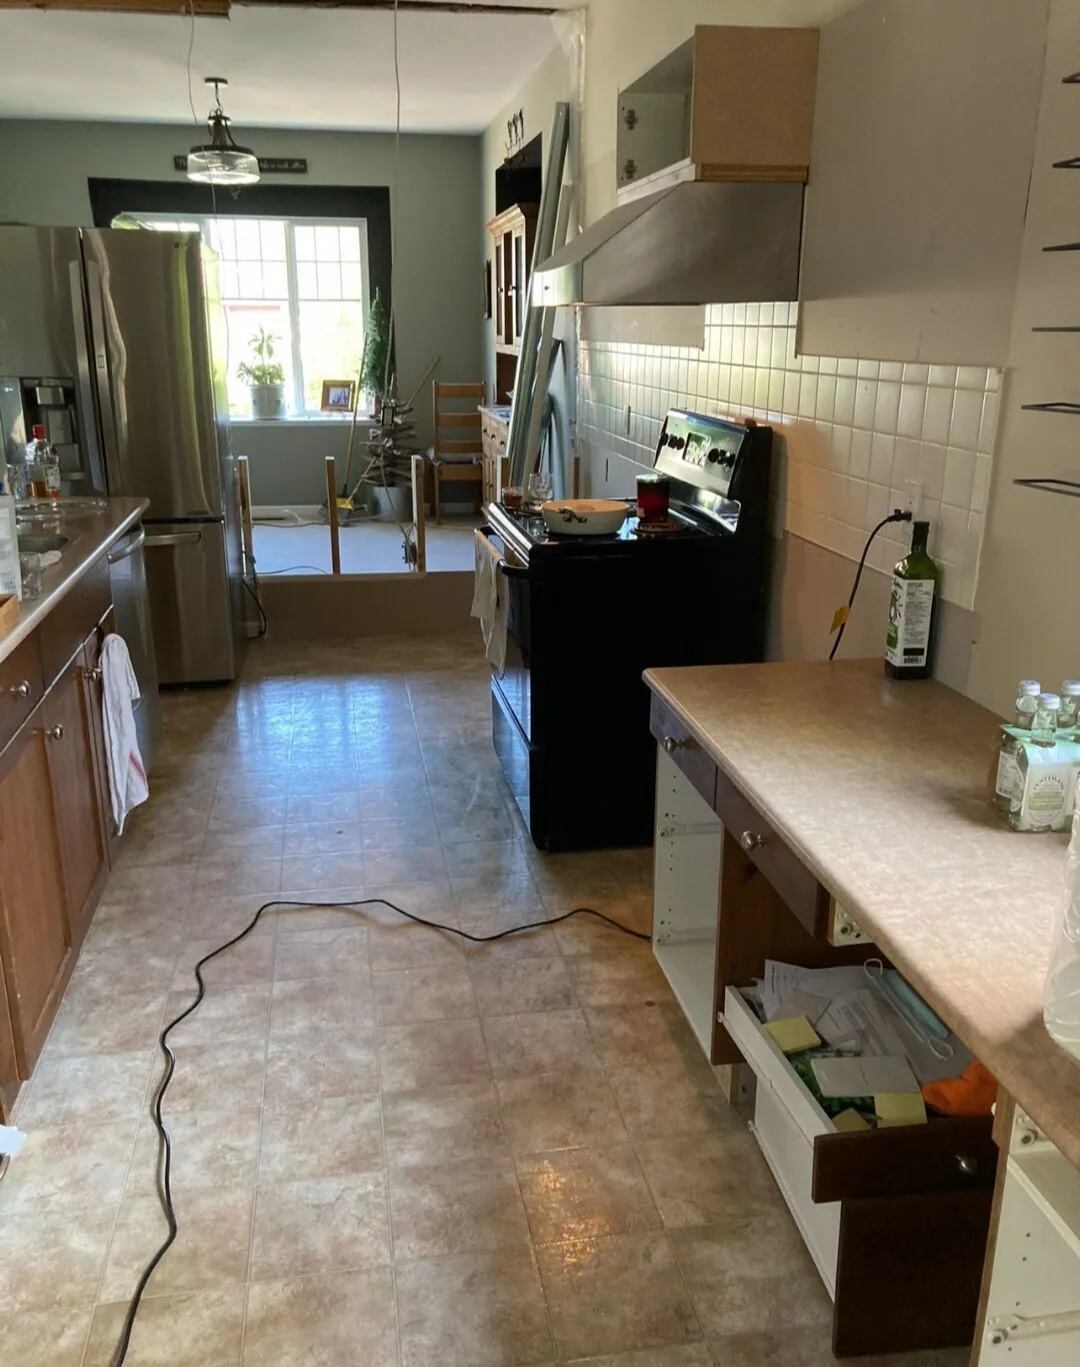
The wall between the original kitchen and the living room was load-bearing and carried plumbing drains, hot and cold supply lines and a full bundle of kitchen-circuit wiring inside it. We engineered and installed a flush beam to take the load, then carefully rerouted every wire and pipe inside the new framing — nothing was abandoned, nothing was surface-mounted on the finished side — so the finished opening reads as a clean header with a single wrapped support post, and you'd never know there used to be a full wall there.
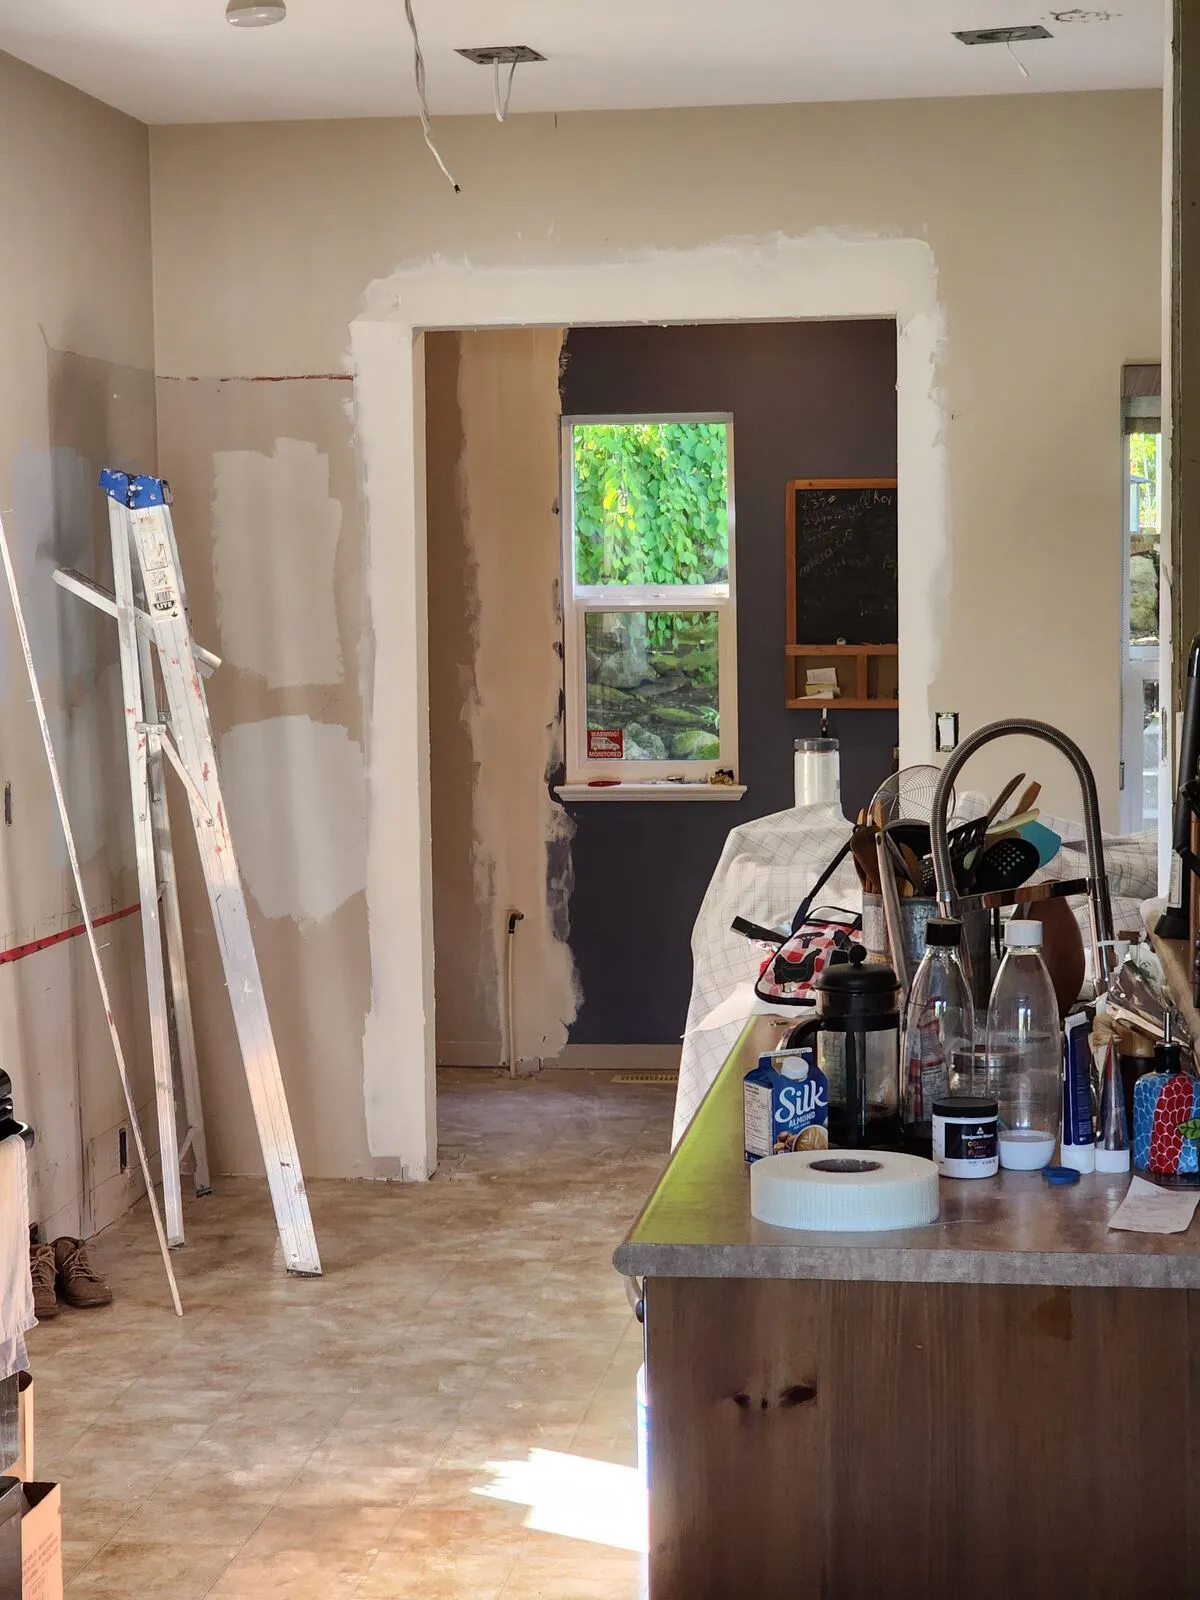
Reusing the old kitchen downstairs
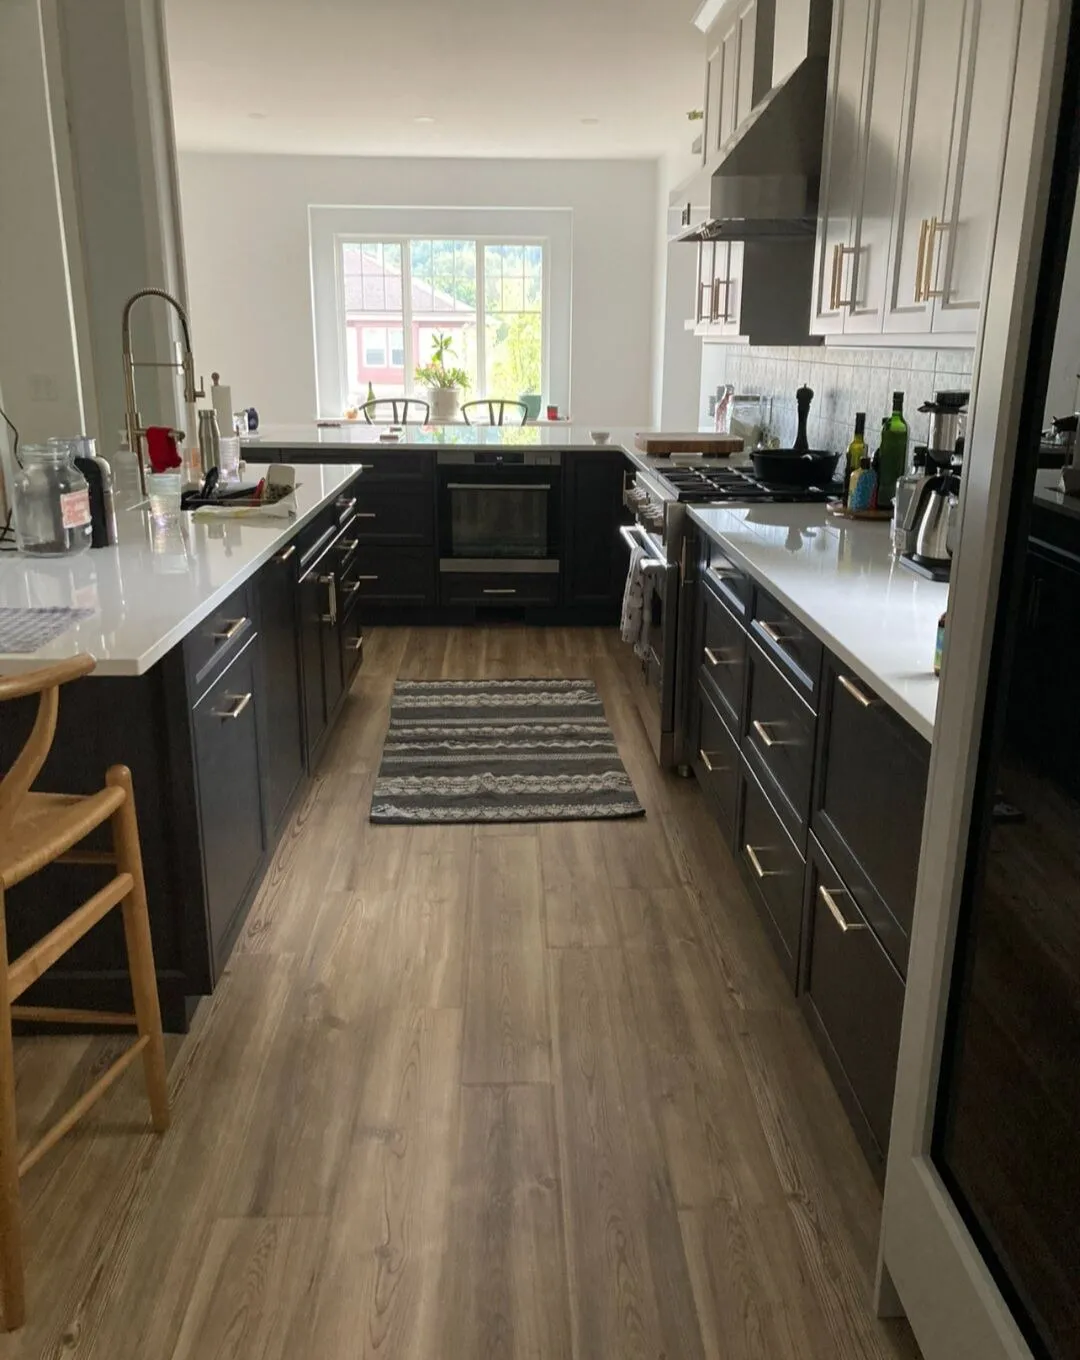
Rather than landfilling a kitchen that still had plenty of life left in it, the original uppers, lowers, countertop, sink and appliances came out in one piece at a time, were labelled, stored, and then reinstalled downstairs as a fully functional secondary suite kitchen in the basement. The original layout flexed slightly to fit the new room, but the cabinet boxes, doors and hardware all carried over — a real cost saving for the homeowner and the more sustainable end of the job.
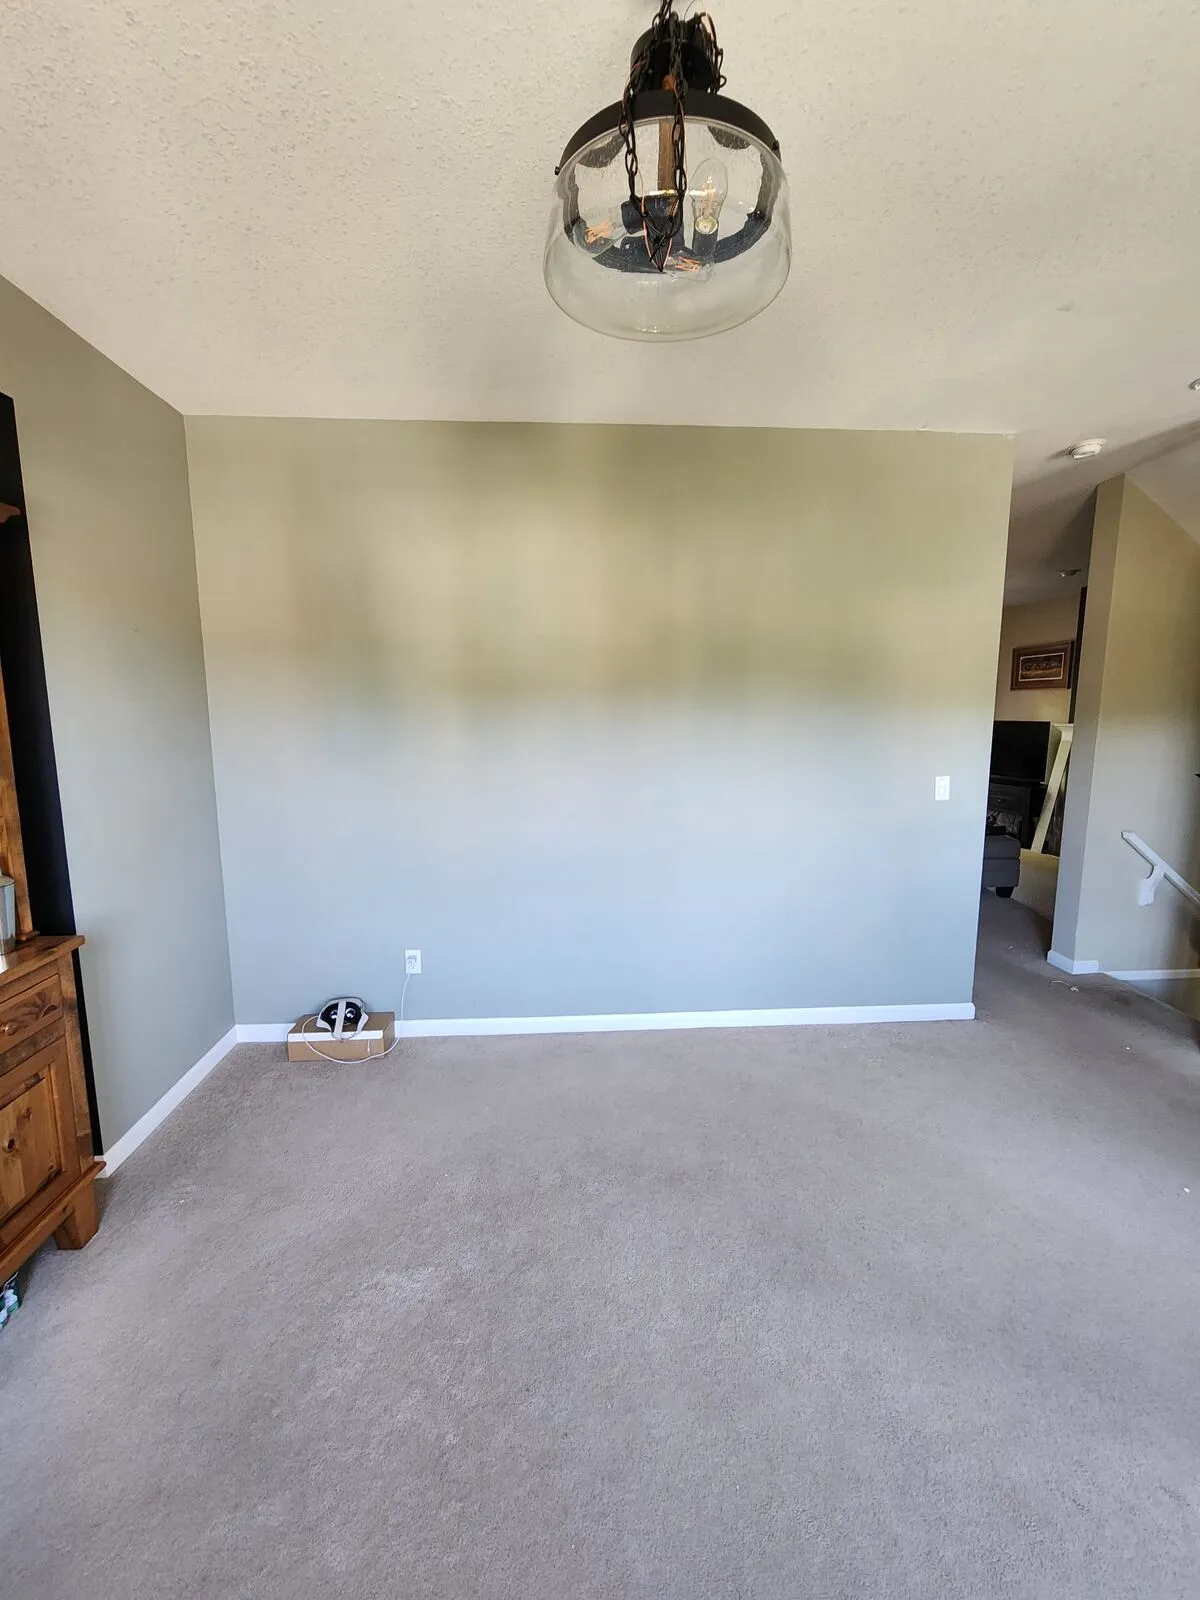
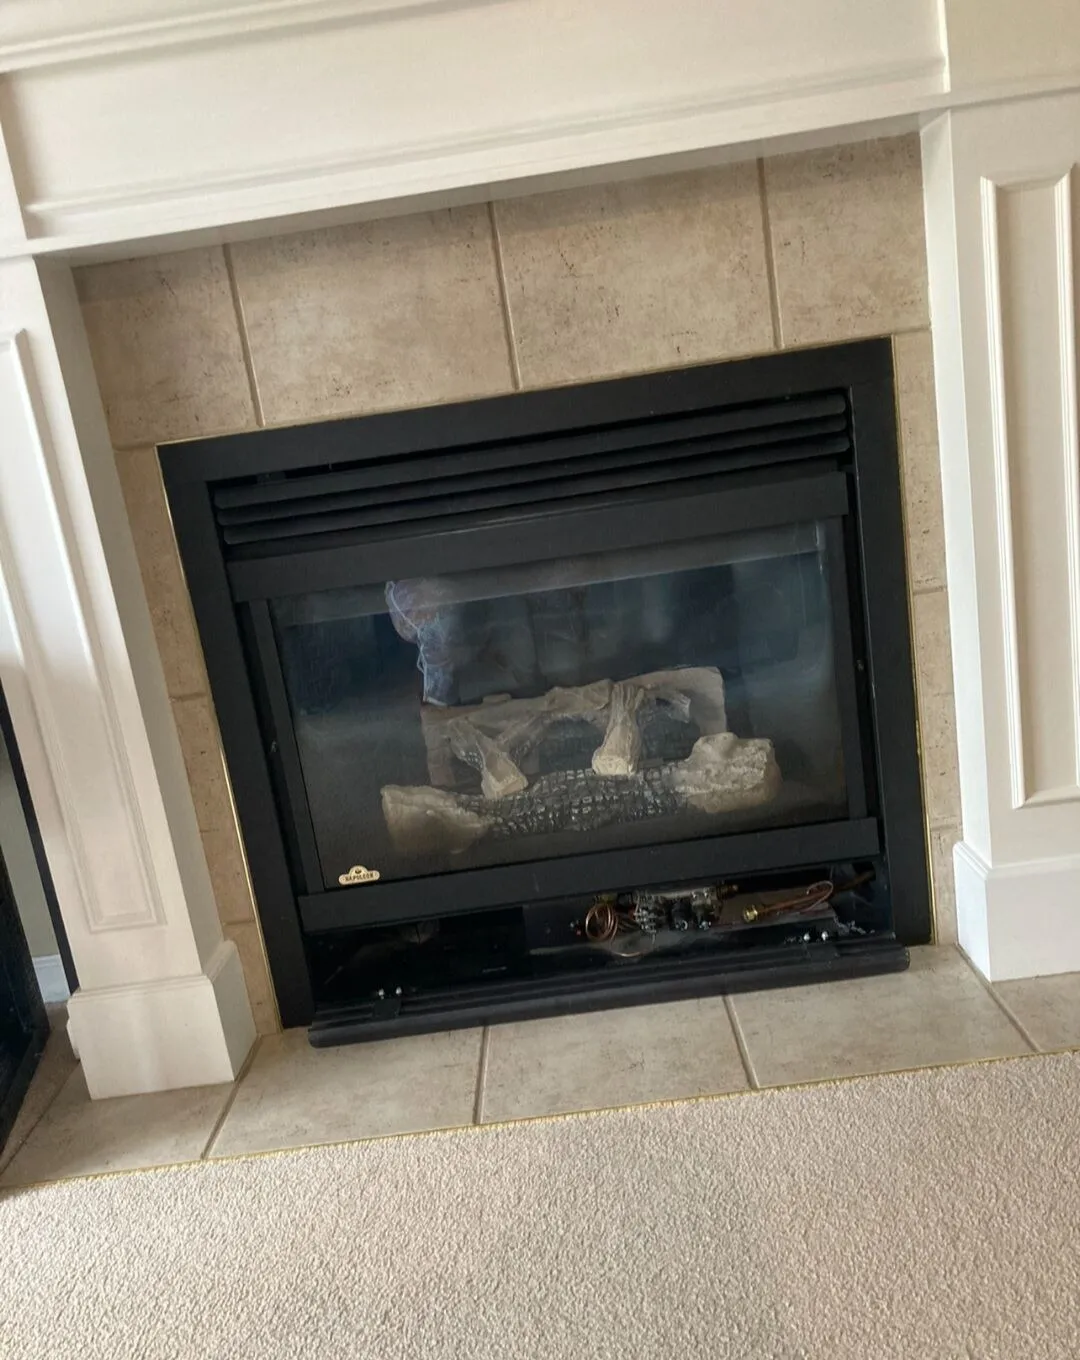
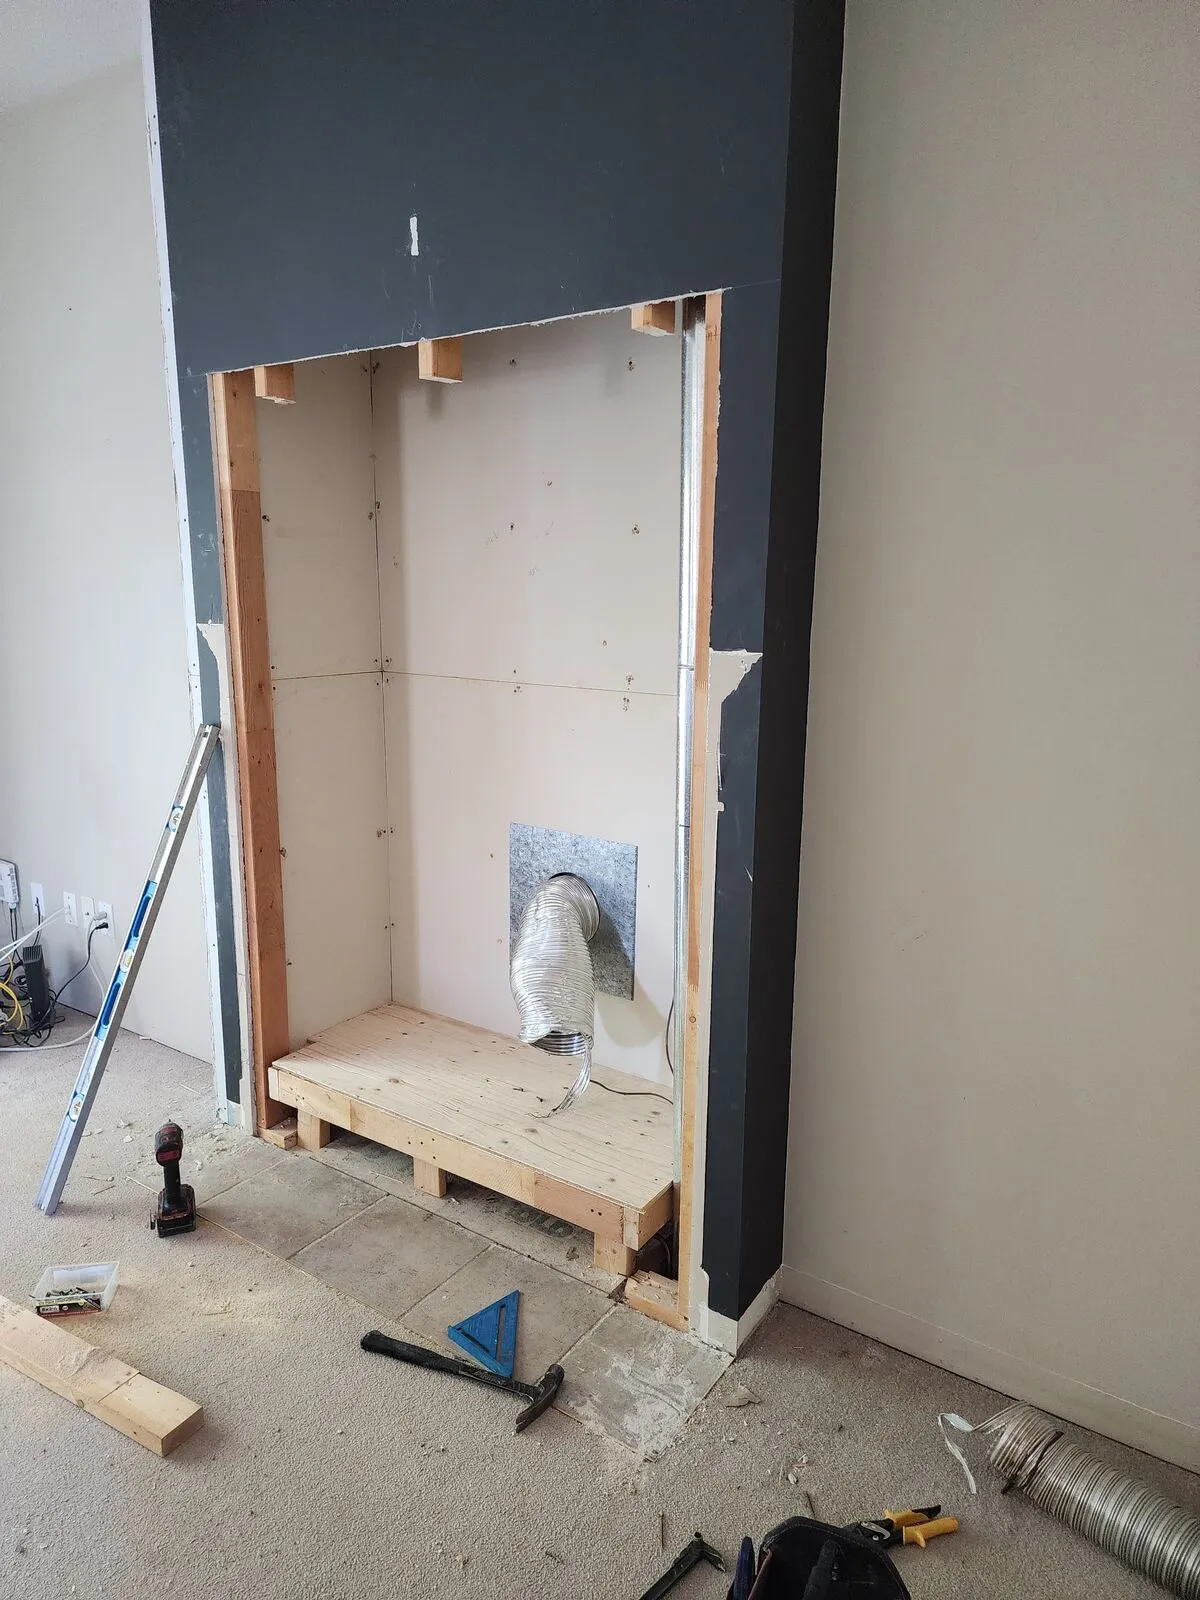
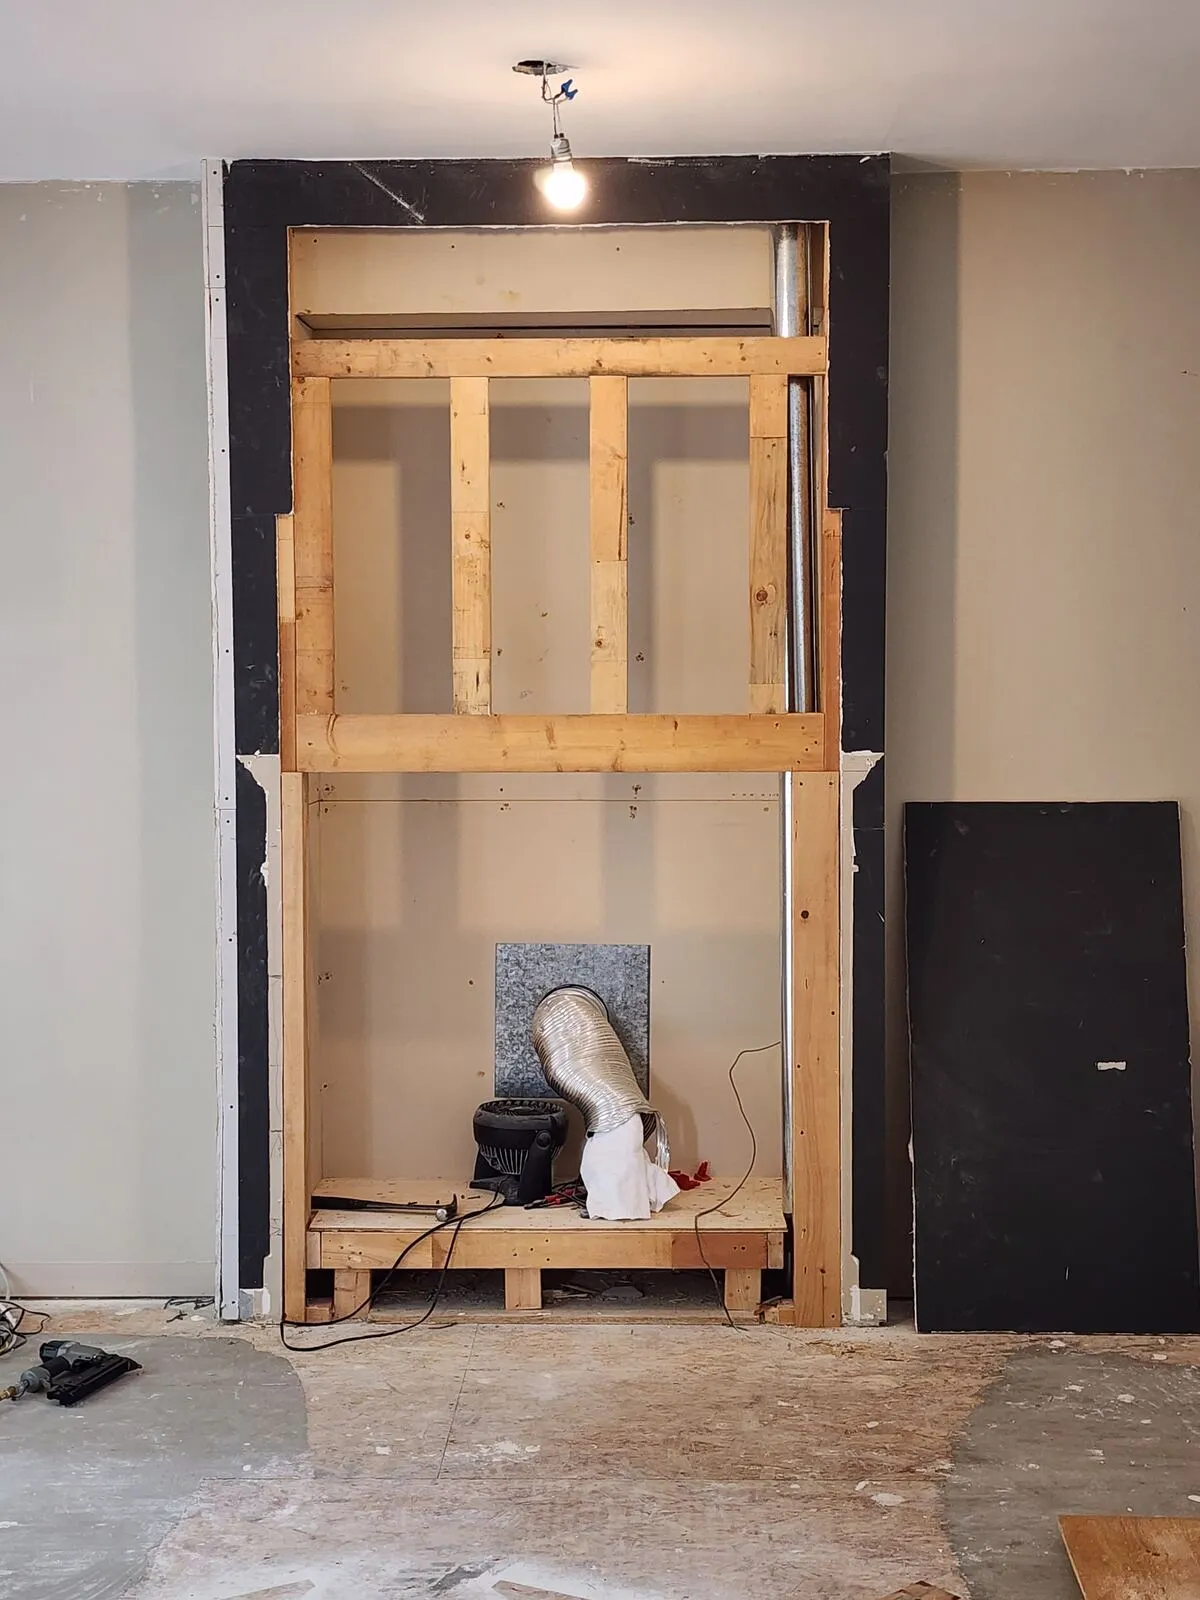
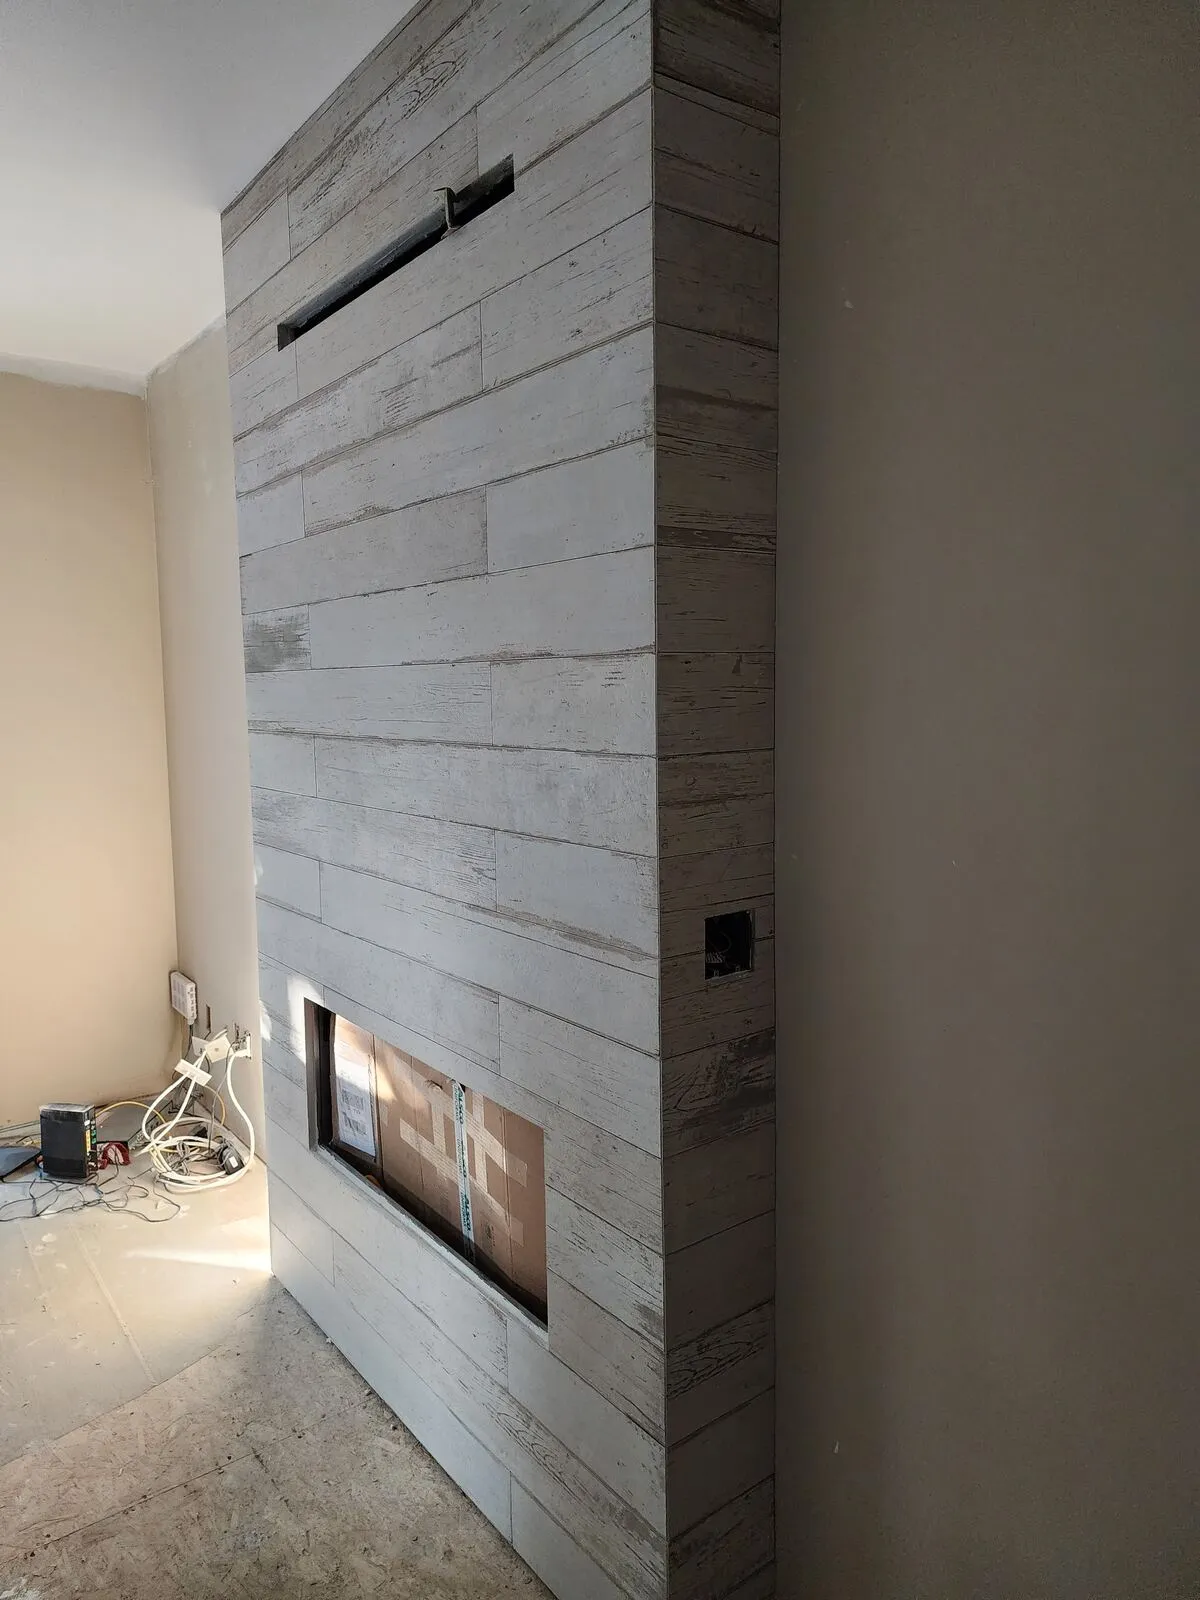
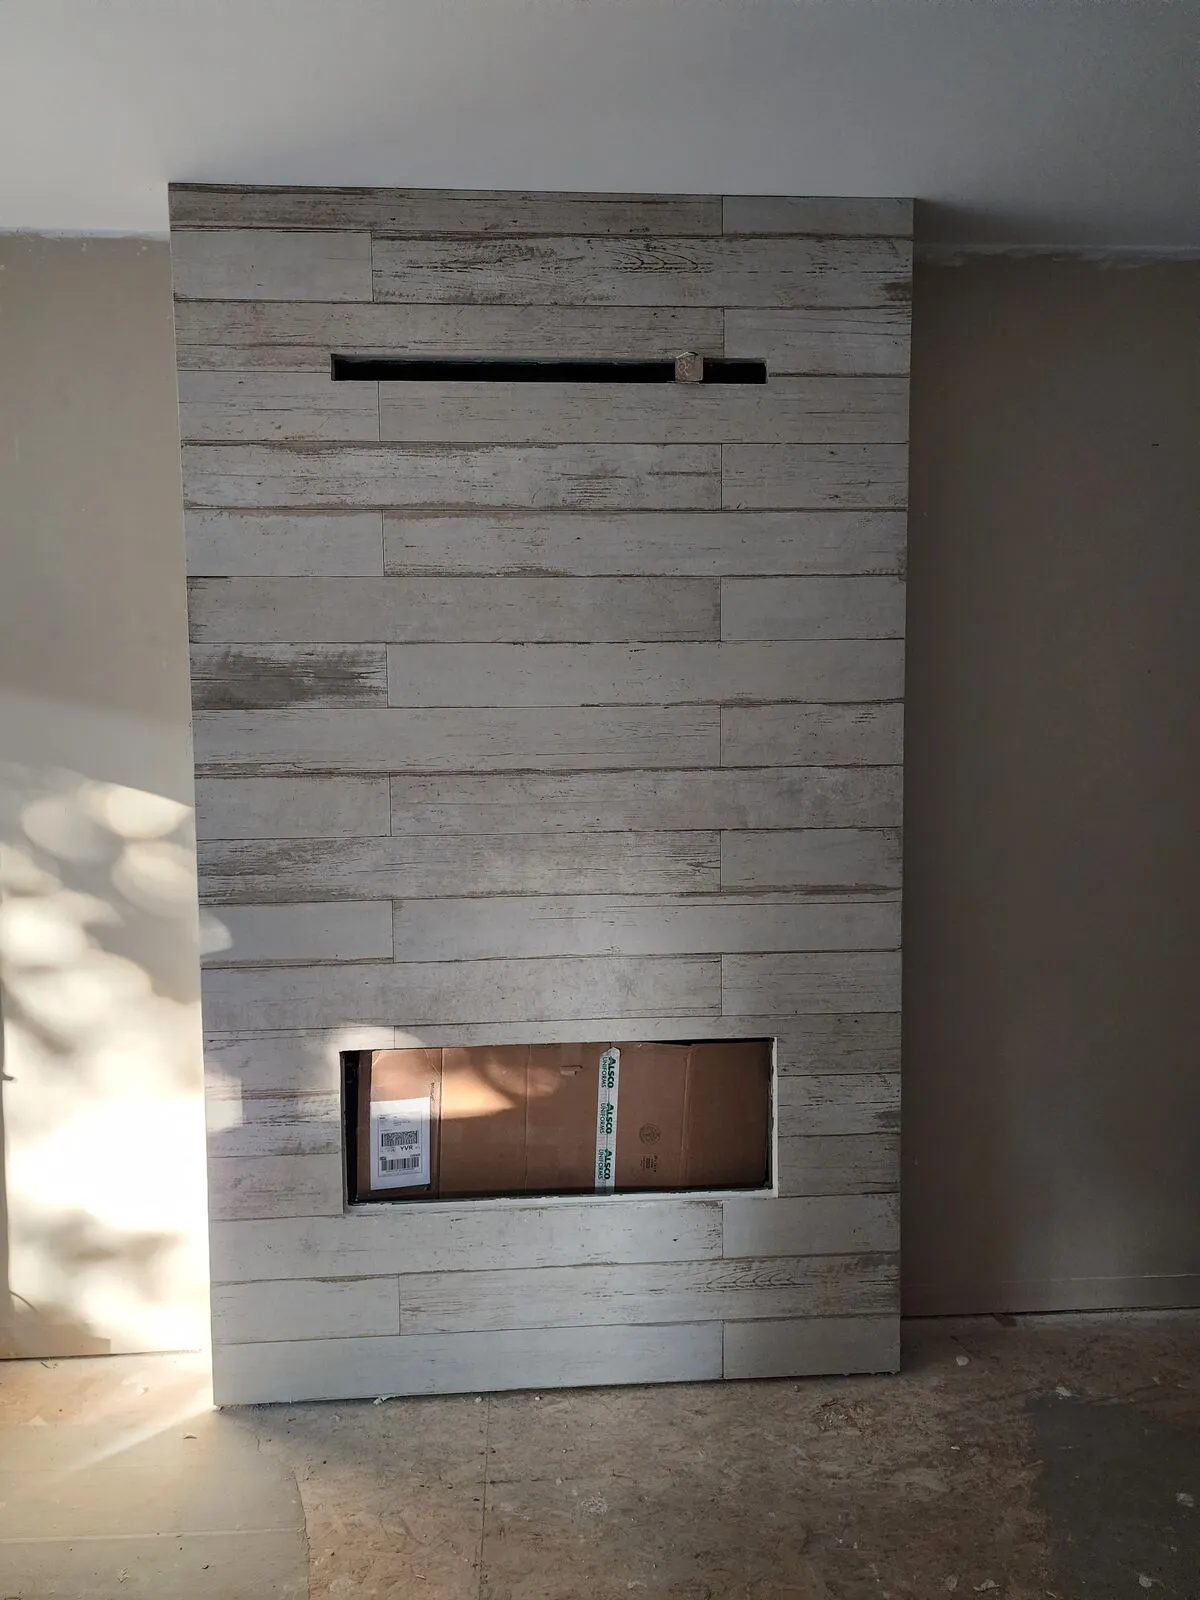
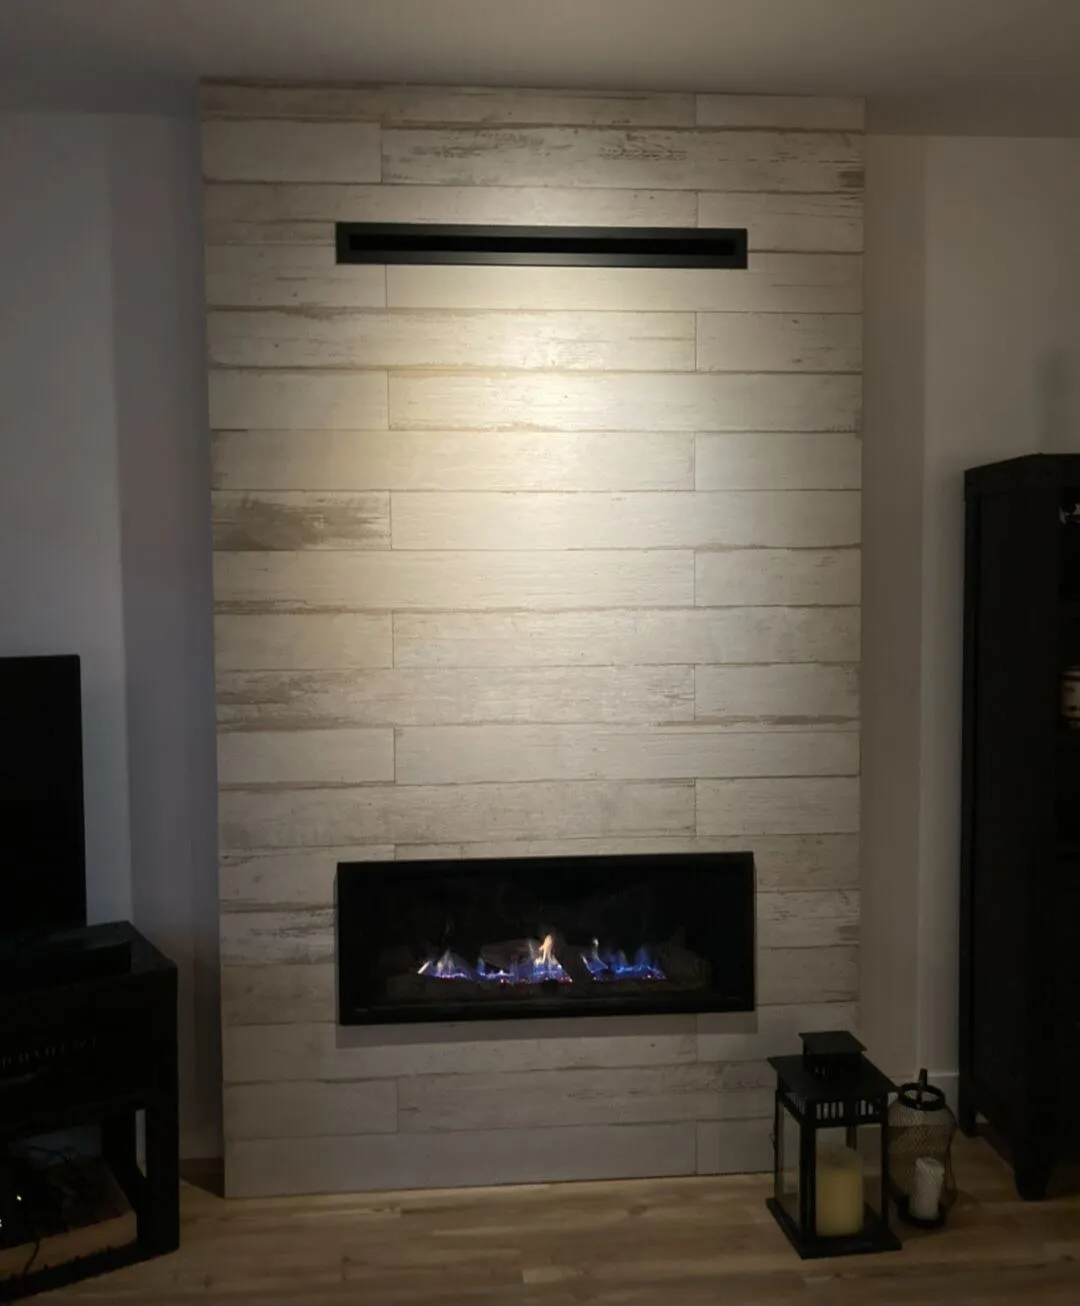
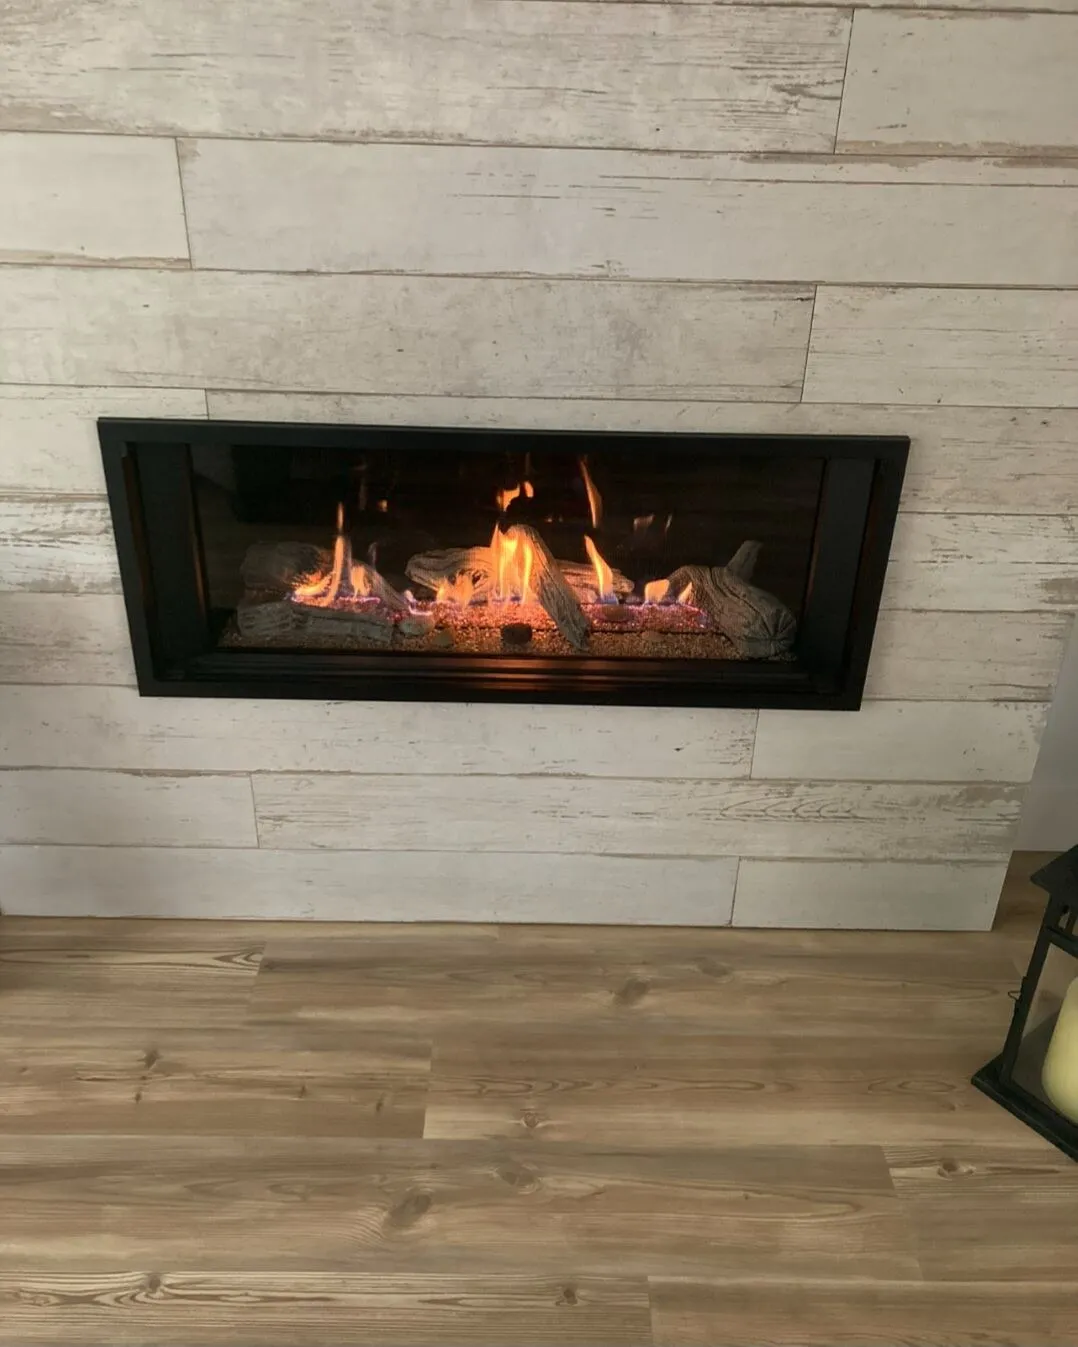
Rebuilding the fireplace: linear gas, whitewashed plank tile, 45° mitred corners
The dated beige-tile fireplace and painted mantel came off the wall in their entirety. In their place we framed a tall full-height cavity for a linear gas insert, ran a new gas line and fresh-air intake/vent through the rim joist, and built the surrounding wall out flat from floor to ceiling. The finish is a whitewashed wood-look porcelain plank tile run vertically, with each outside corner returned with a 45° mitred edge instead of a metal Schluter strip — the tile literally wraps the corner as a single seamless line. A continuous LED light bar above the insert reads as one clean horizontal slot, with no visible trim.
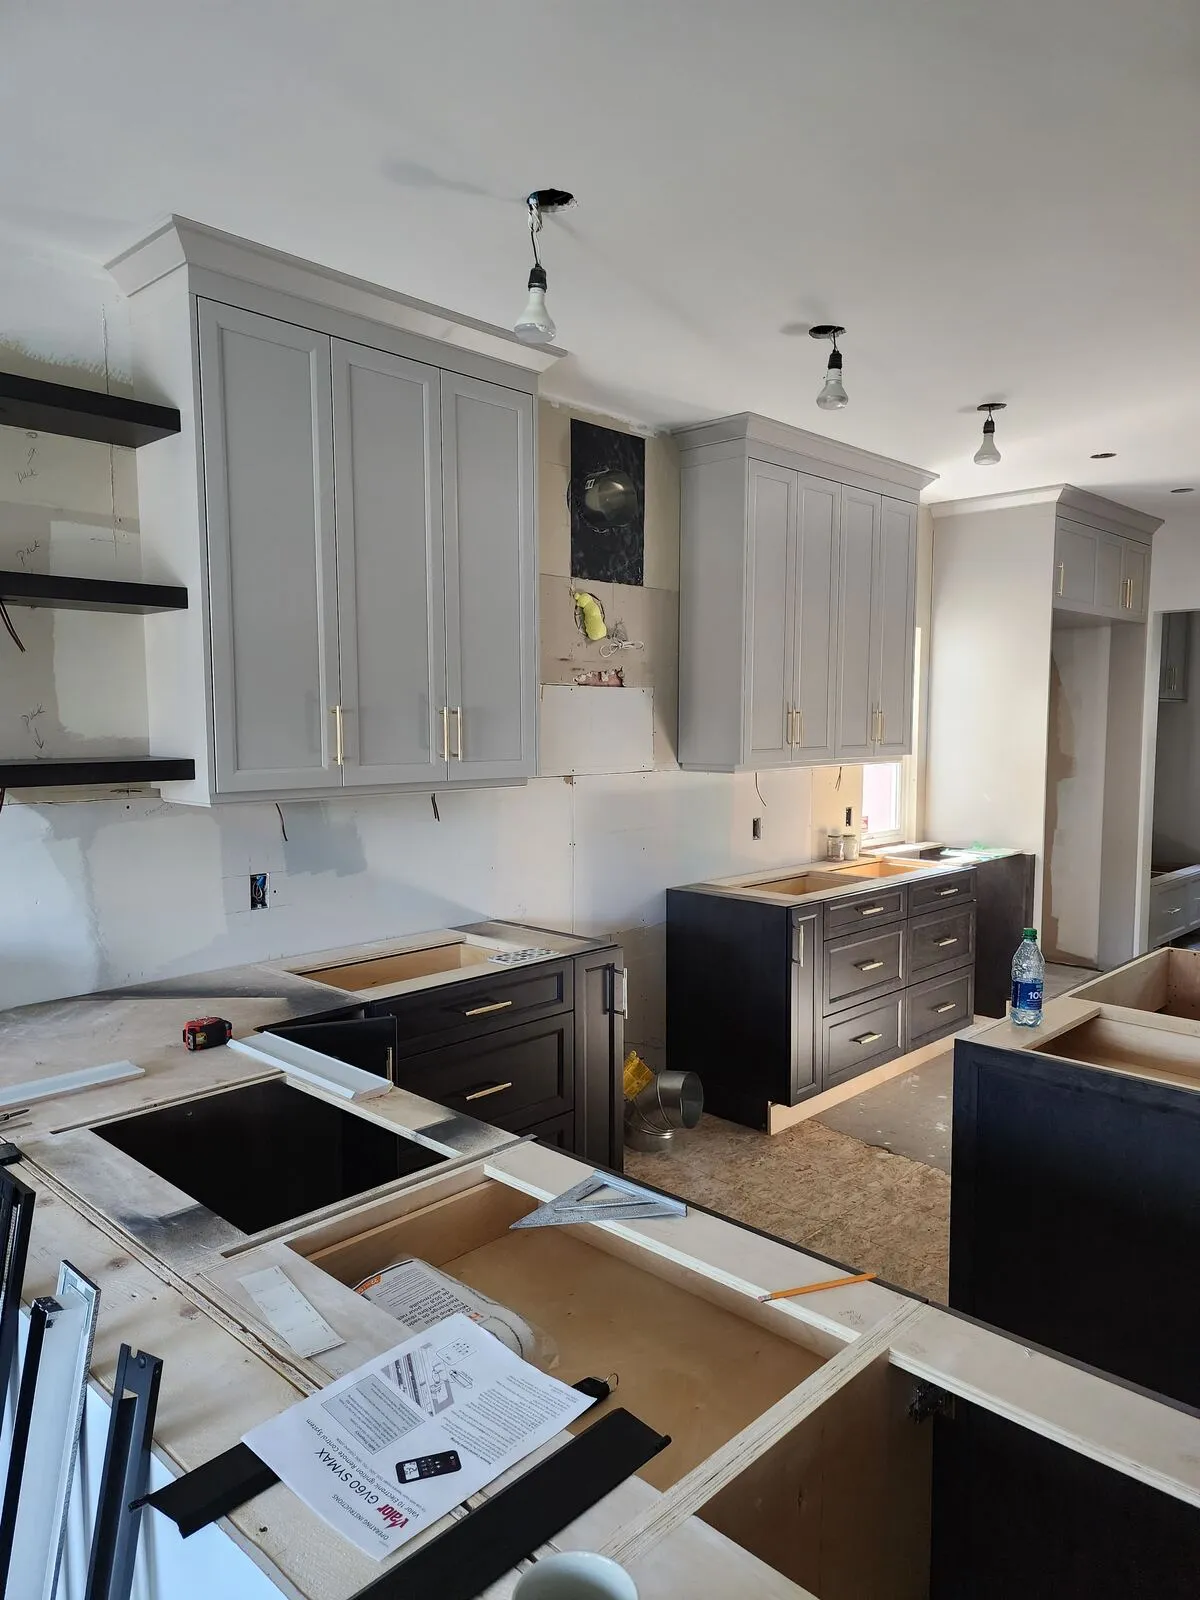
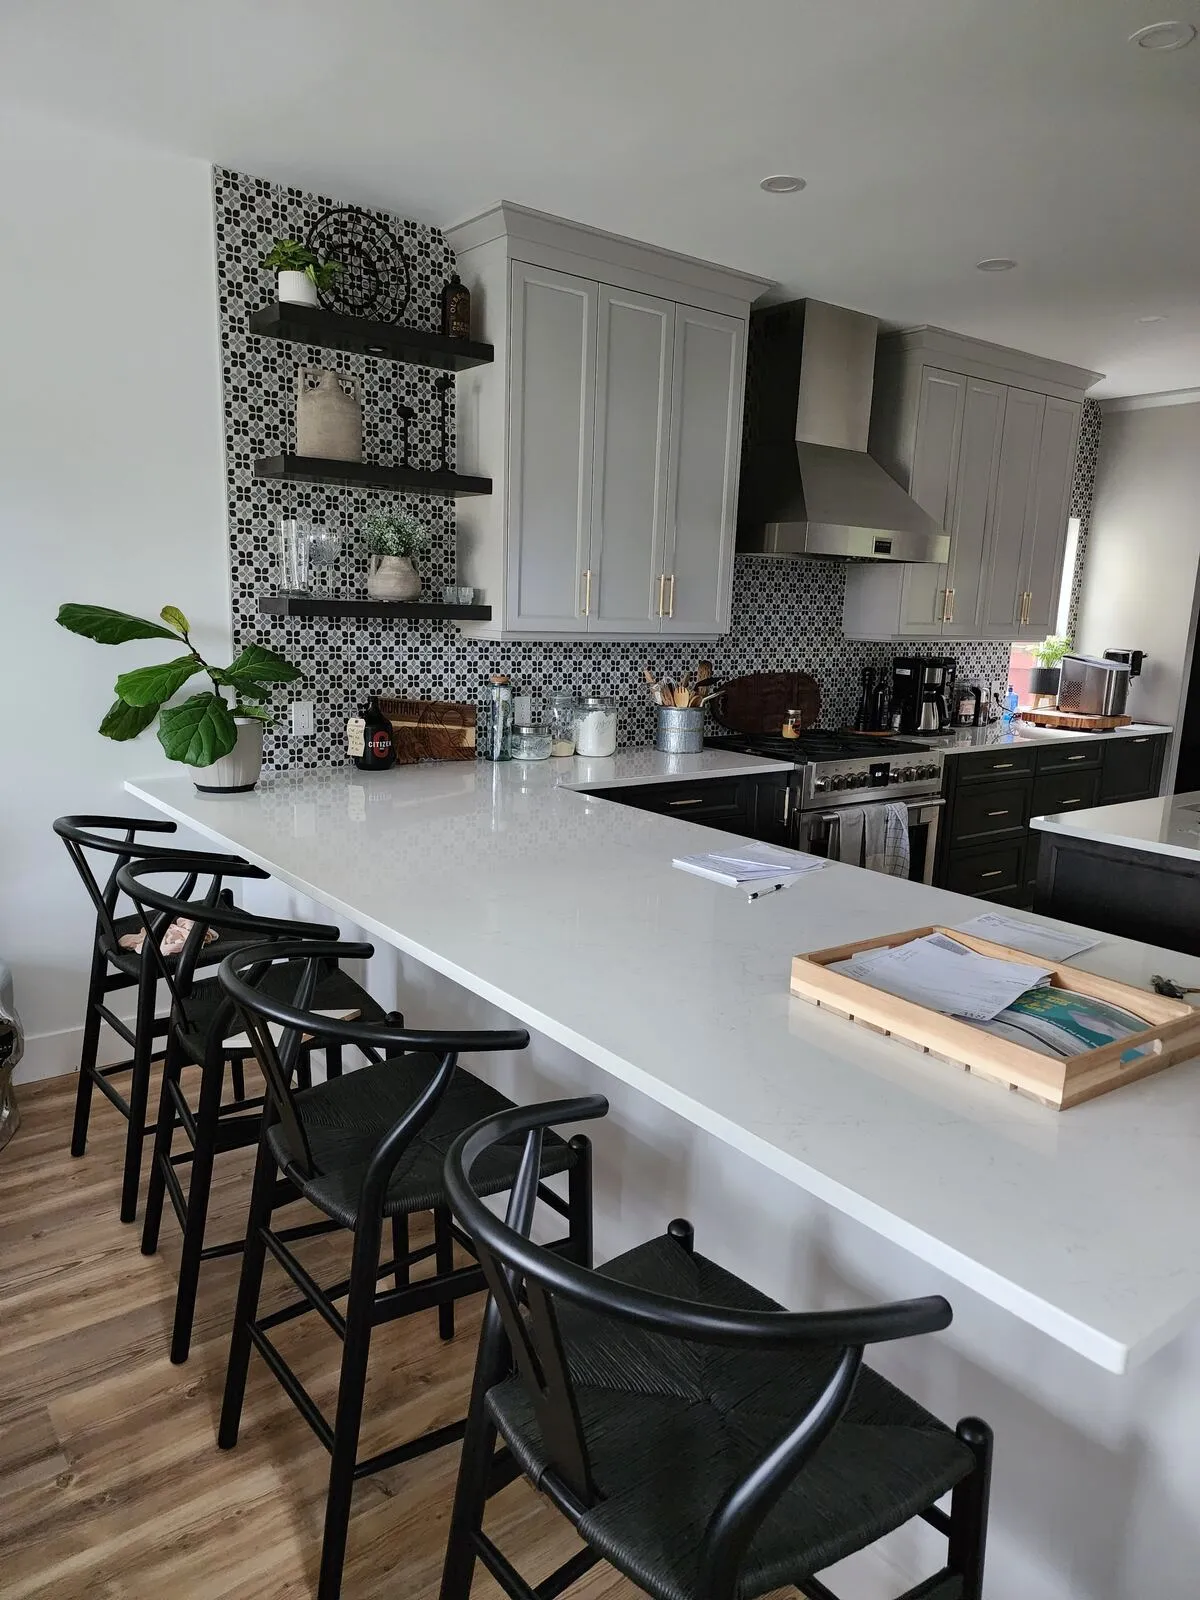
The new kitchen: warm-grey Shaker, quartz peninsula, mosaic backsplash
Once the wall was open and the new flooring was down, the new kitchen went in along the original kitchen footprint plus a new waterfall-edge peninsula extending into what used to be the wall line. Warm-grey Shaker uppers and lowers with brushed brass cup pulls, white quartz counters with a waterfall end on the peninsula, a single-bowl undermount stainless sink with a brushed brass pull-down faucet, and a black hex-and-dot mosaic tile backsplash anchored by two black floating shelves. The peninsula seats three on black wishbone-style stools — exactly the open-concept eat-in setup the family wanted.
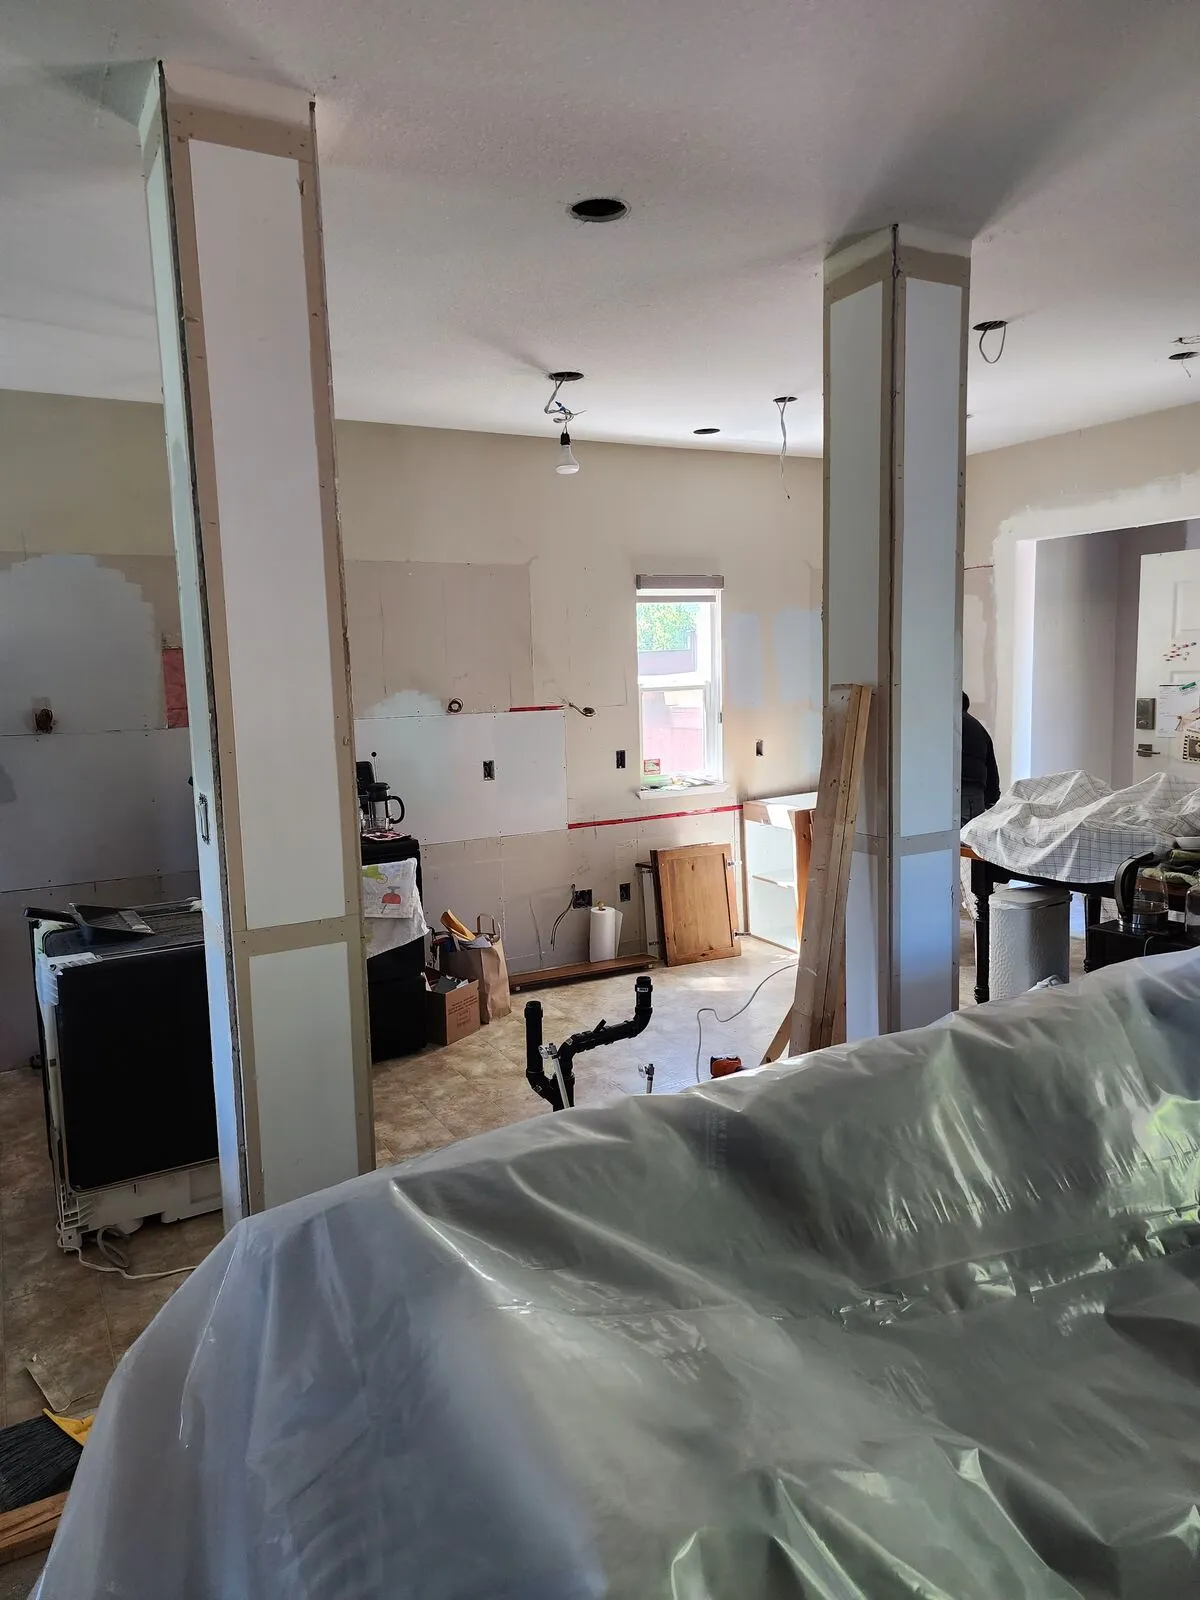
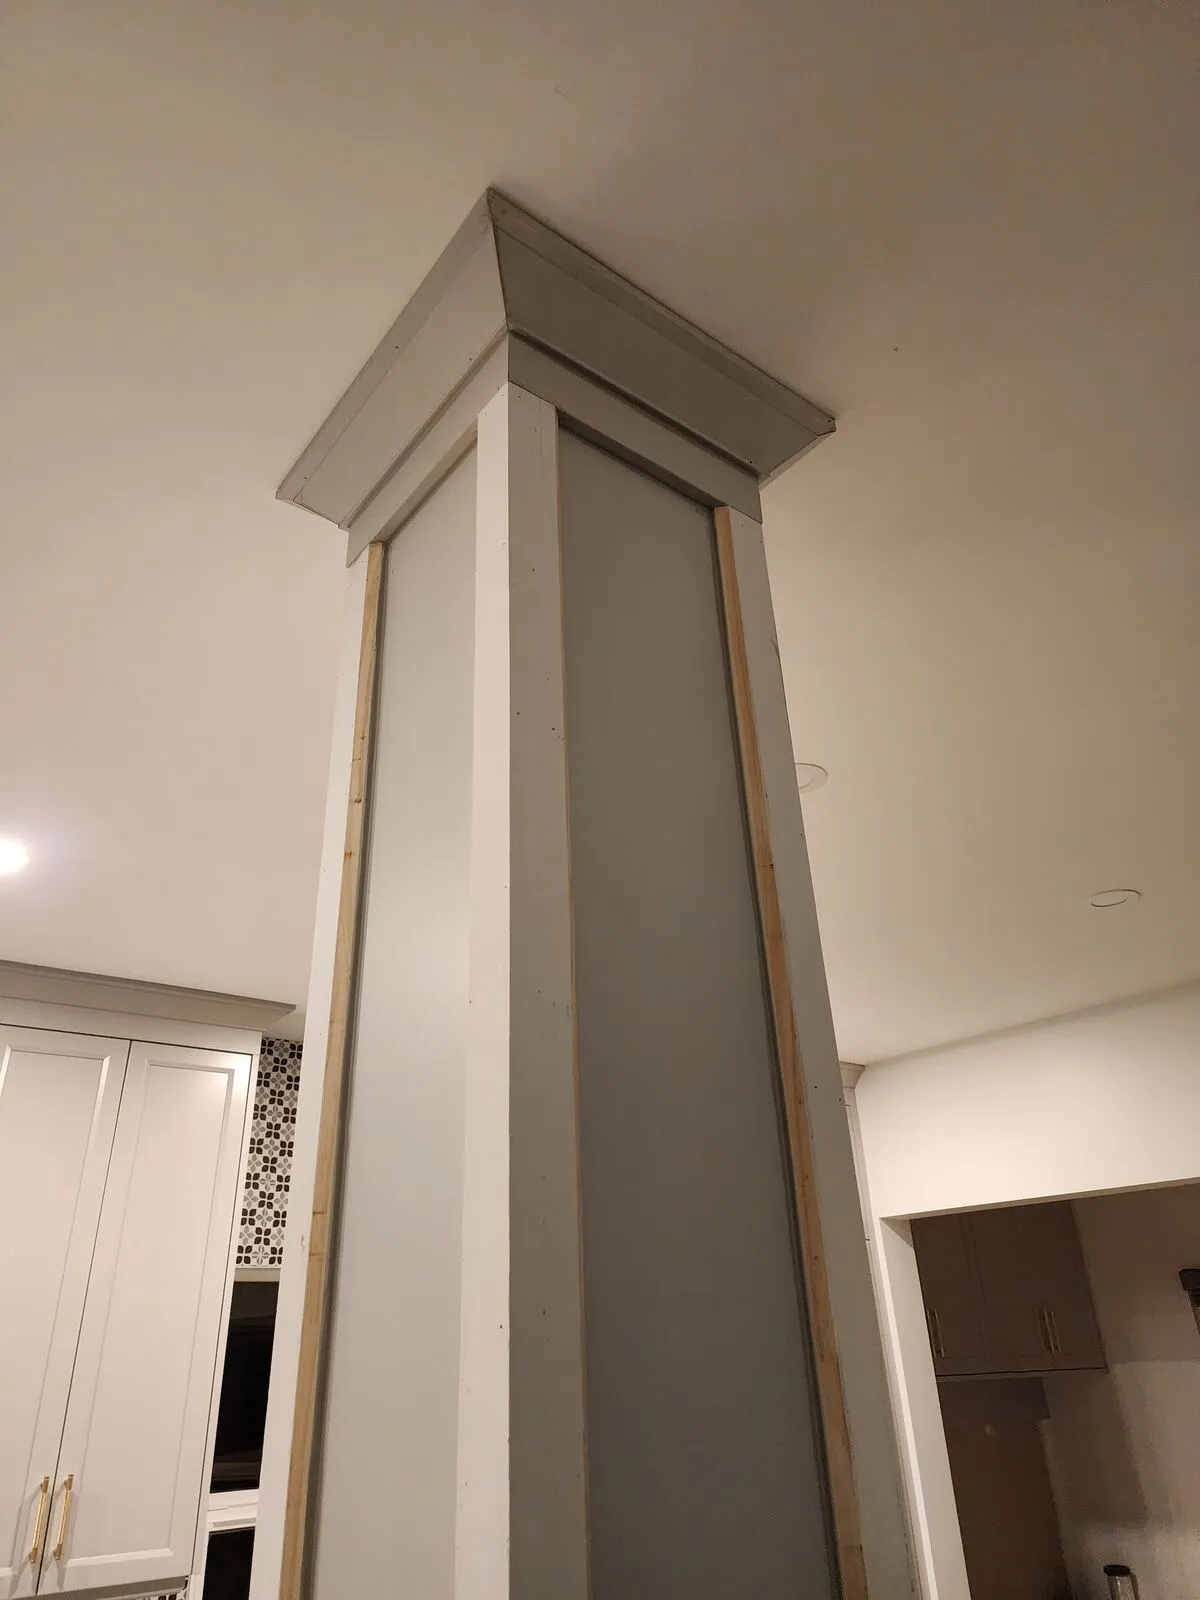
Wrapping the new support post as a finished column
The structural post that landed inside the new opening was wrapped on site with mitred MDF, a crown cap and a base plinth so it reads as a finished interior column rather than a piece of leftover framing. Painted in the same crisp white as the trim and ceiling, it ties the new opening back into the living-room side and gives the eye a clean vertical anchor between the kitchen and the seating area.
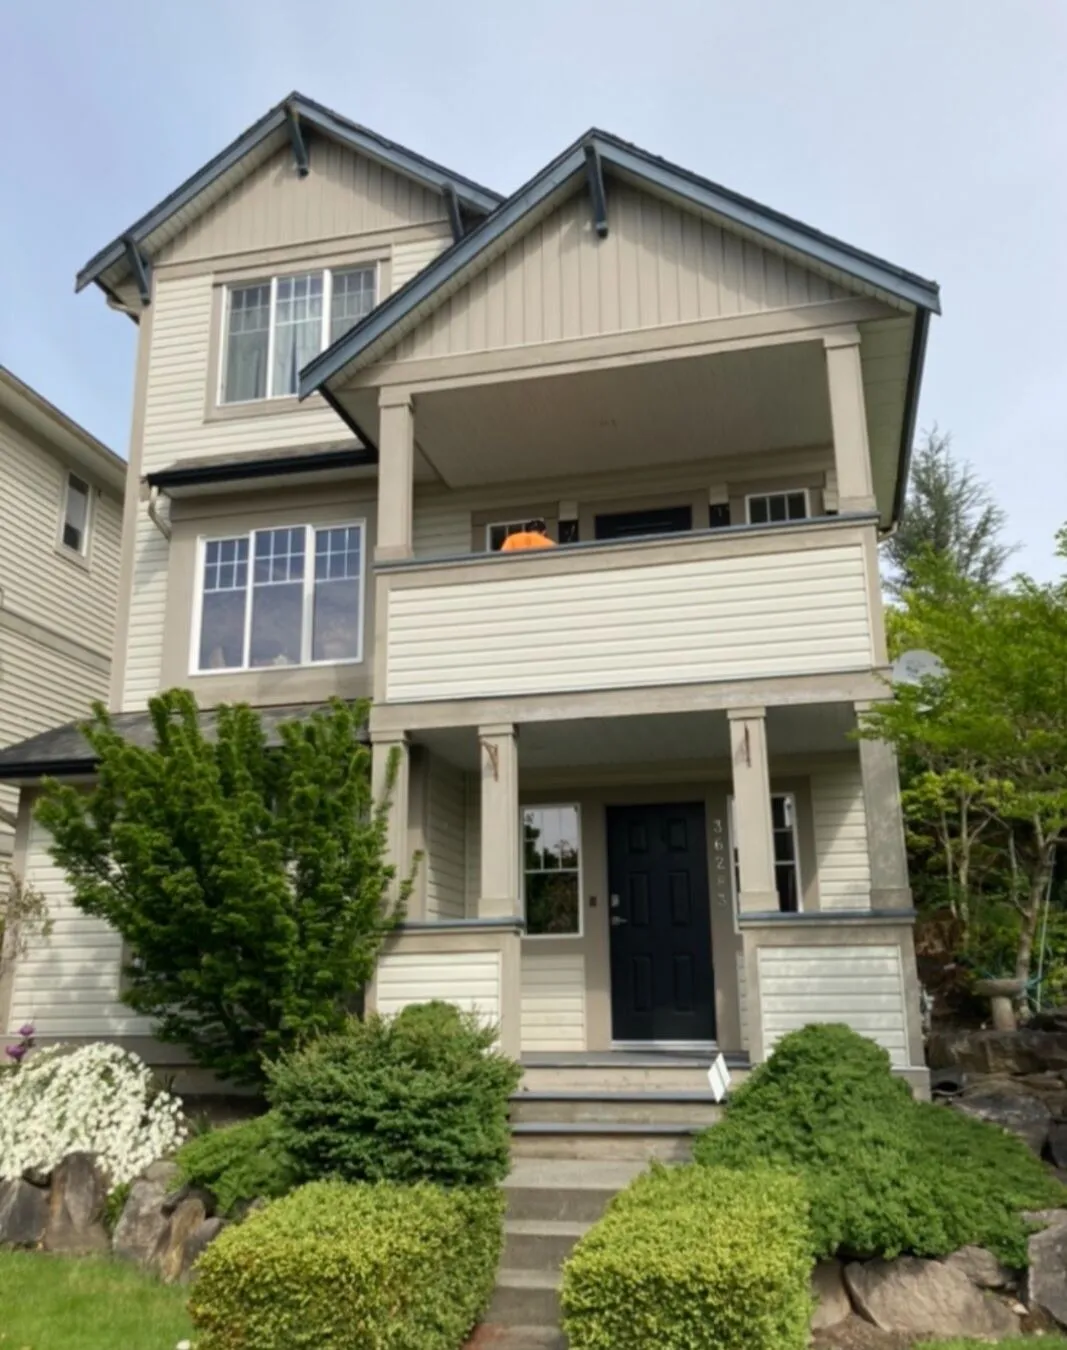
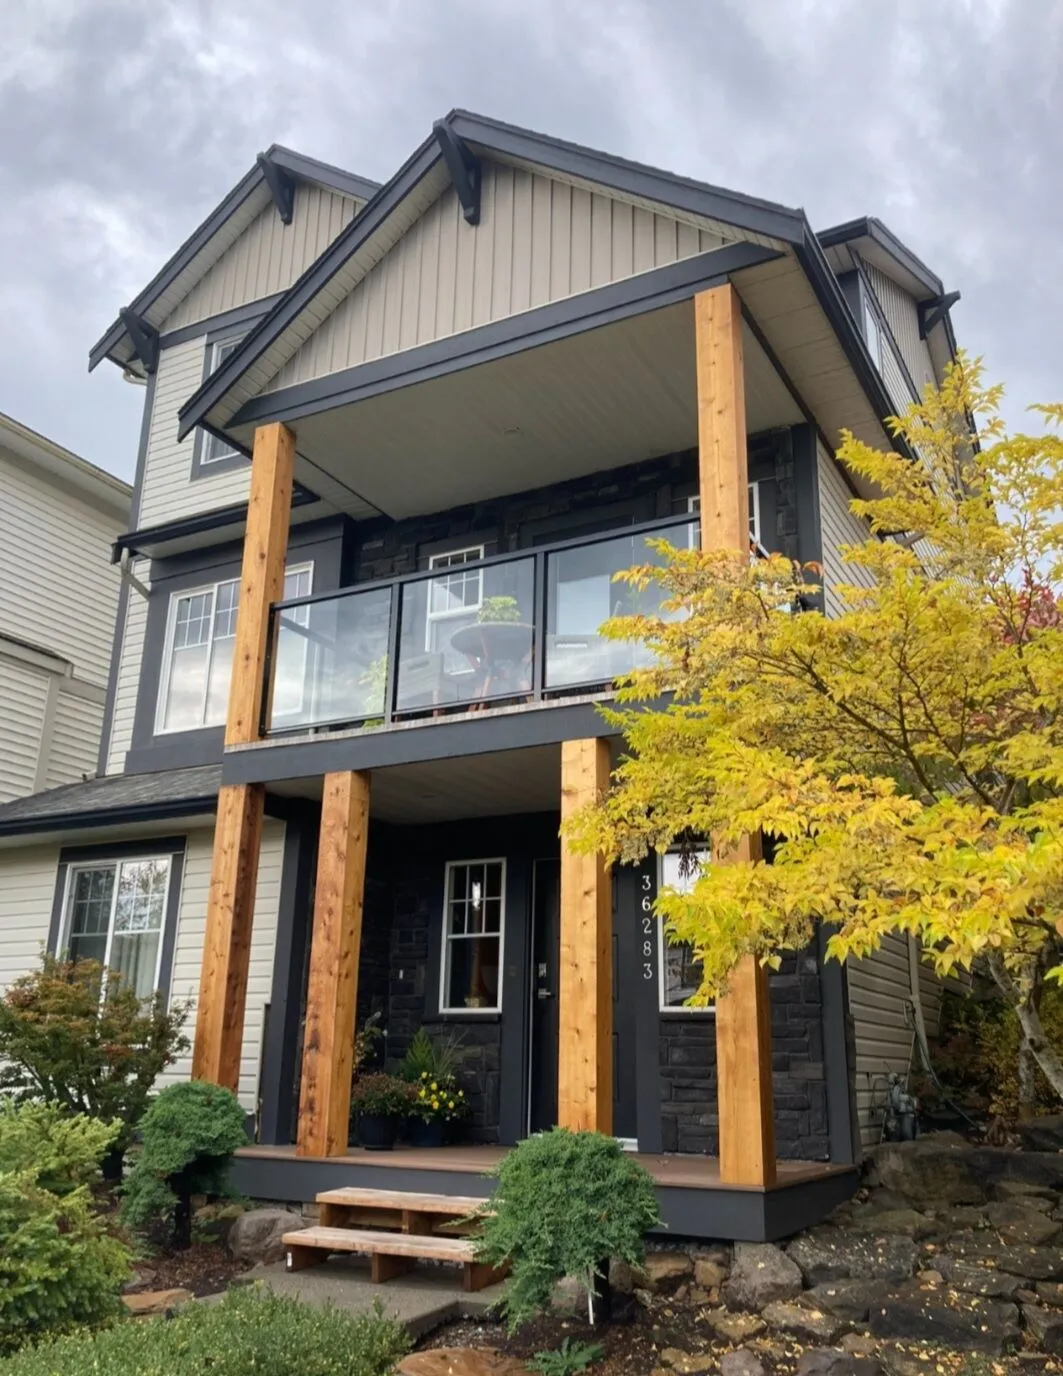
Outside: pony walls out, cedar-wrapped posts, vinyl deck and composite landing
The exterior scope ran in parallel with the interior work. Before: a flat beige front elevation with white-painted wood pony walls on the upper deck and a plain concrete landing. After: the pony walls came out down to the structural posts, the posts were straightened, flashed and wrapped in rough-sawn cedar continuous from grade to soffit on both front columns, a frameless glass guardrail went in across the upper deck in place of the old wood railing, and a vinyl waterproof membrane was installed across the full upper deck surface — both a finished walking surface and the rain roof for the covered porch below. At the front entry, the original landing was rebuilt in composite decking with matching open-tread steps. The house was repainted in deep charcoal with black trim at the same time, so the natural cedar reads as a warm vertical accent against a dark backdrop.