The call: 'something's soft underfoot on the rooftop deck'
The Vancouver homeowner had noticed the rooftop deck membrane was bubbling near the threshold of the slider, and a couple of spots felt soft underfoot. Inside, the wall directly below the deck was starting to show staining. We opened up a small inspection area on day one, found rot in the plywood and joists below the membrane, and after talking it through with the owner agreed the only honest fix was to strip the deck back to the structure, see exactly how far the rot had spread, and rebuild it from the framing up rather than patch over more failing material. That's the project these photos document.
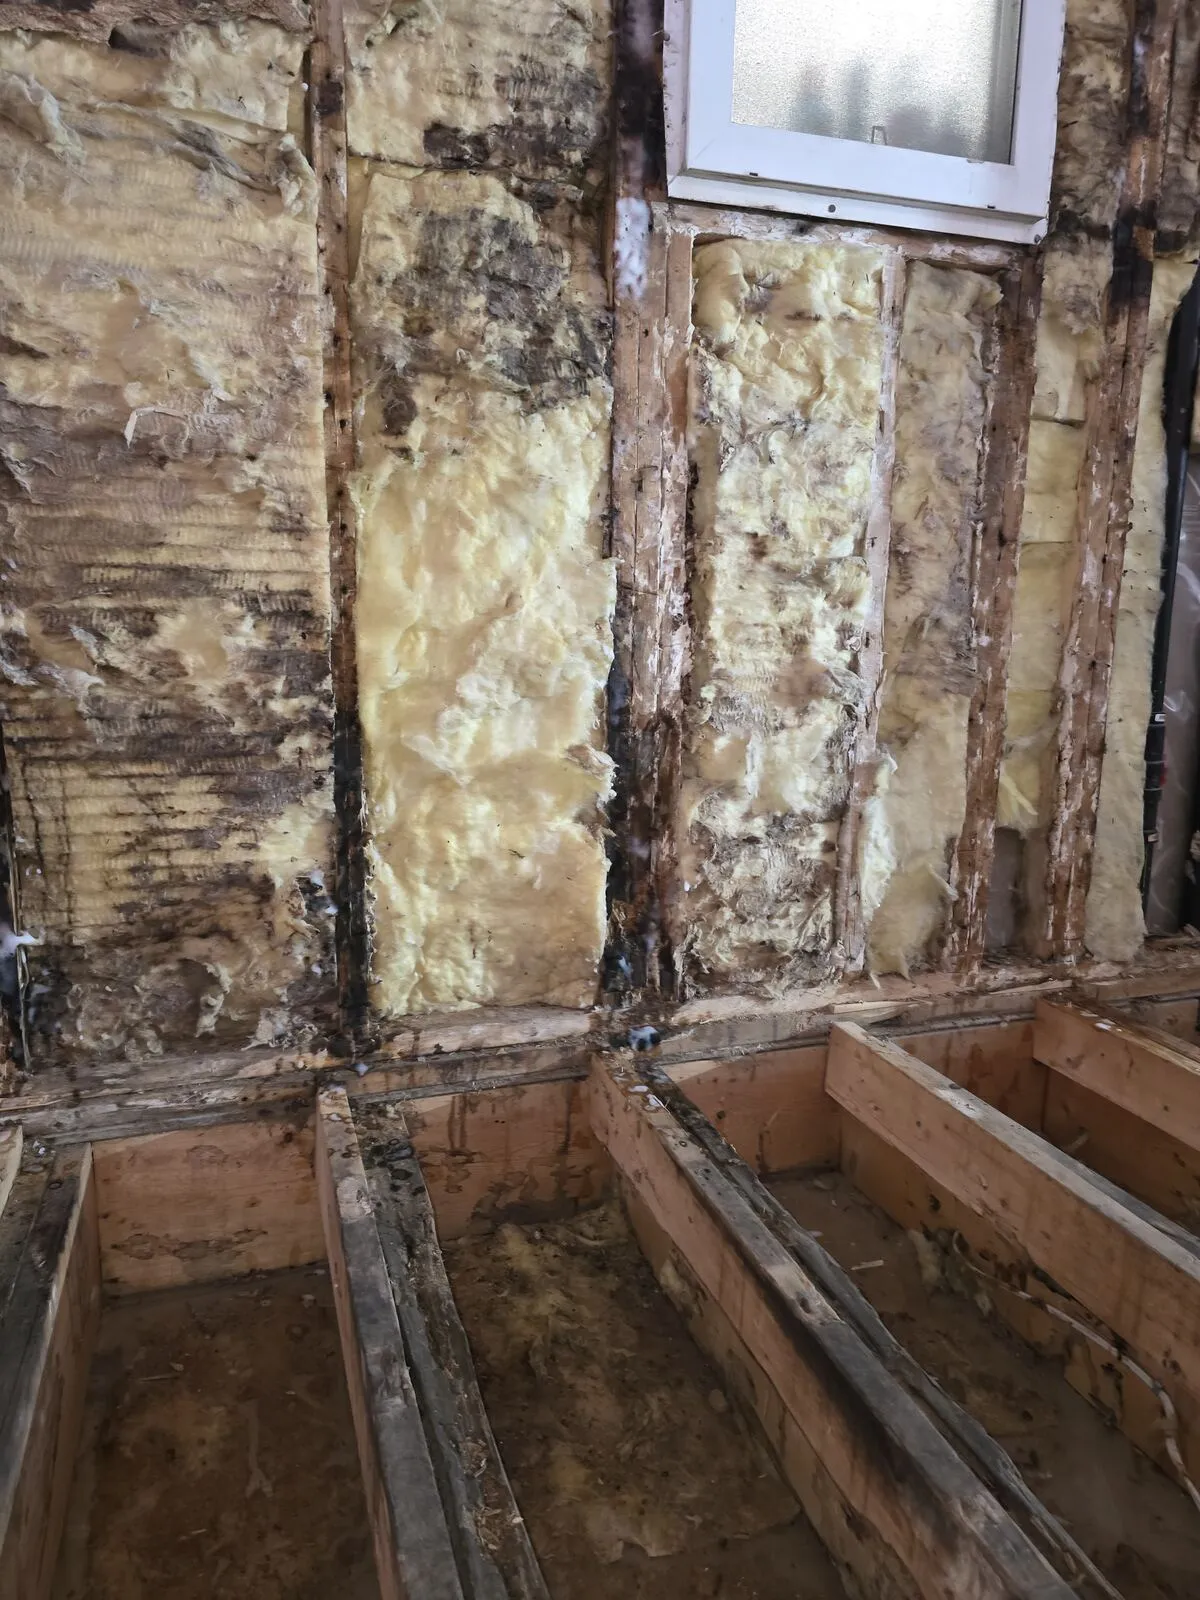
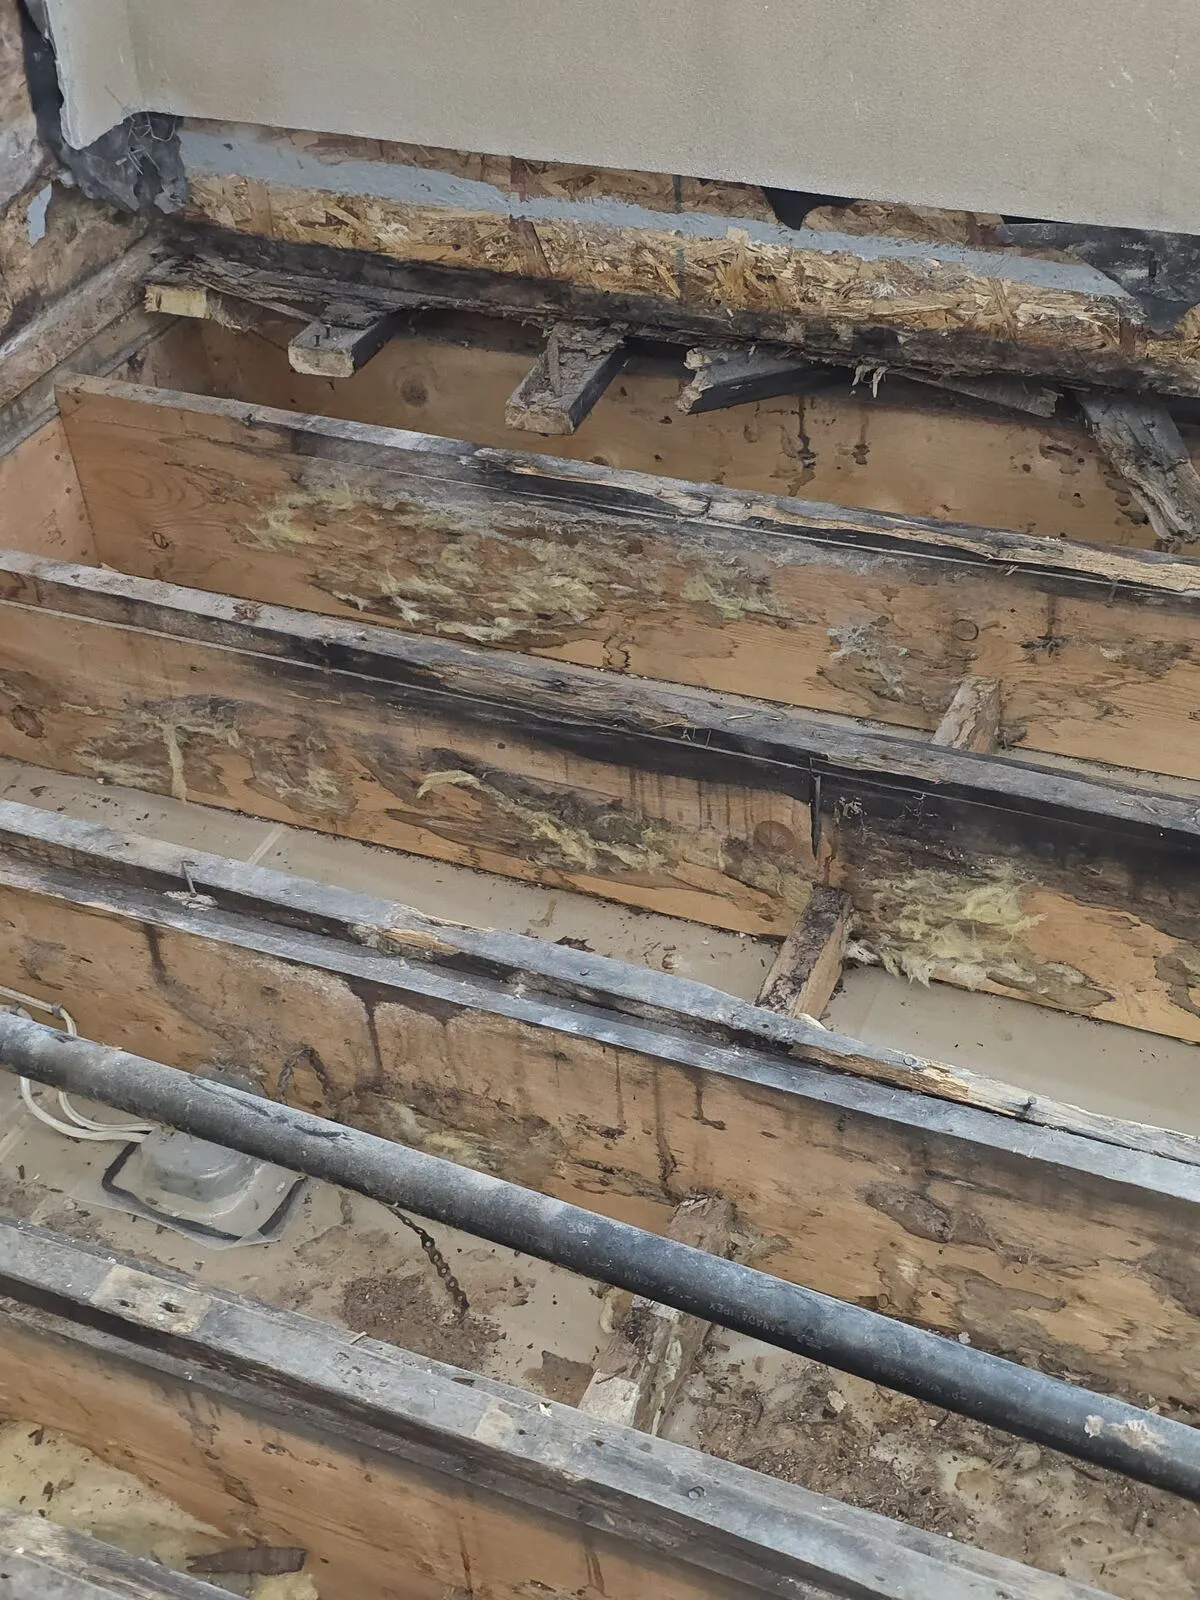
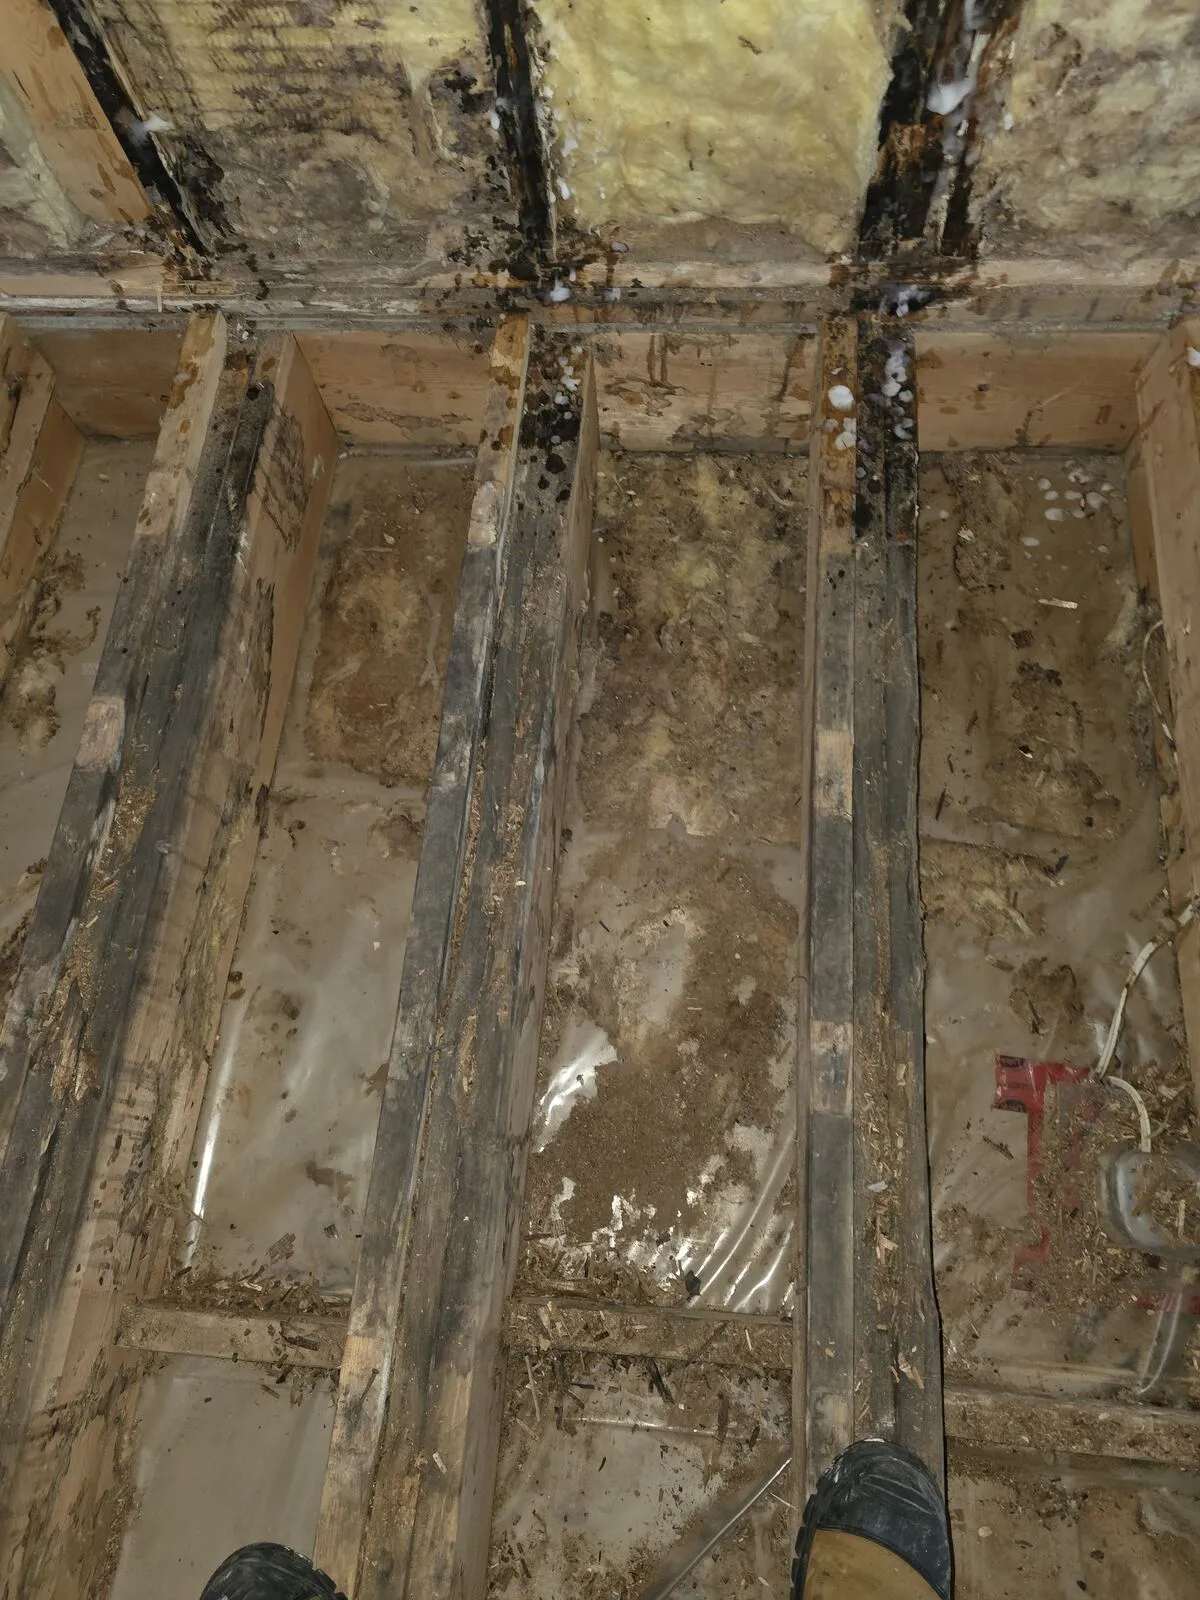
Demo: vinyl, plywood and insulation off — finding the damage
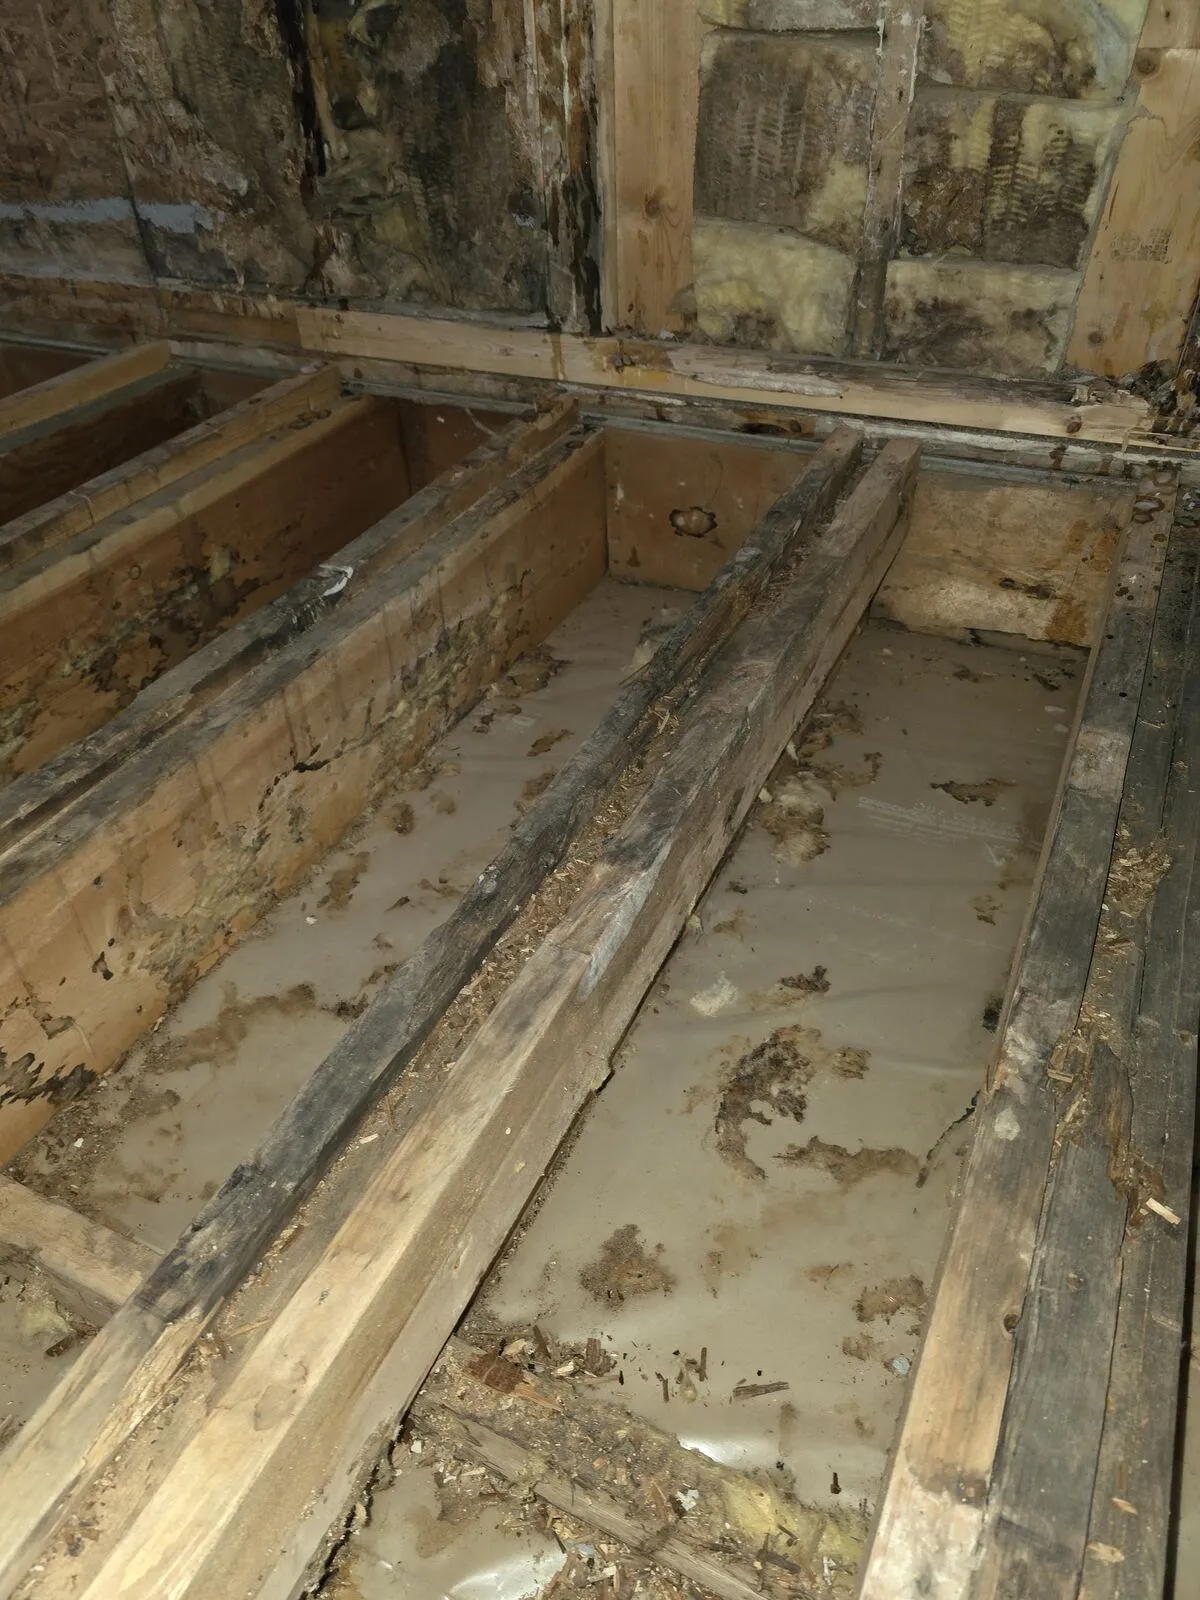
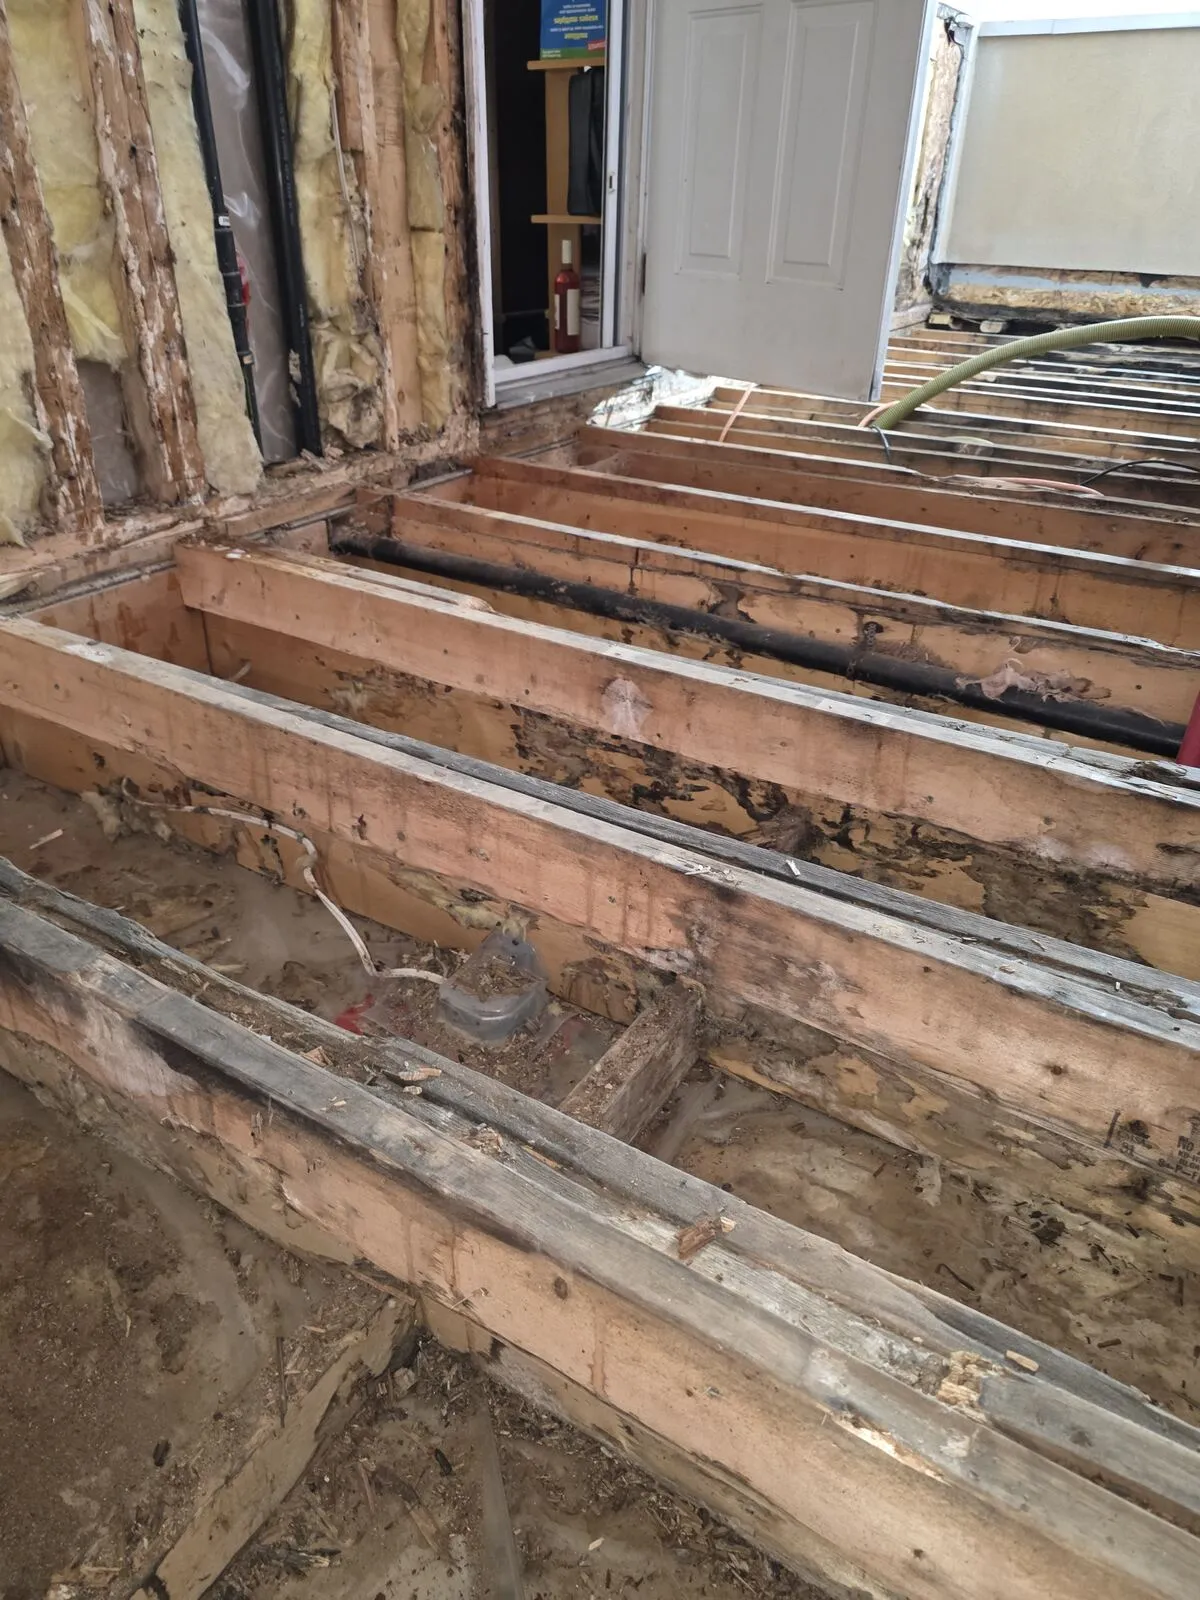
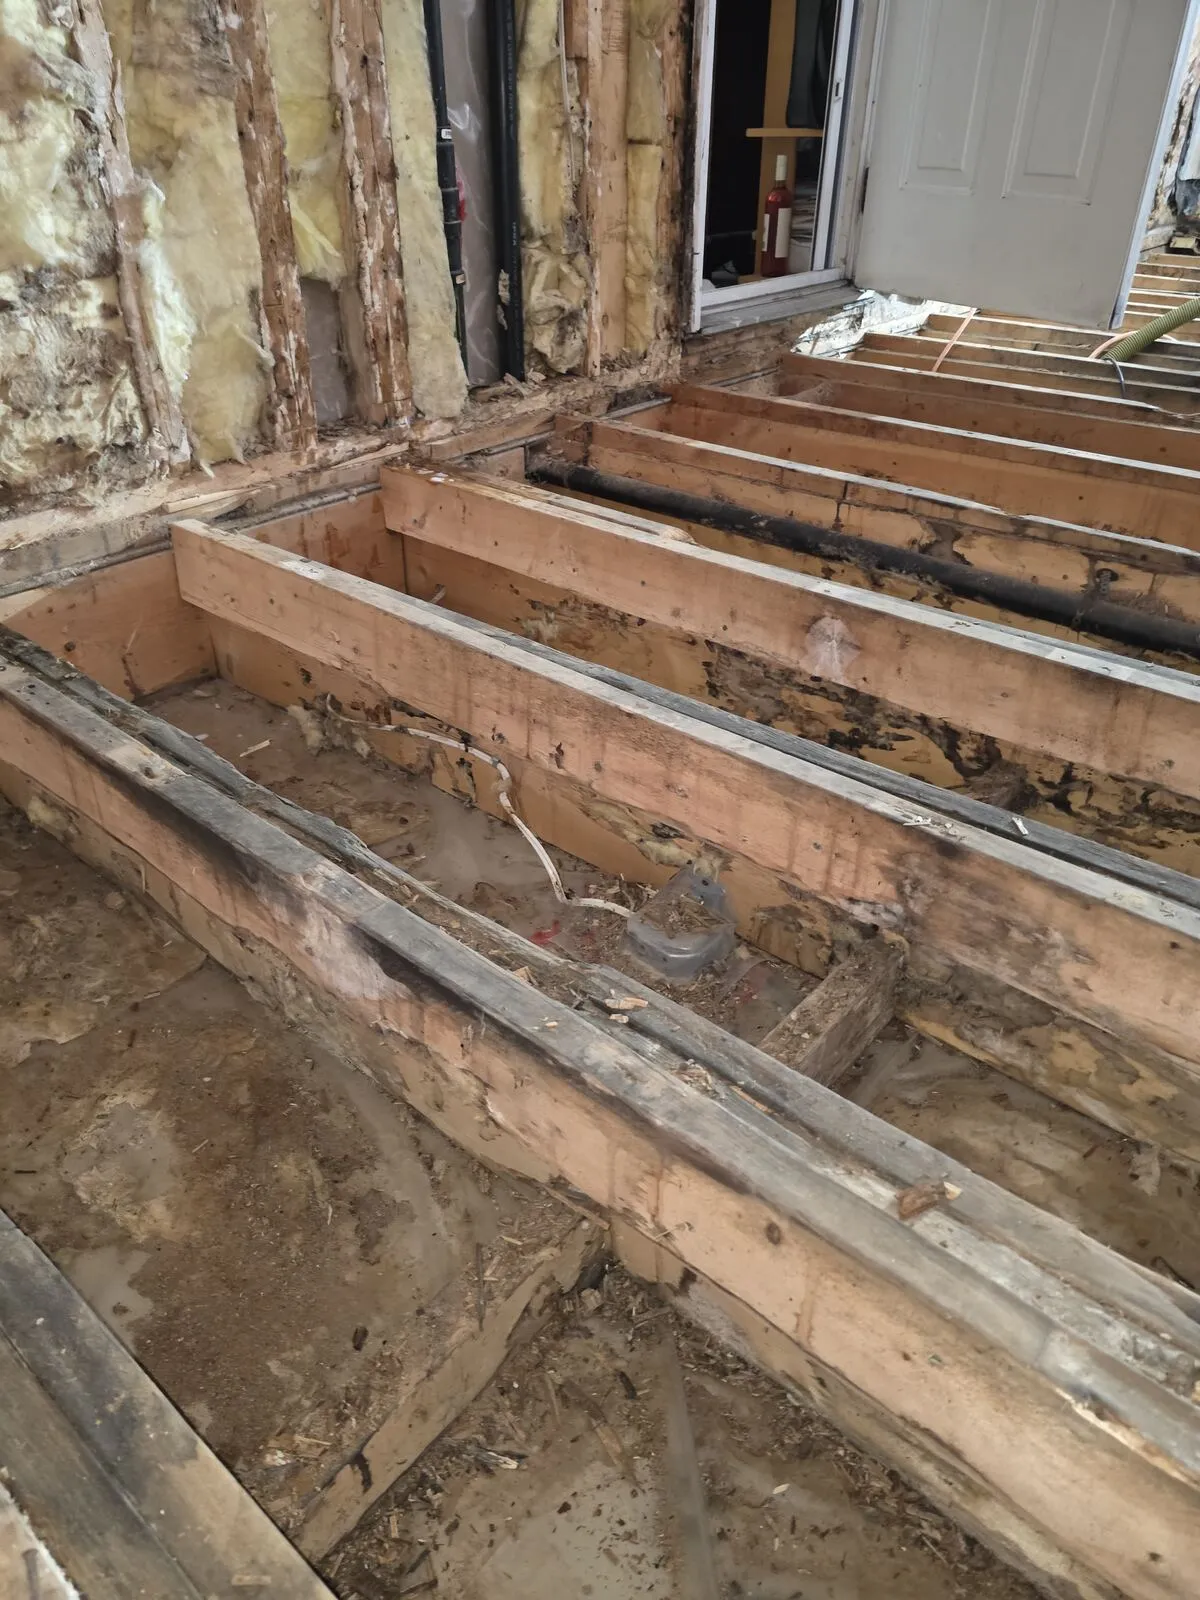
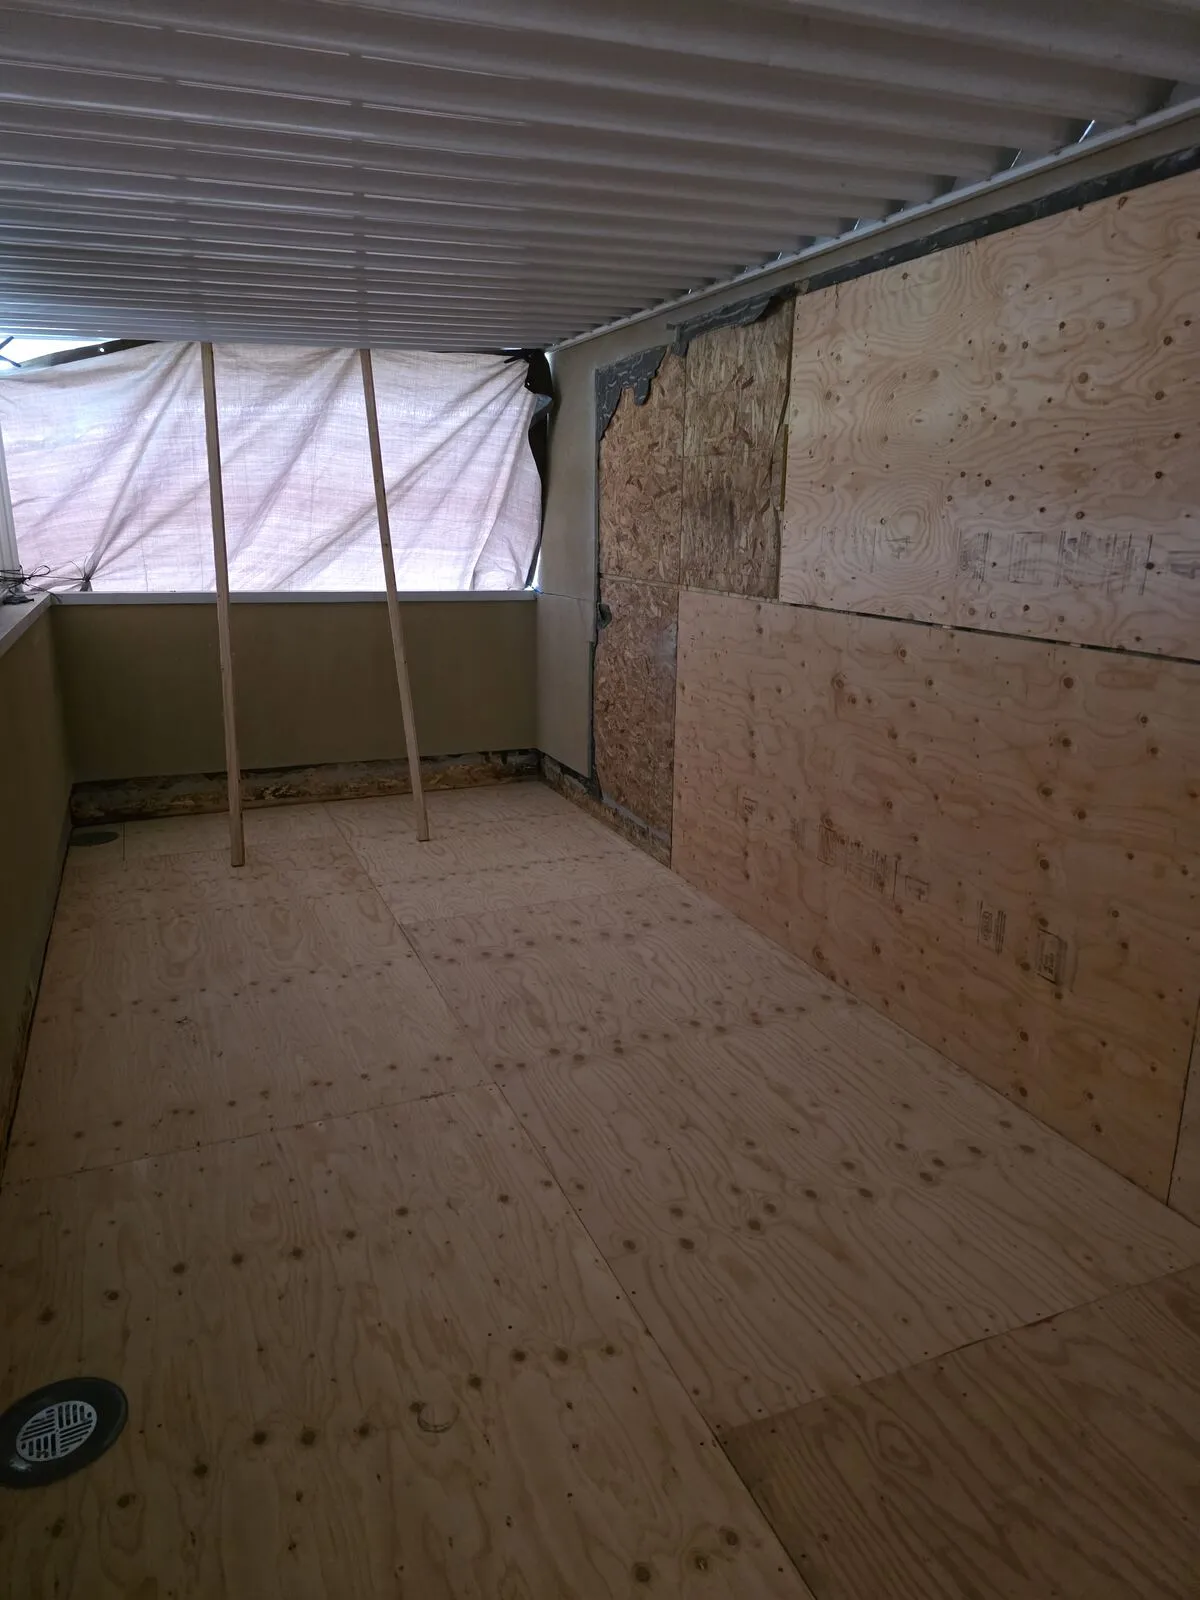
Once the vinyl membrane and plywood subfloor came up, the scope grew. Multiple joists were rotted along their top edges where water had been sitting trapped between the membrane and the sheathing, the rim joist at the wall was saturated, the batt insulation in the floor cavities was wet enough to be lifted out in handfuls, and pulling the interior wall sheathing back at the threshold showed rot running down the studs as well — the leak had been getting into the wall assembly, not just the deck. The photos here are the discovery phase: the dirty grey film on the joists is years of fine debris that washed through the failed membrane, the black marks are where water sat against pressure-treated rim, and the yellow fiberglass is the original batt insulation that came out as part of the tear-out.
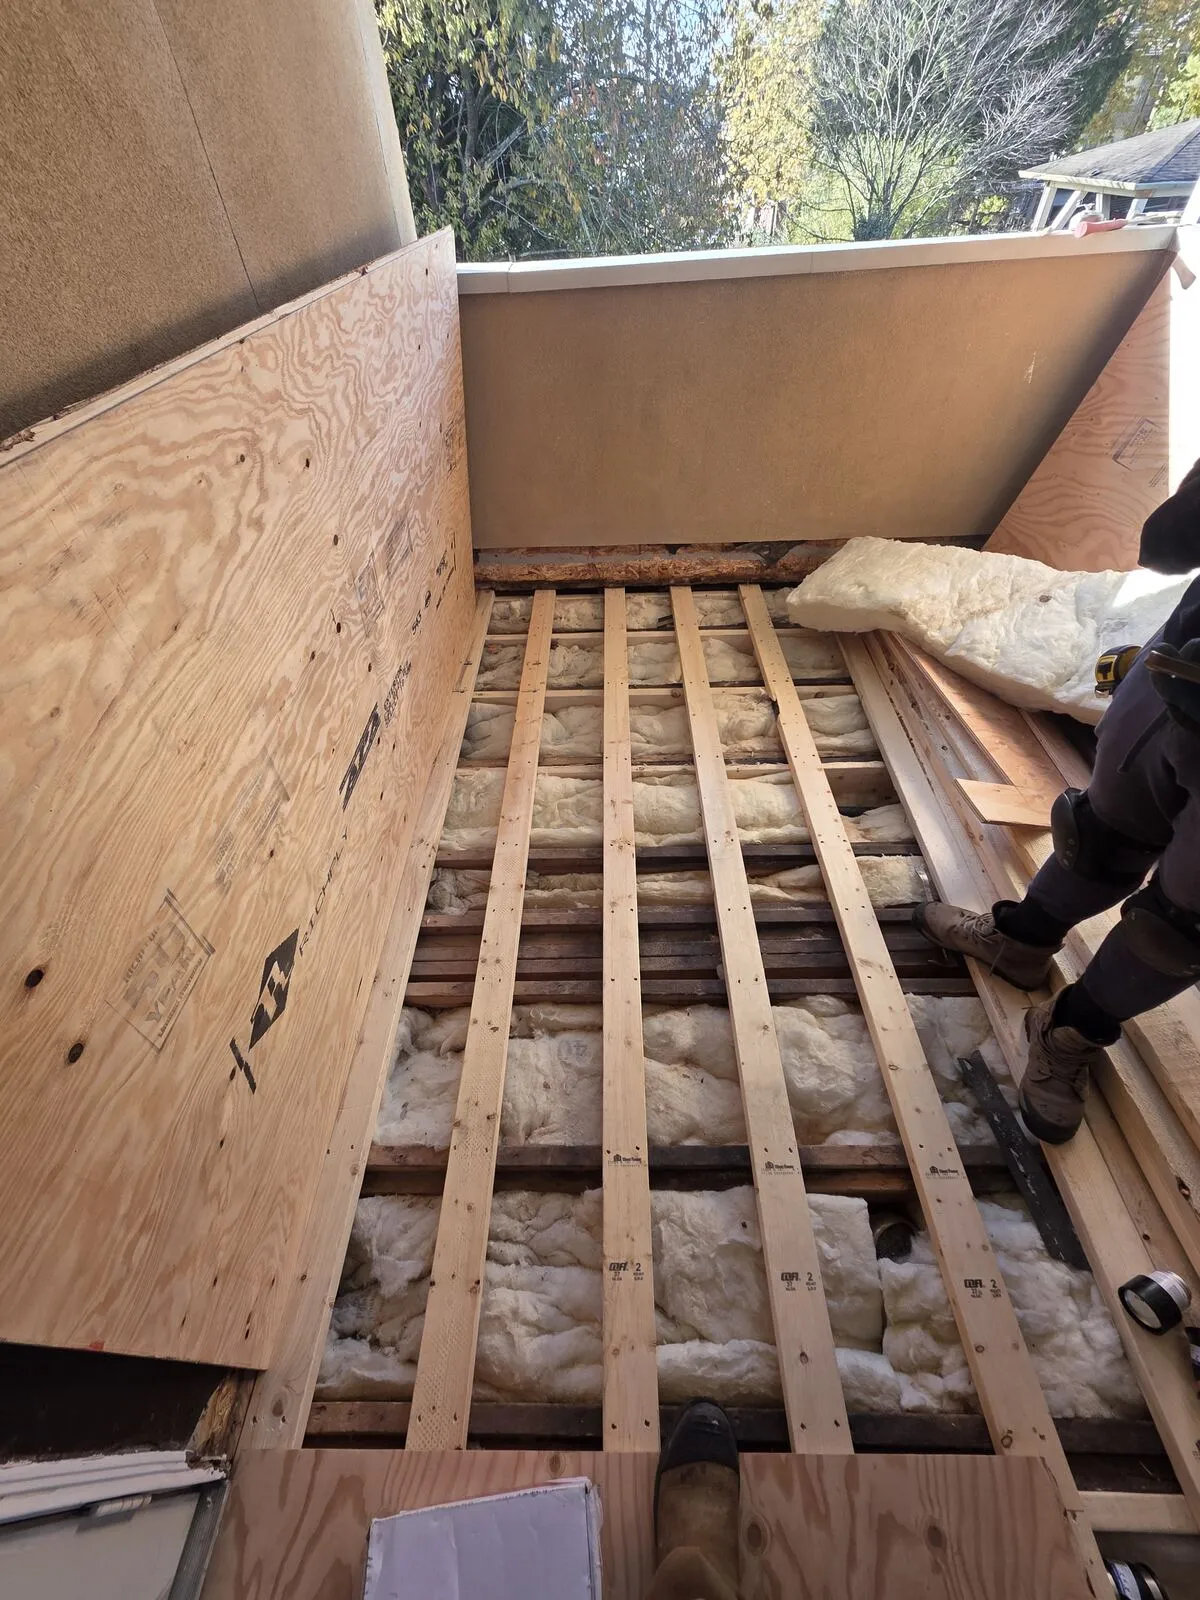
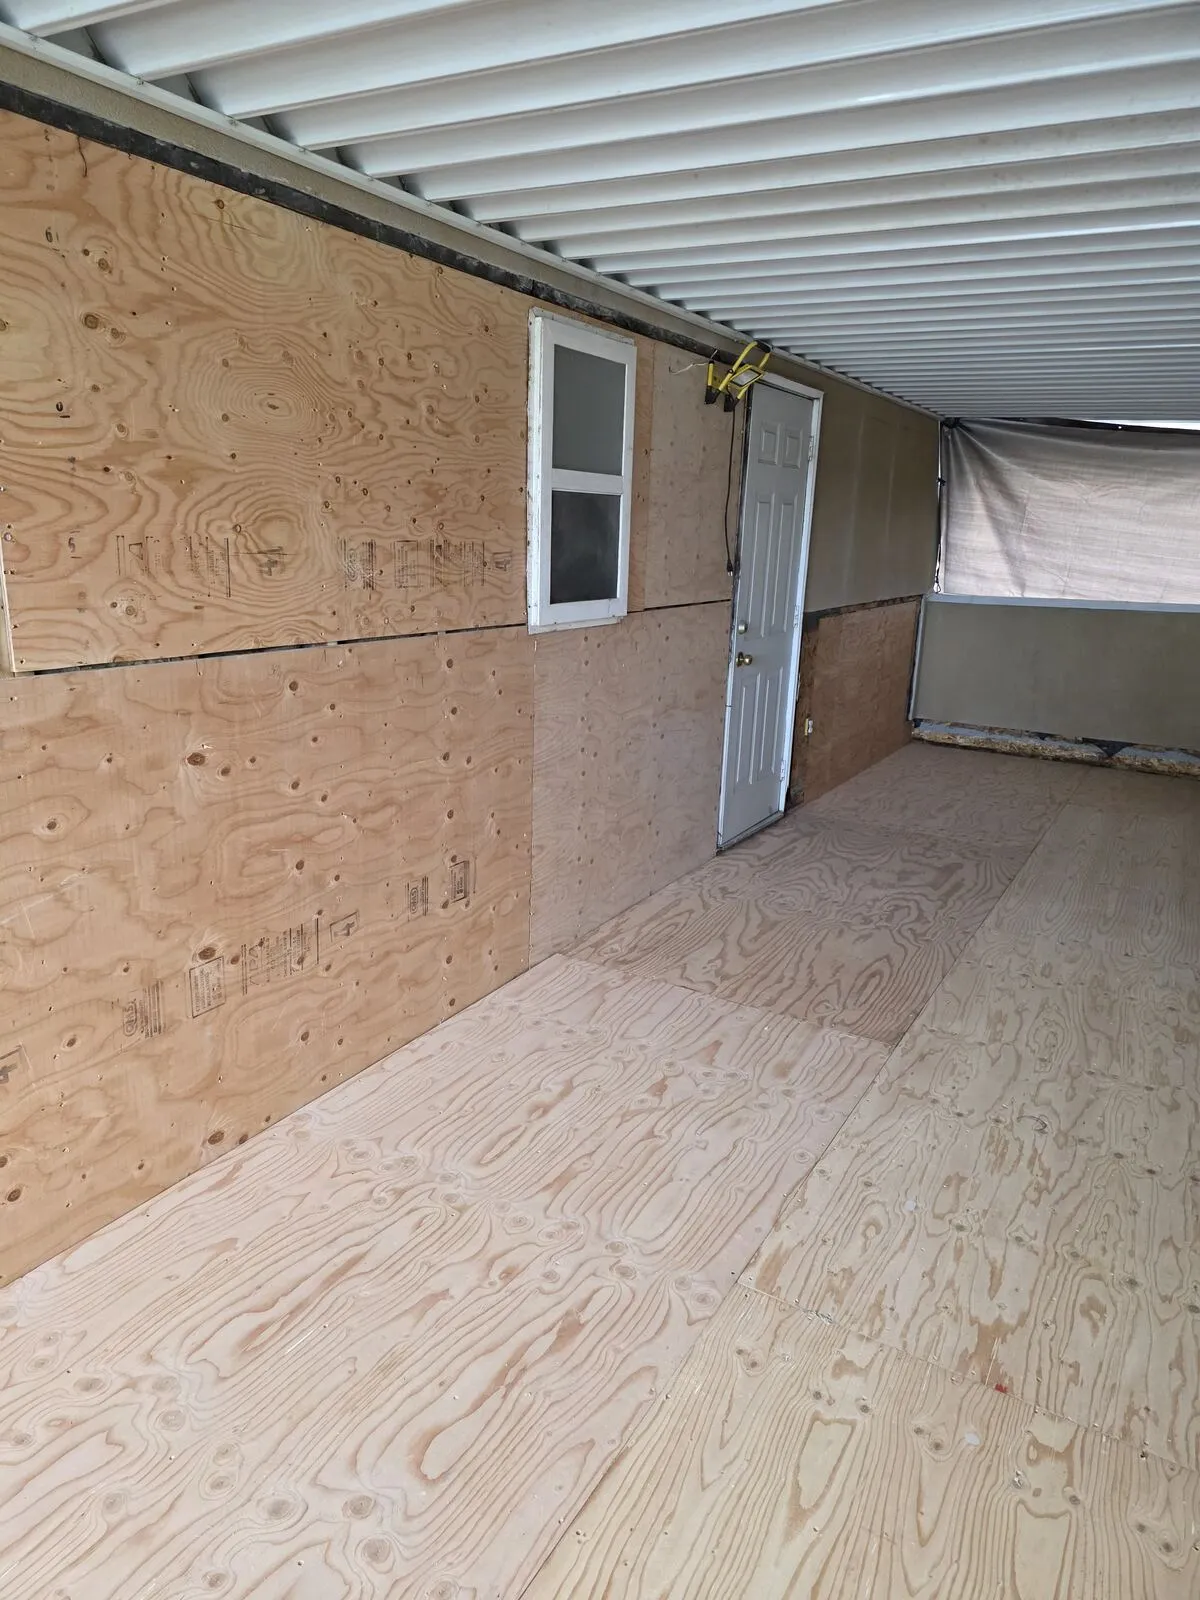
Rebuild: new framing, sleepers, insulation and sheathing
With the scope confirmed we cut out every compromised member back to sound wood, sistered or fully replaced the affected joists, replaced the rim and the wall studs that had rotted, and re-insulated the floor cavities and the exterior wall bays with new batt insulation. Pressure-treated 2×4 sleepers then went on top of the joists at calibrated heights to build a continuous drainage slope toward the existing drain — the original deck never had enough slope, which is half the reason the membrane failed in the first place. New tongue-and-groove plywood went down over the sleepers as the membrane substrate, and the interior wall got fresh plywood/OSB sheathing patched into the gaps where the original had to come out.
Weather barrier and new vinyl membrane
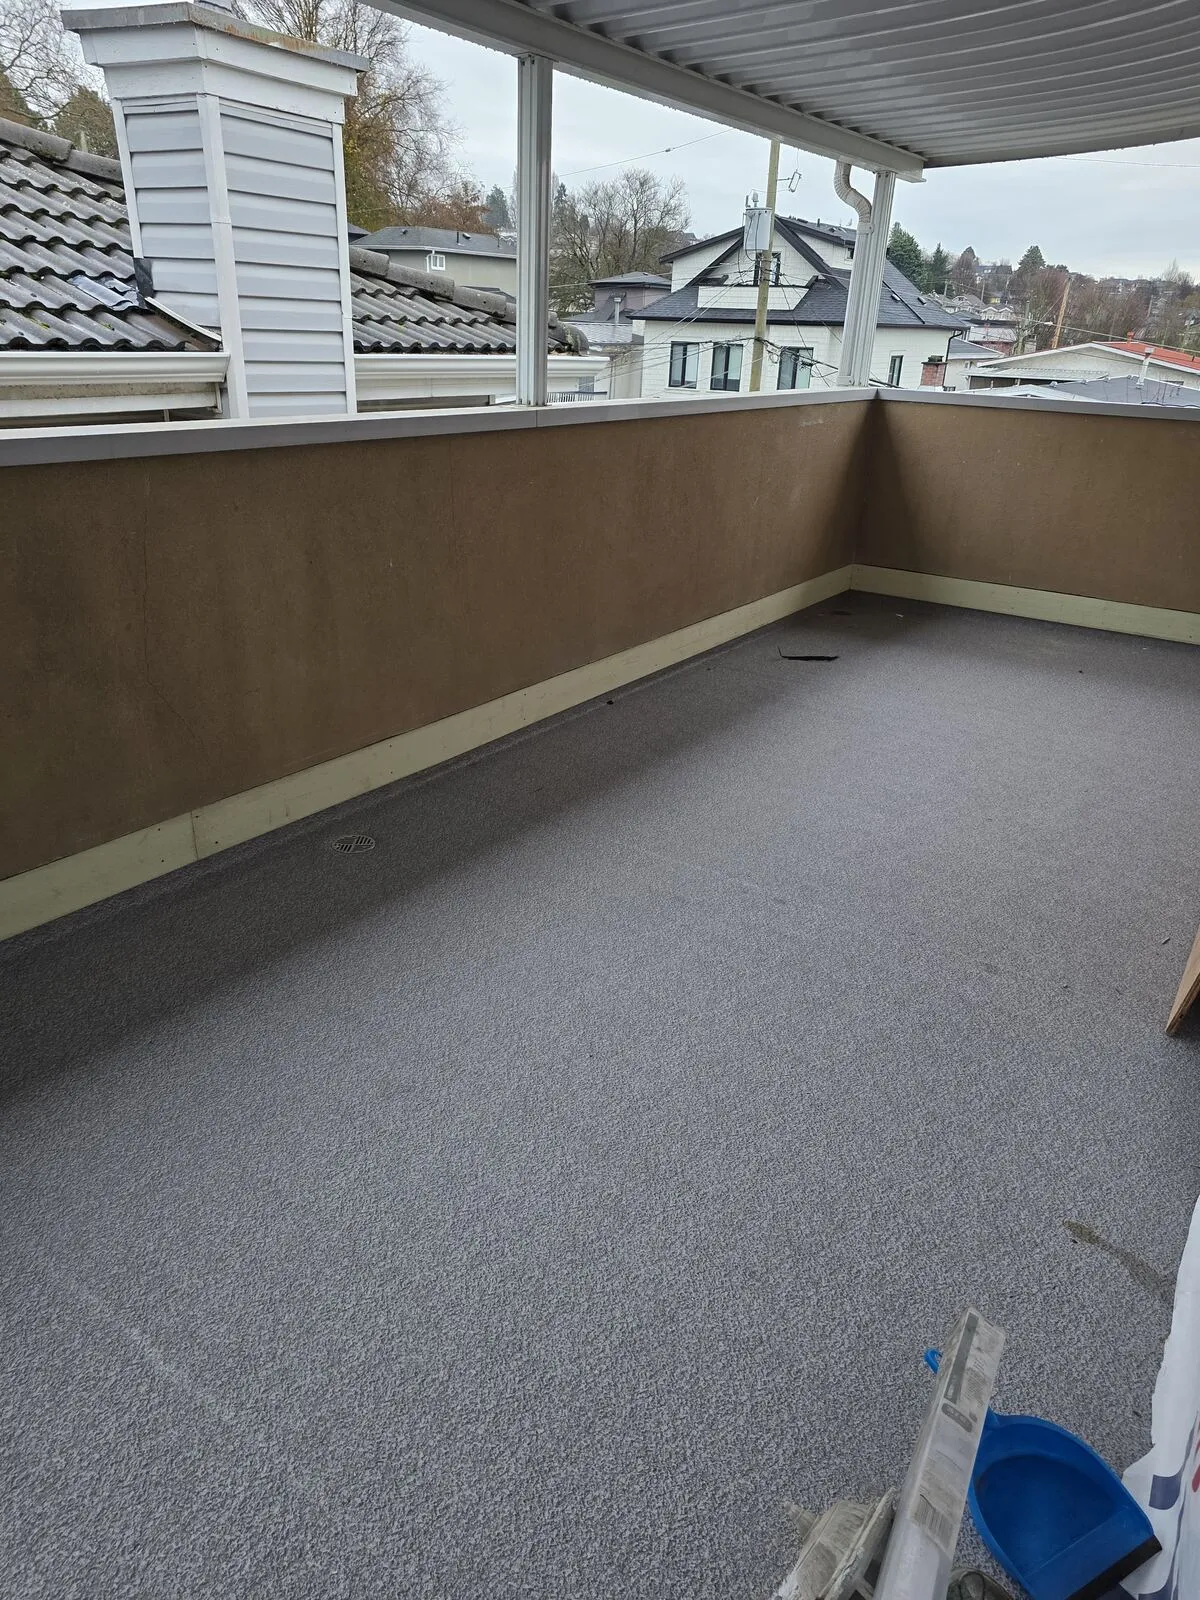
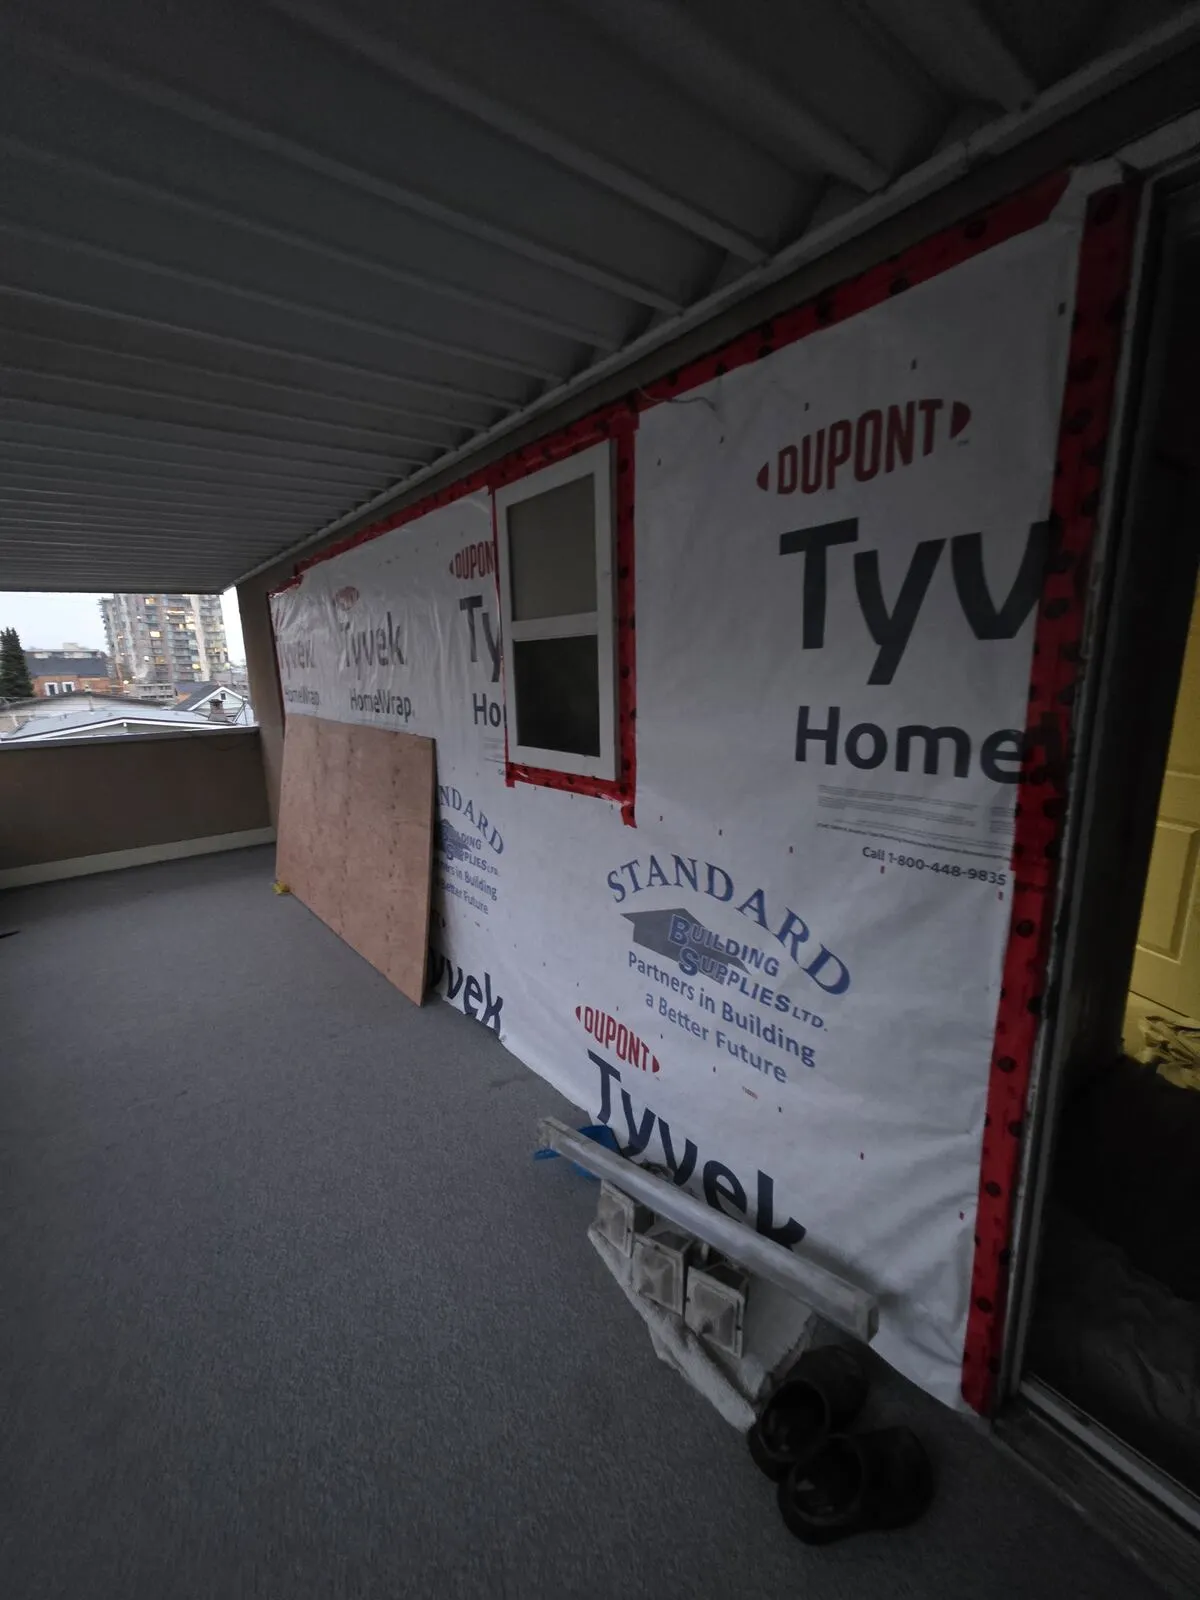
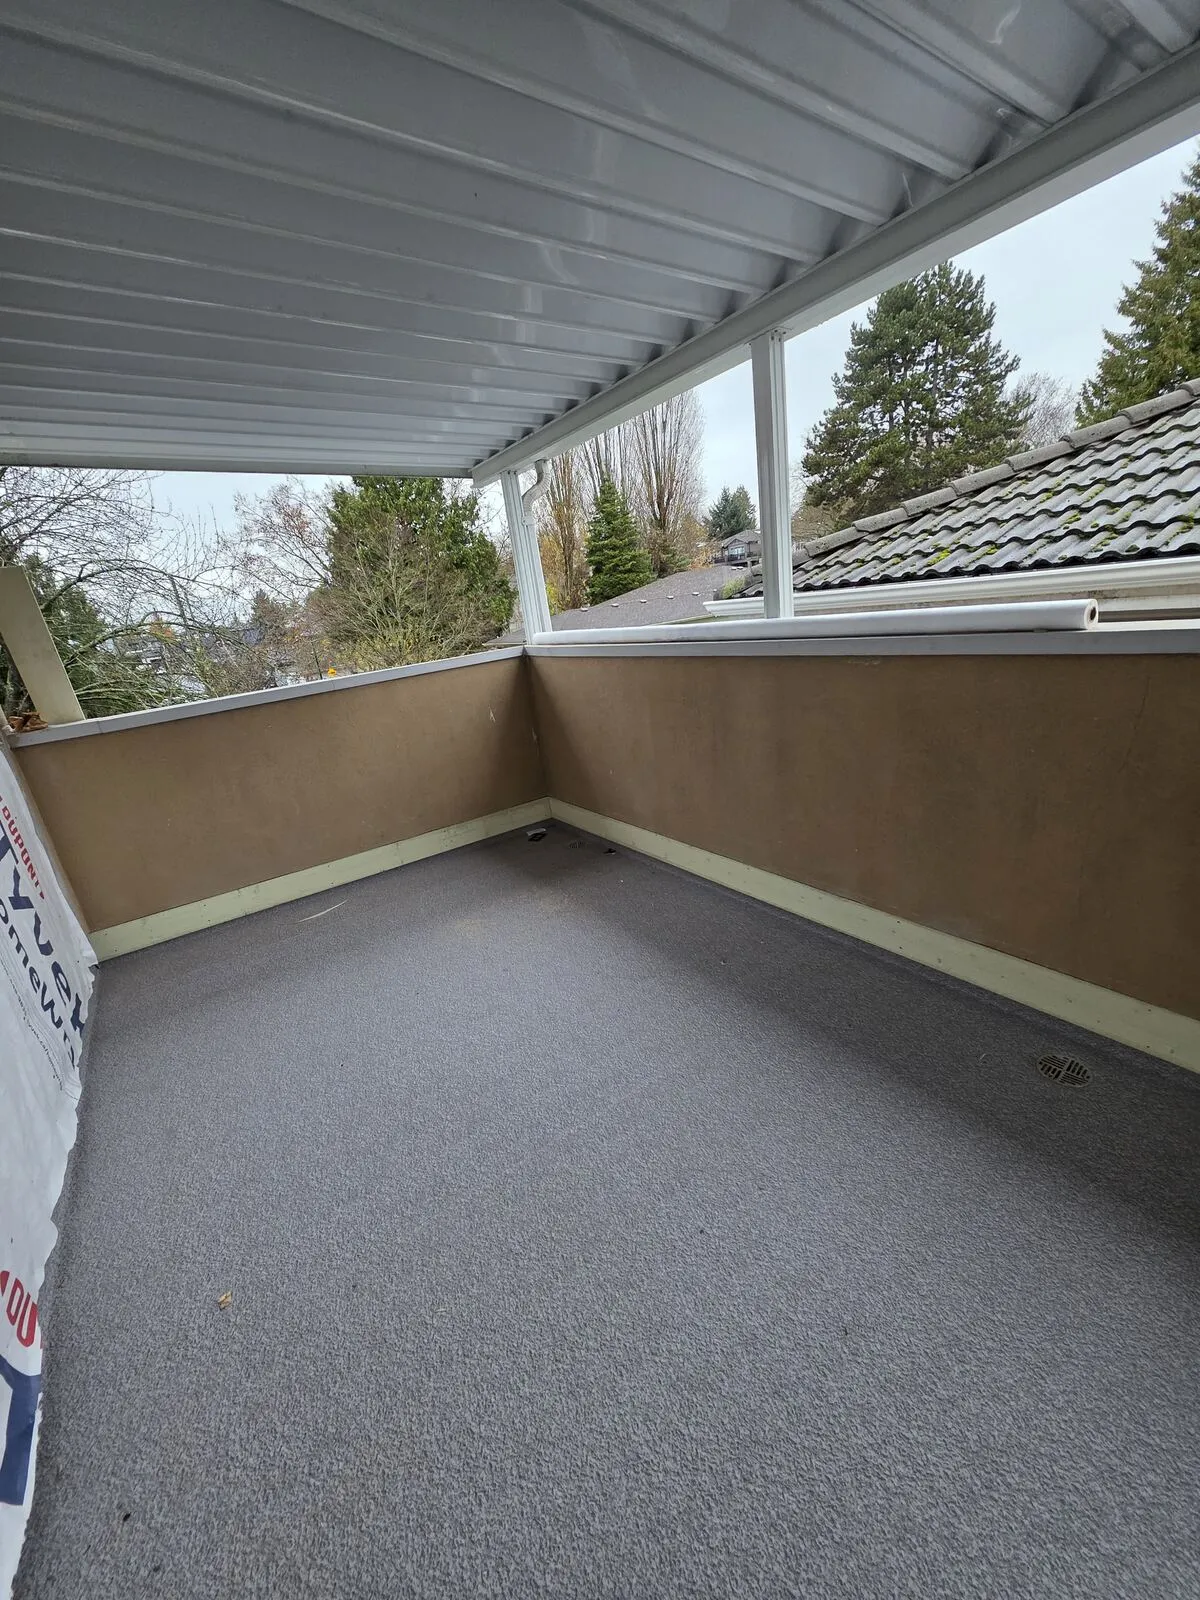
Once the structure was tight and dry the exterior wall facing the deck got a full wrap in DuPont Tyvek HomeWrap, with the seams overlapped and taped and a clean red-tape detail around the window opening so any future bulk water that gets behind the cladding has a continuous drainage plane to follow back out. The deck itself was then re-membraned in new heat-welded vinyl, tied properly into the wall flashing and the drain so the whole surface drains as one piece. The finished deck is the soft-textured grey vinyl floor in the last two photos — clean, sloped, drained, and sitting on top of an assembly that is now fully sound from the joists up.